Prioritize, Assign and Set A Due Date For An Update
In addition to tracking updates for you, Beam gives you the ability to act on them as well. In this tutorial, we'll show you how to prioritize, assign, and set due dates for product updates detected by Beam.
3
min read
NOTE: In this tutorial, we show you how to prioritize updates from the Updates page. Updates are also accessible on Asset Pages, Product Pages, and Manufacturer Pages. The process is the same on all these pages.
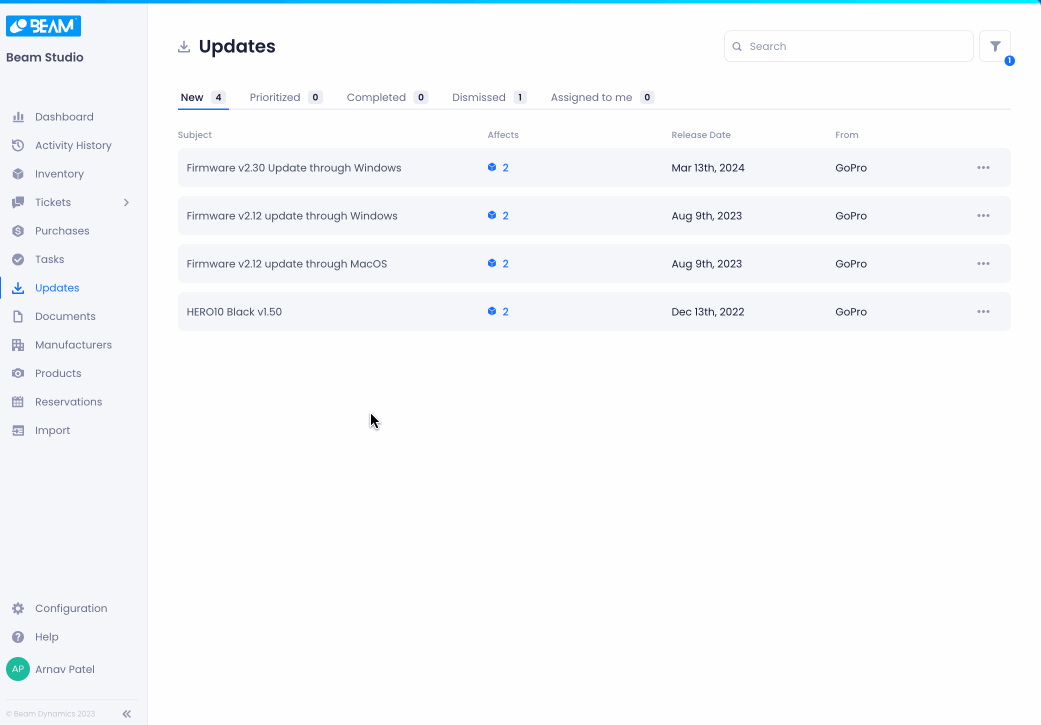
1. Click on the update that you want to prioritize.
2. In the top right of the Update popup, click on the prioritize button.
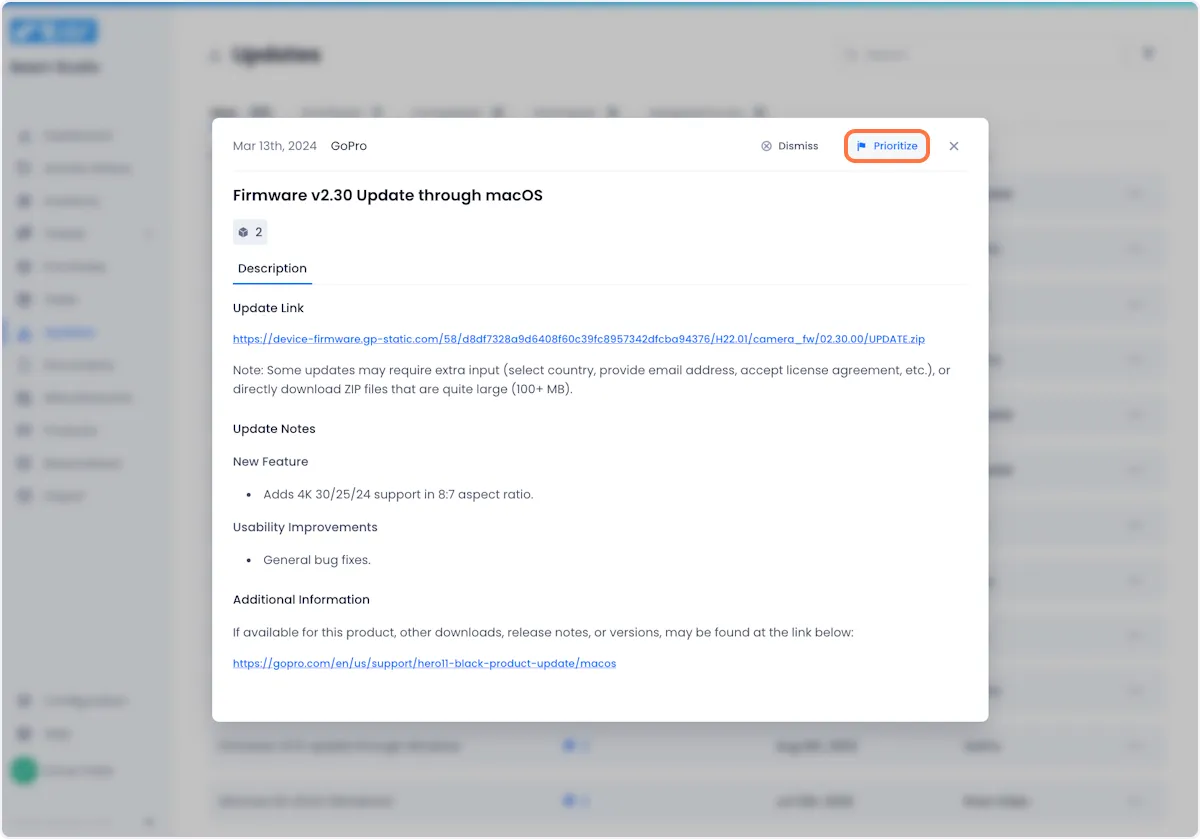
3. Doing so will open a modal where you can configure its priority.
Set the priority status, assign it to a teammate (optional), and set a due date for the update (optional)
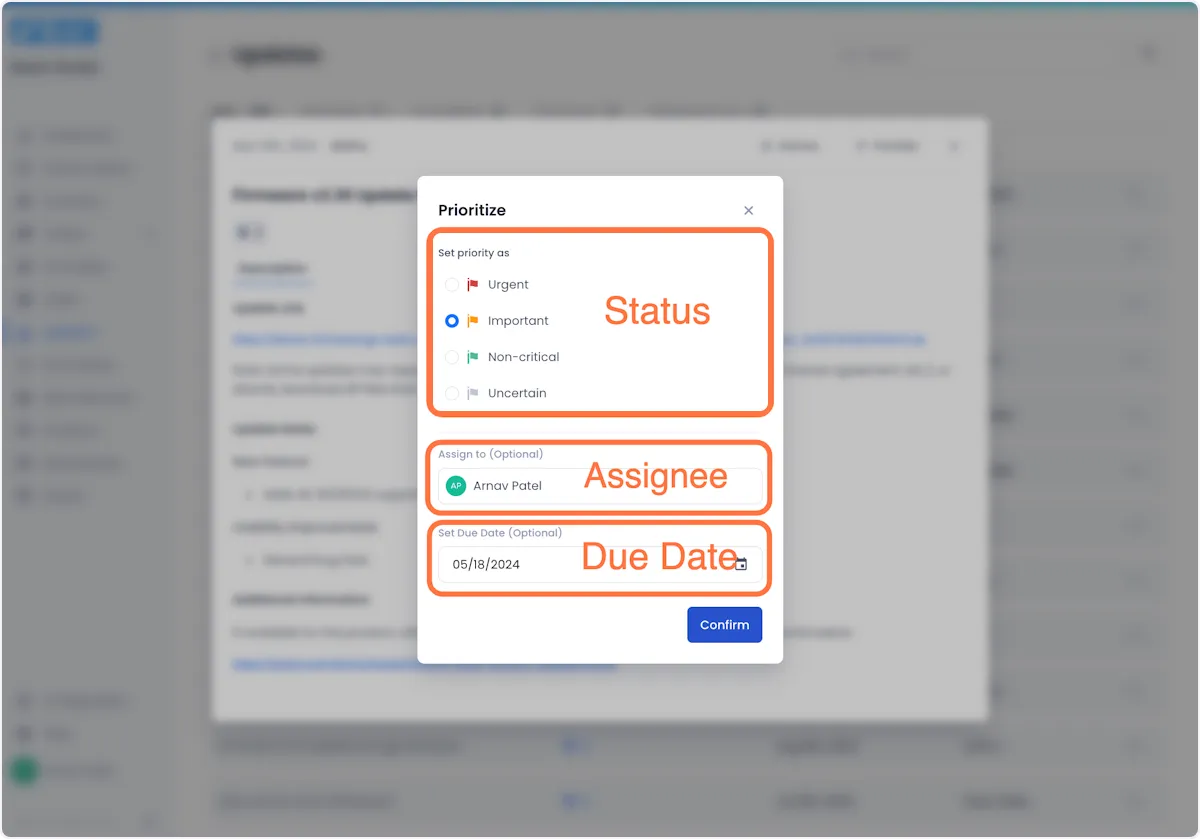
4. When you're satisfied with your changes, click confirm to complete the process.


Arnav Patel
Product Marketing Specialist