Creating A Purchase
The Purchases module in Beam lets you track asset purchases for reporting purposes. In this tutorial we will show you how to create a new Purchase in Beam.
5
min read
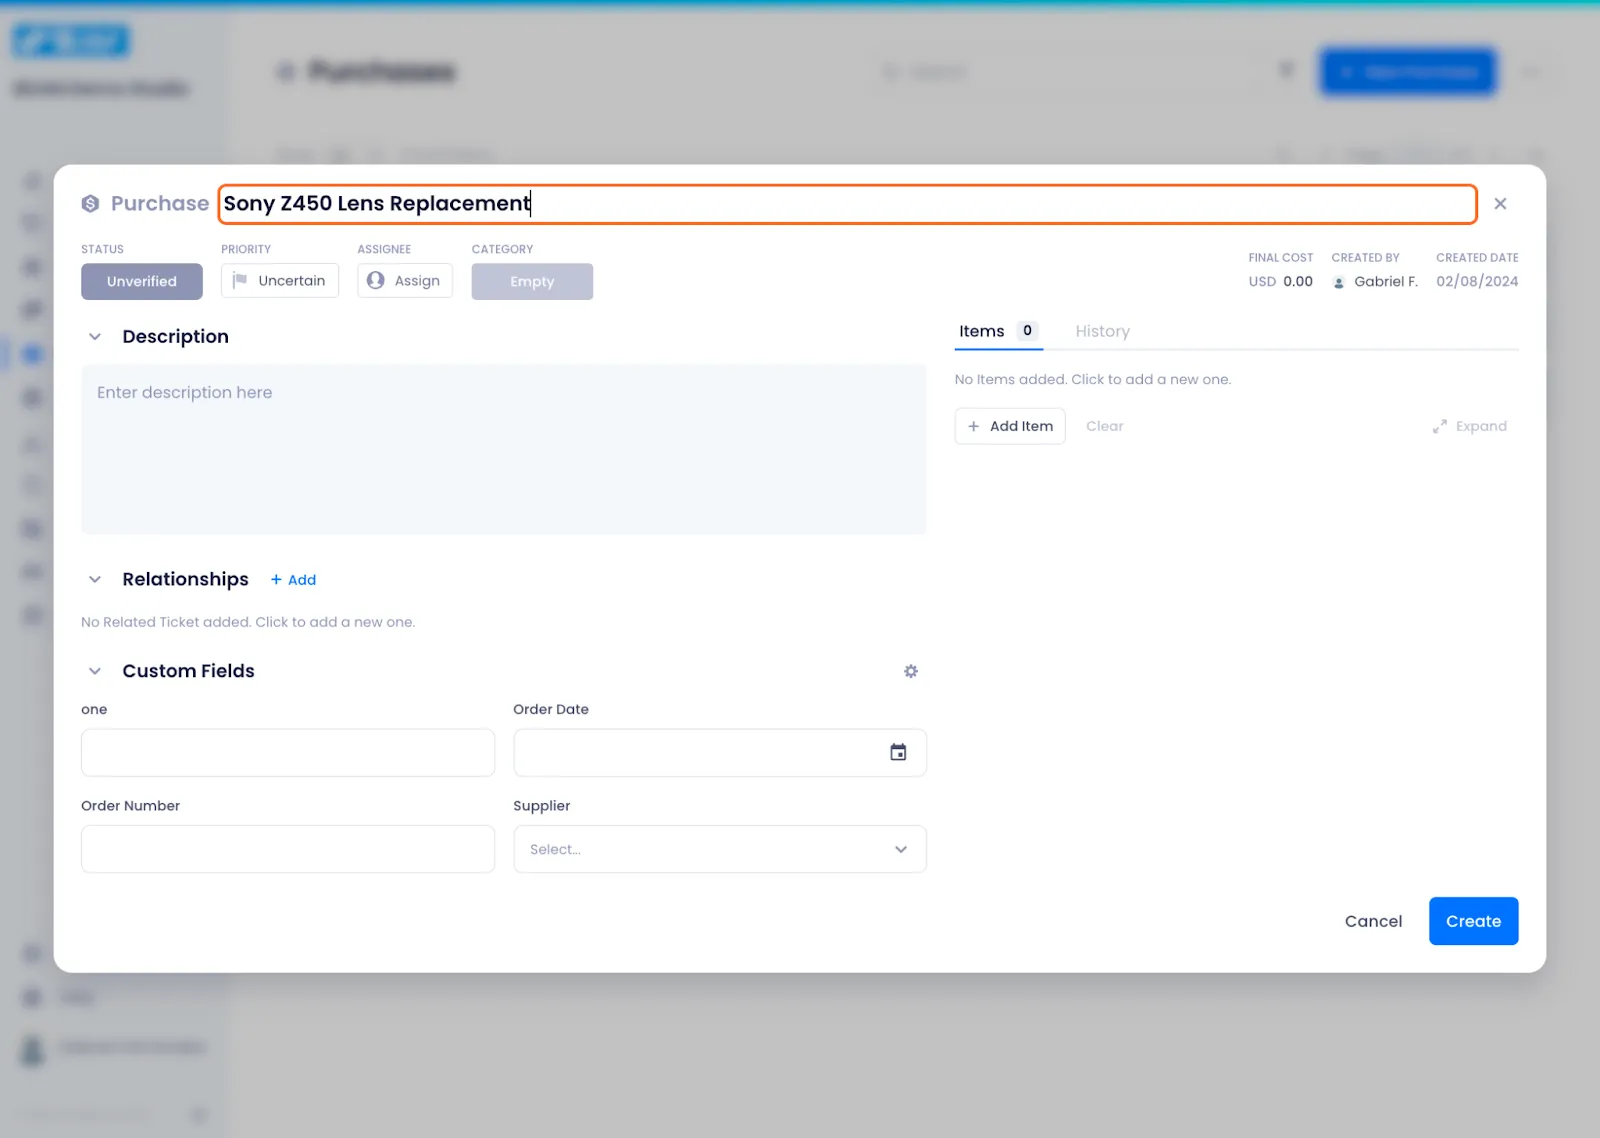
1. Click New Purchase in the top right of the Purchases page.
Defining Your Purchase
2. Give your Purchase a name.
3. Set your Purchase's basic attributes (status, priority, assignee, and category).
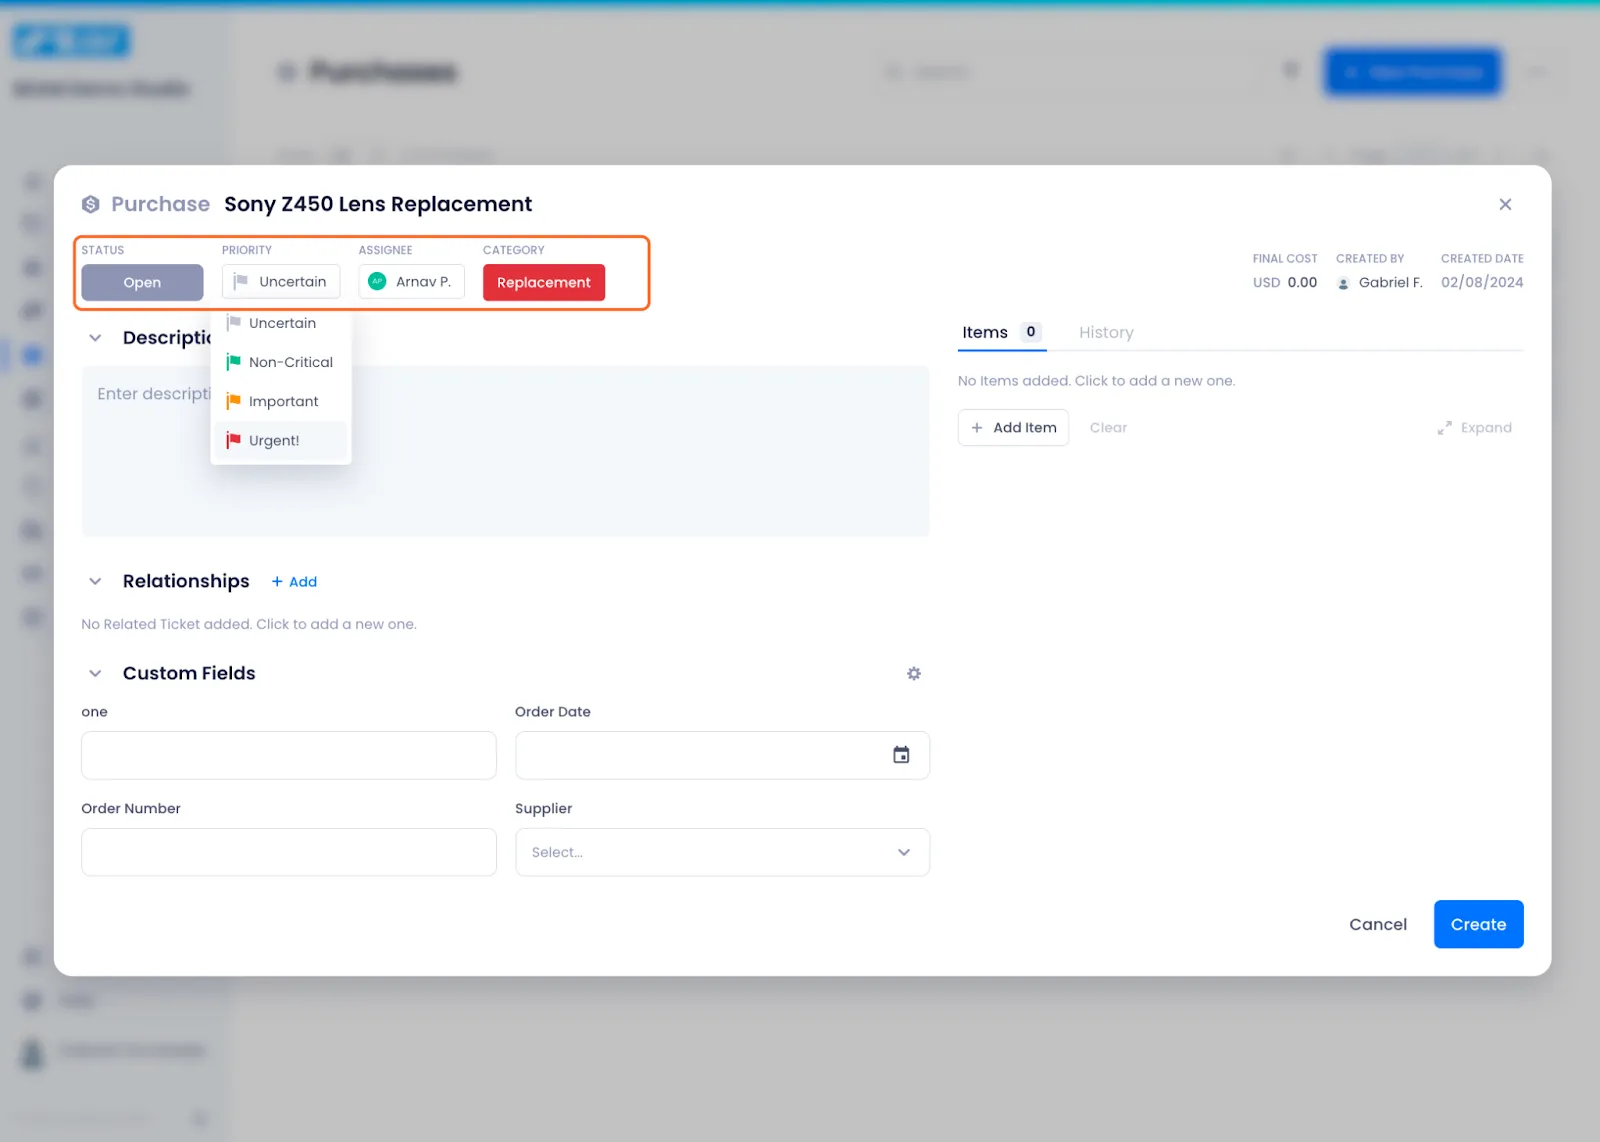
5. Give your Purchase a description so that your fellow teammates have additional context on why you're requesting it.

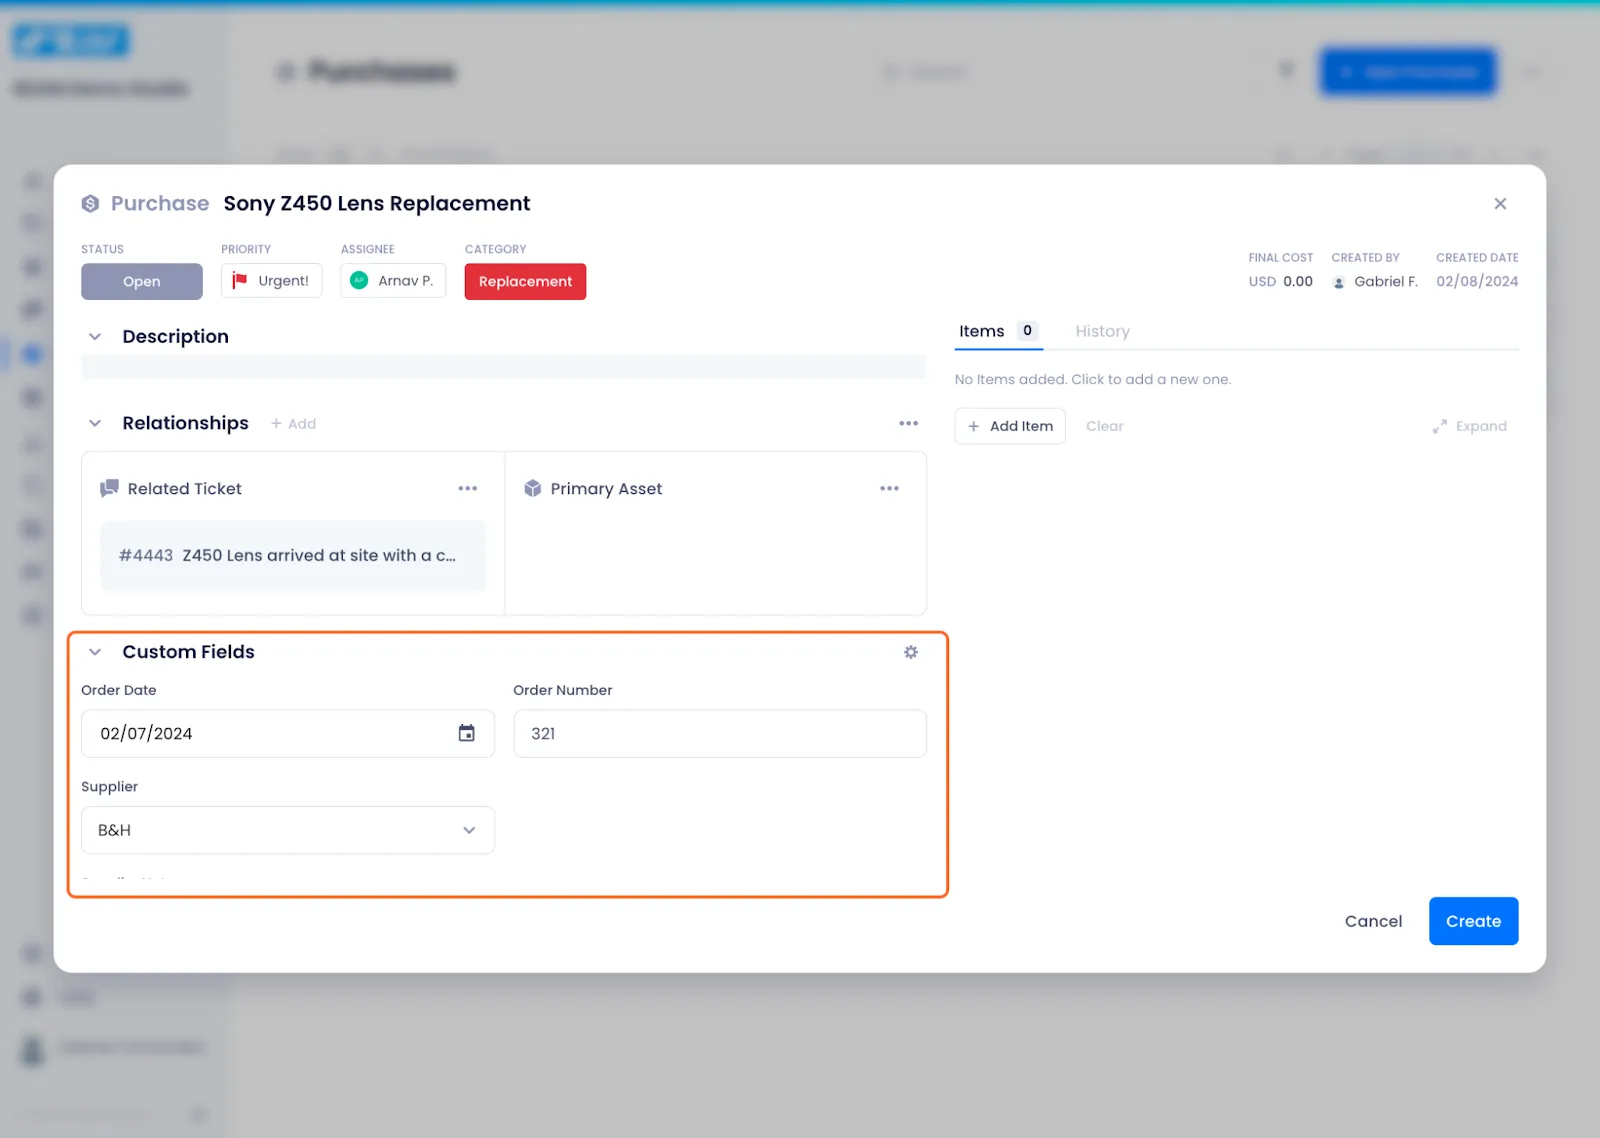
6. If you want to relate your Purchase to a ticket, click Add in the Relationships section and select a ticket on the ensuing modal.
NOTE: Each purchase can only be related to one ticket.
7. Set values for your custom fields.
Custom fields are unique to your workspace and can be configured in the Entity Management section of your Beam workspace. Check our documentation on Managing Custom Fields For Purchases to learn more.
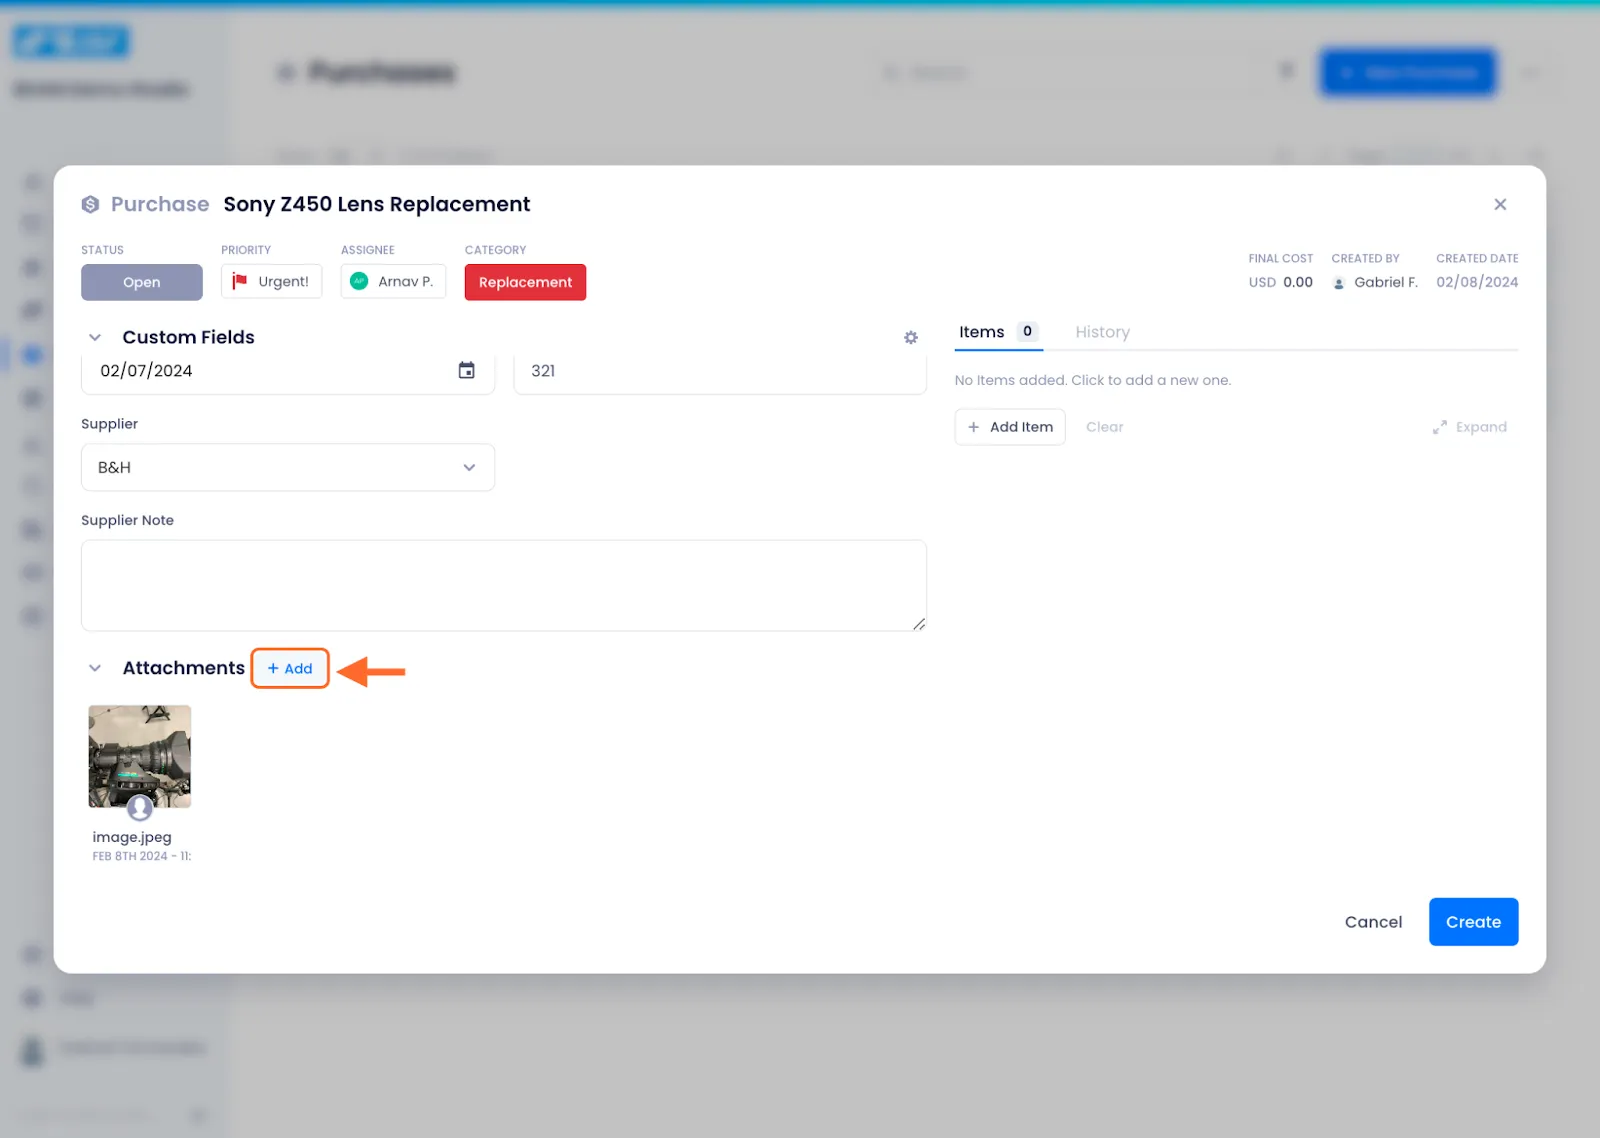
8. Add supporting photos to your Purchase by clicking the add button and selecting a file from your computer.
Adding Assets To Your Purchase
Next you will need to add the specific assets that you want purchased.
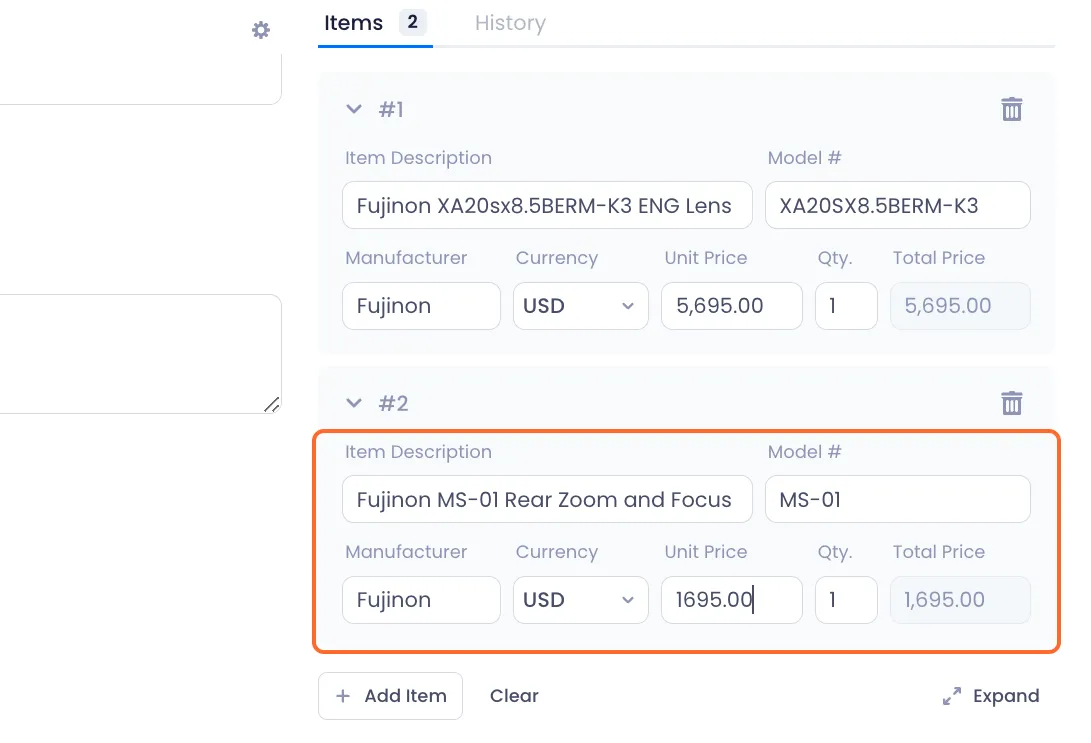
1. Click Add Item on the right side of the modal.

2. Specify the details of the asset you want purchased
Every item requires a Description, Model #, Manufacturer, Currency, Unit Price, and Quantity.
Using unit price and quantity, Beam will automatically calculate the total price.

3. Add additional items to the same Purchase by clicking the Add Item button again.
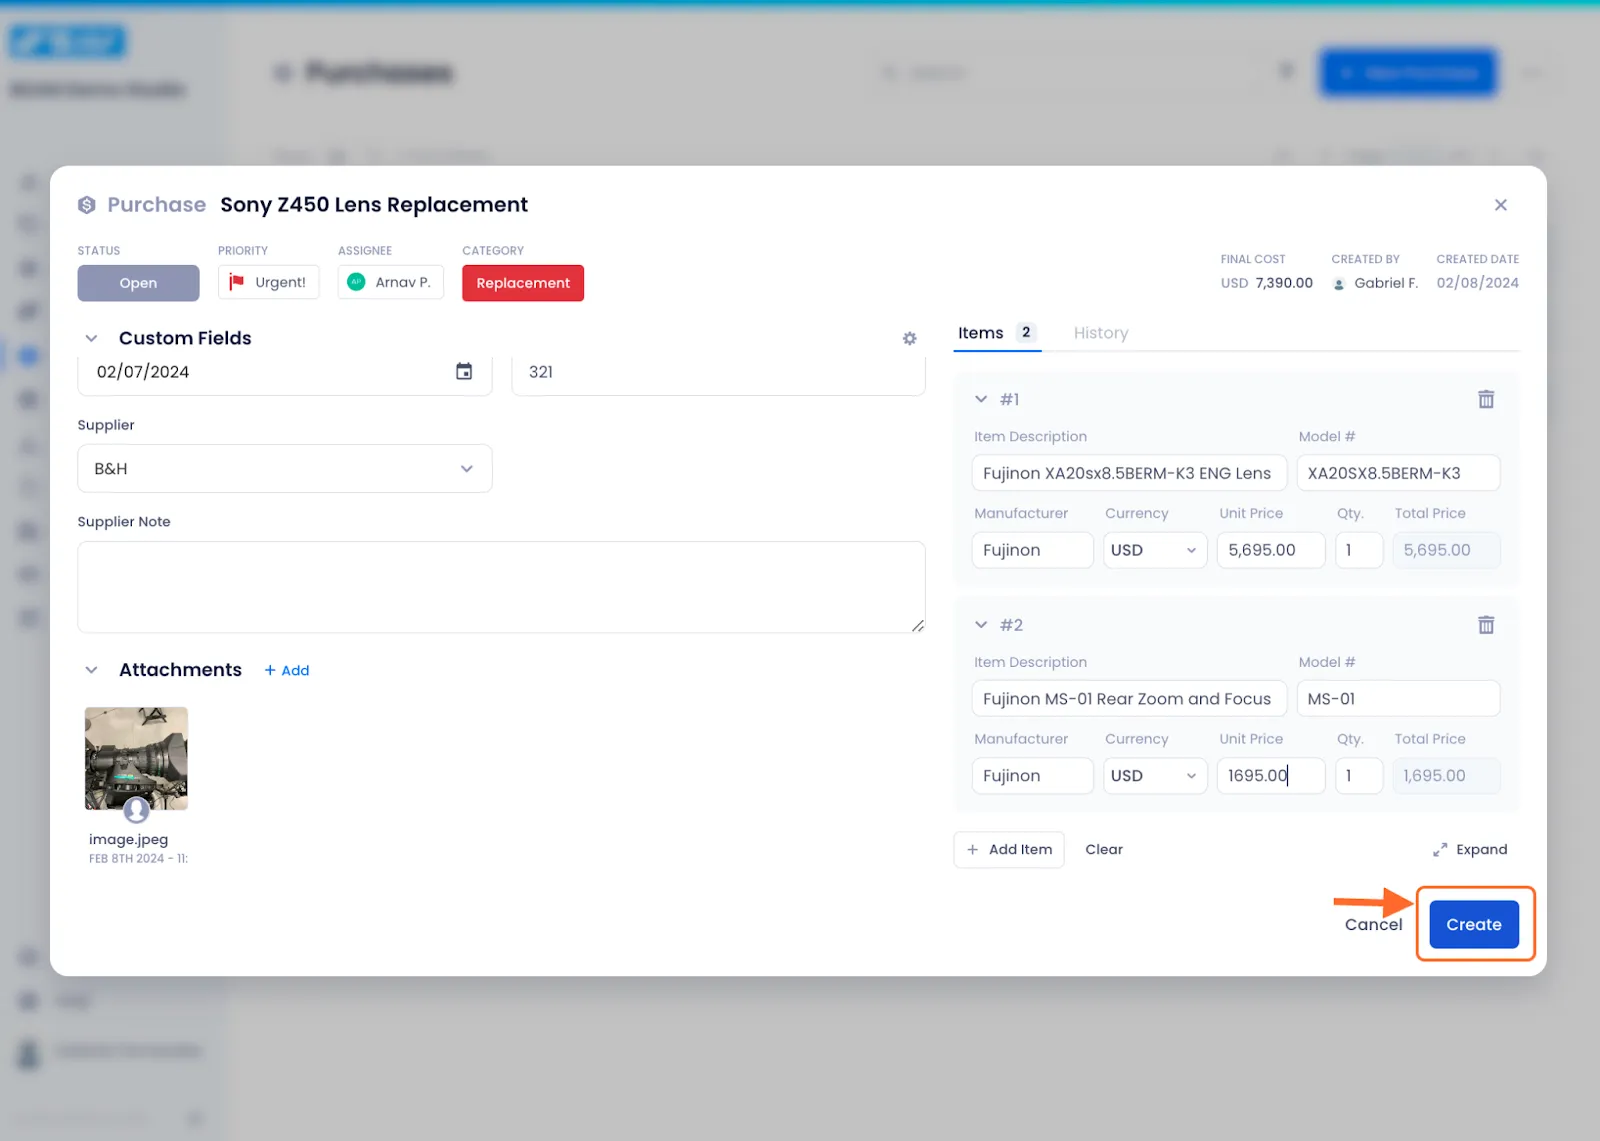
4. When you're satisfied with how your Purchase is configured, click Create to complete the process.

Arnav Patel
Product Marketing Specialist