Managing Asset Custom Fields
Beam gives you the ability to customize the fields associated with your assets. In this tutorial, we will show you how to customize asset fields in your workspace.
4
min read
Accessing Field Configuration
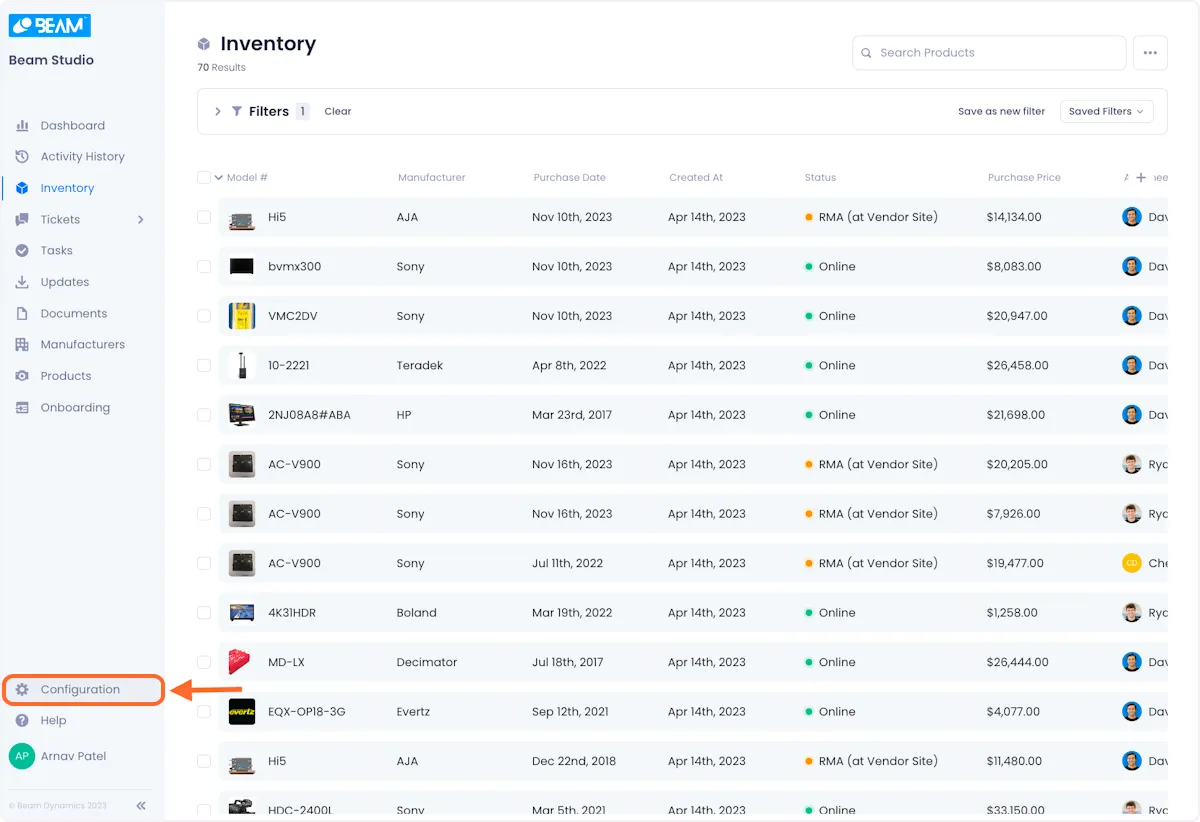
1. Click on Configuration in the sidebar of your Beam workspace.
2. On the configuration screen, click on Entity Management.
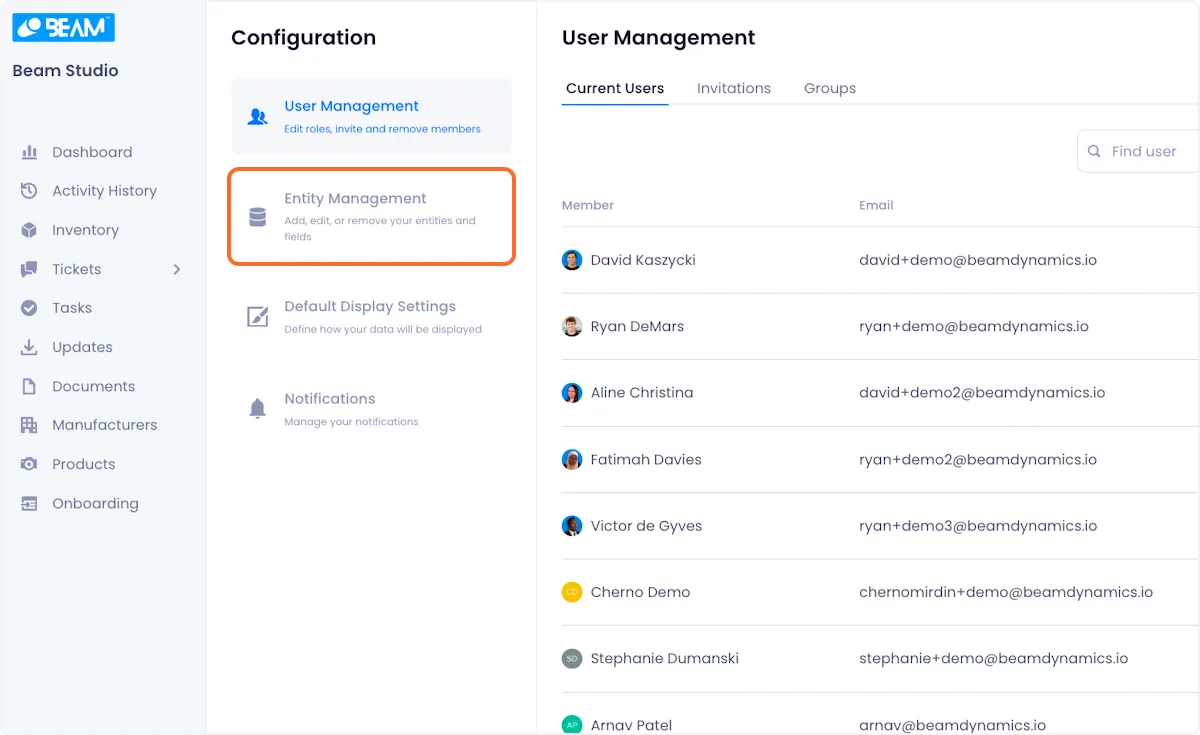
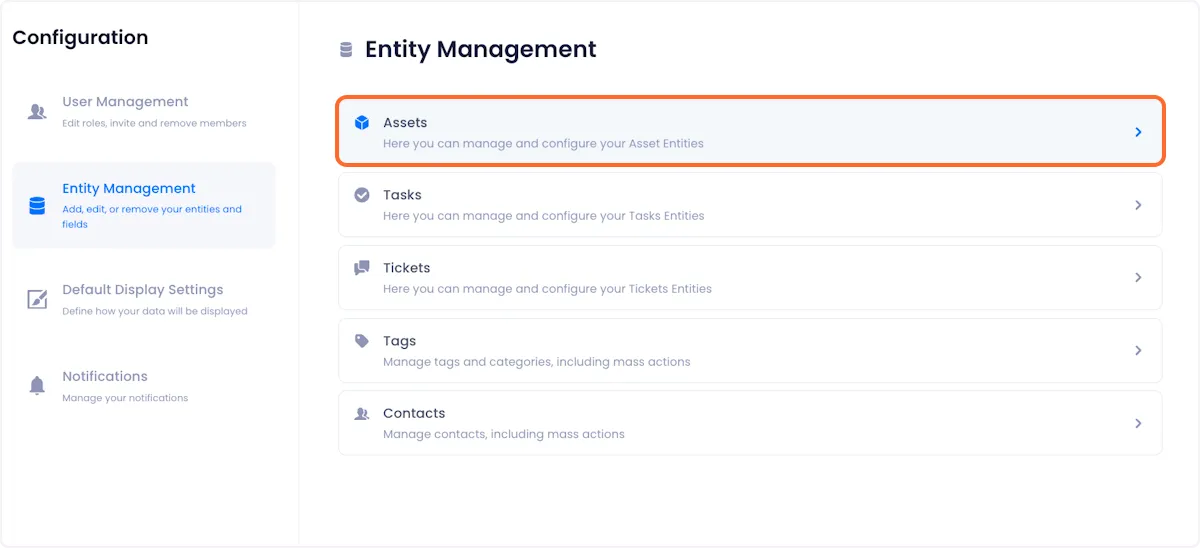
3. Select the Assets Entity.
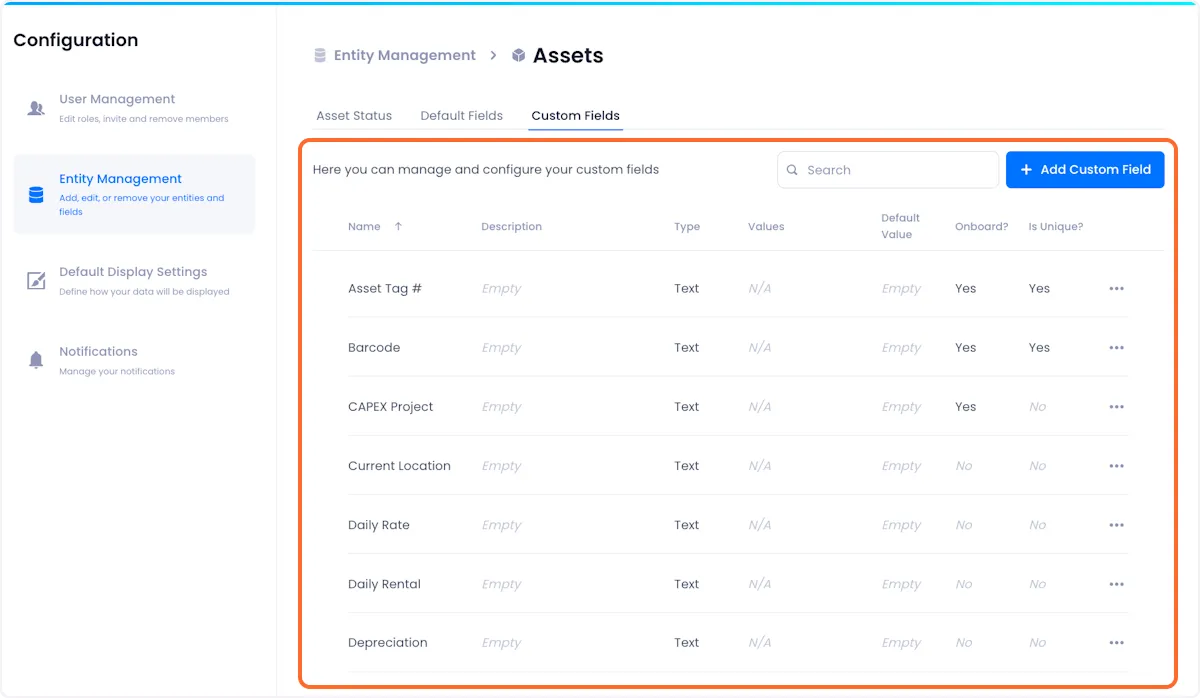
4. Click on Custom Fields from the tabs at the top of the screen.
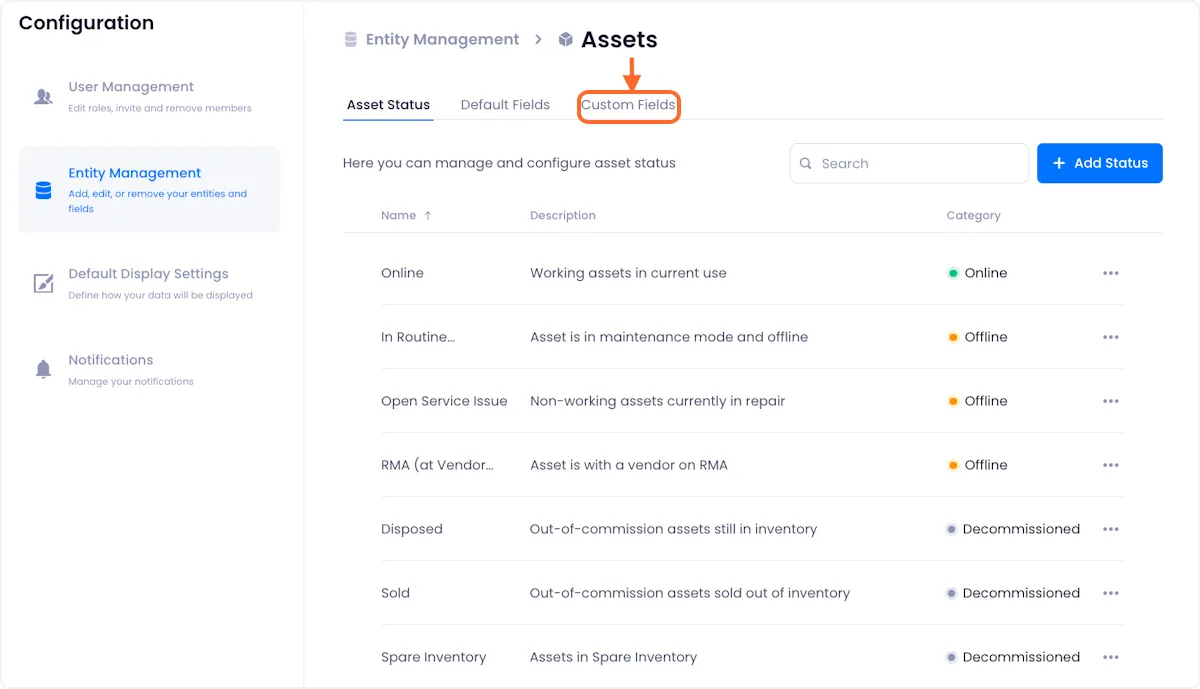
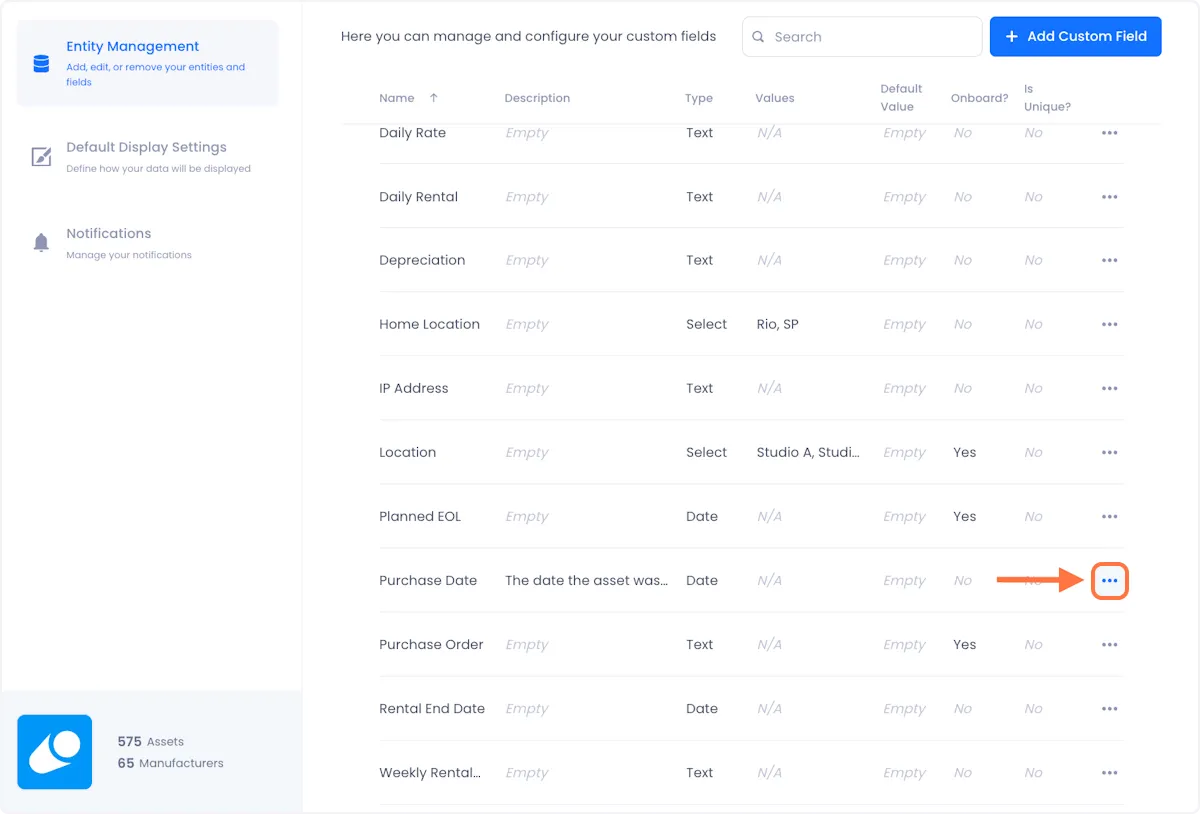
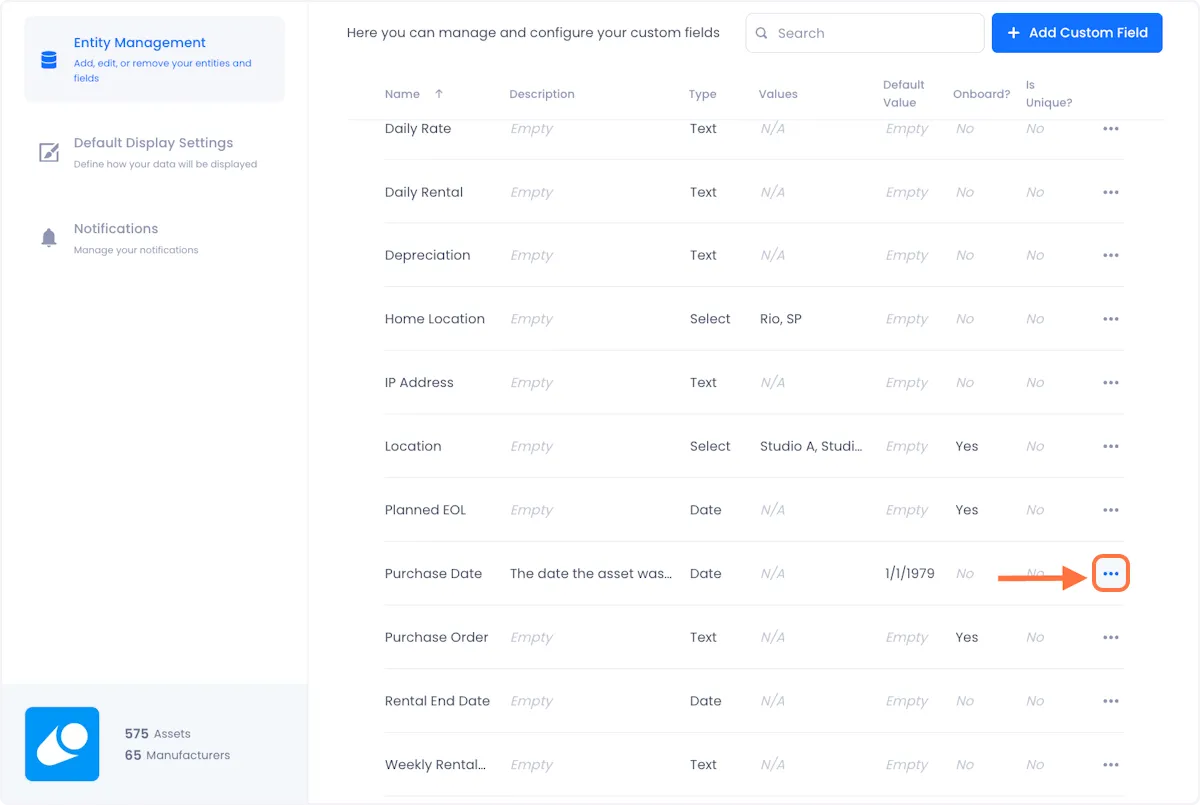
5. On the next page, you will be able to see a comprehensive list of your custom asset fields.
Adding A Custom Field
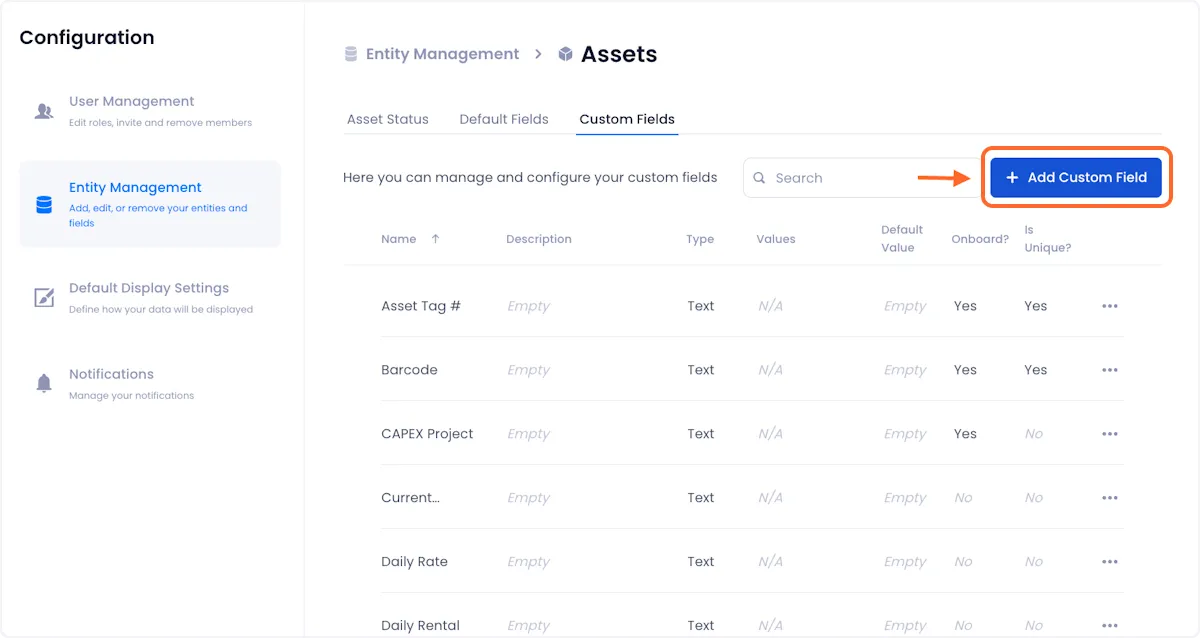
1. Click on Add Custom Field, at the top right of the screen.
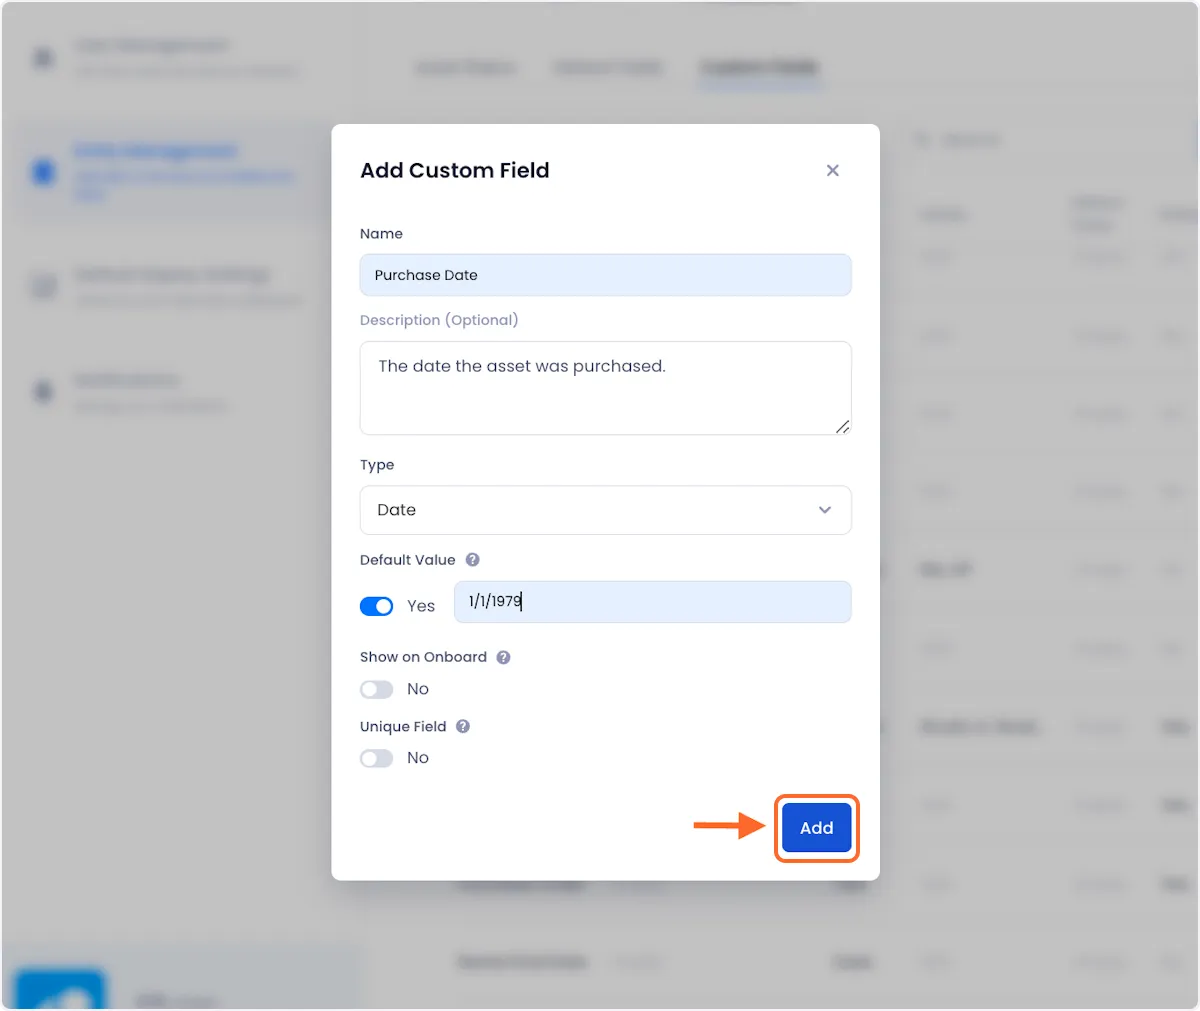
2. Give your custom field a name and description.
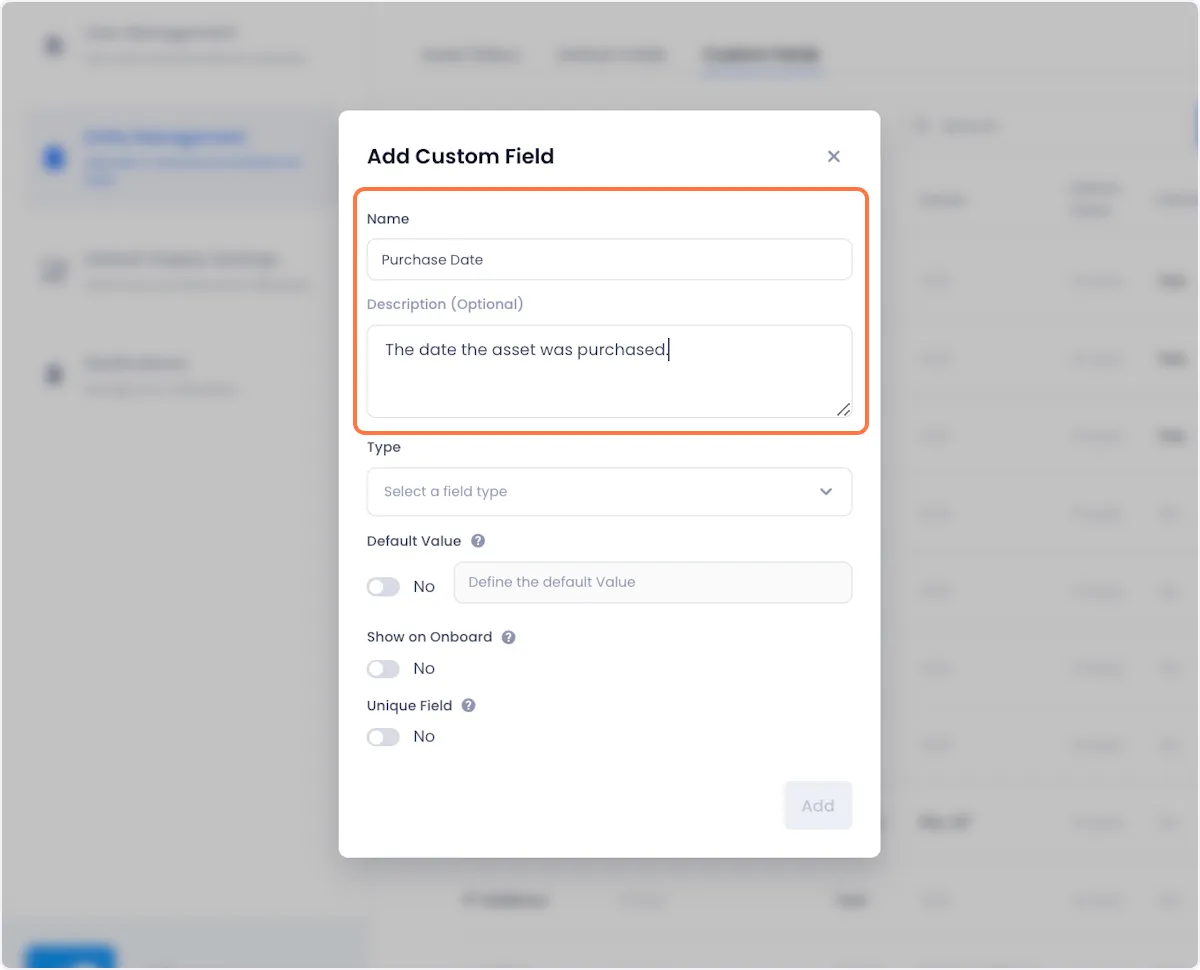
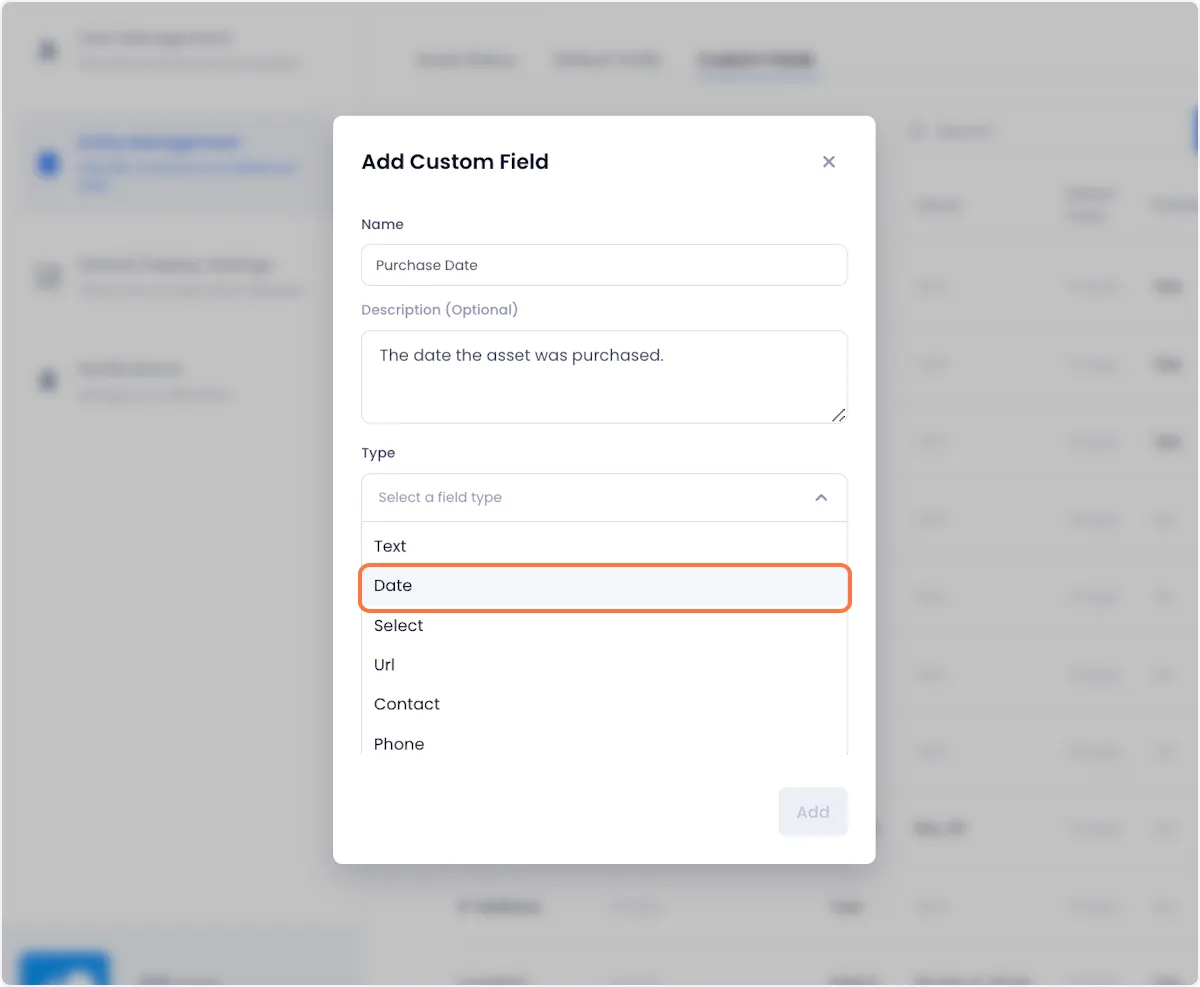
3. Select a data type for your field from the Type dropdown menu.
4. Finish setup using the configuration options.
Default Value - If set to "Yes", you will be able to add a default value that will automatically be applied to any new assets unless manually specified by the person creating the asset.
Show on Onboard - If set to "Yes", the field will appear as one of the column headings in the asset onboarding csv template.
Unique Field - If set to "Yes", no two assets can have the same value for that field.
5. Click on Add in the bottom right of the to save your new field.
Editing A Custom Field
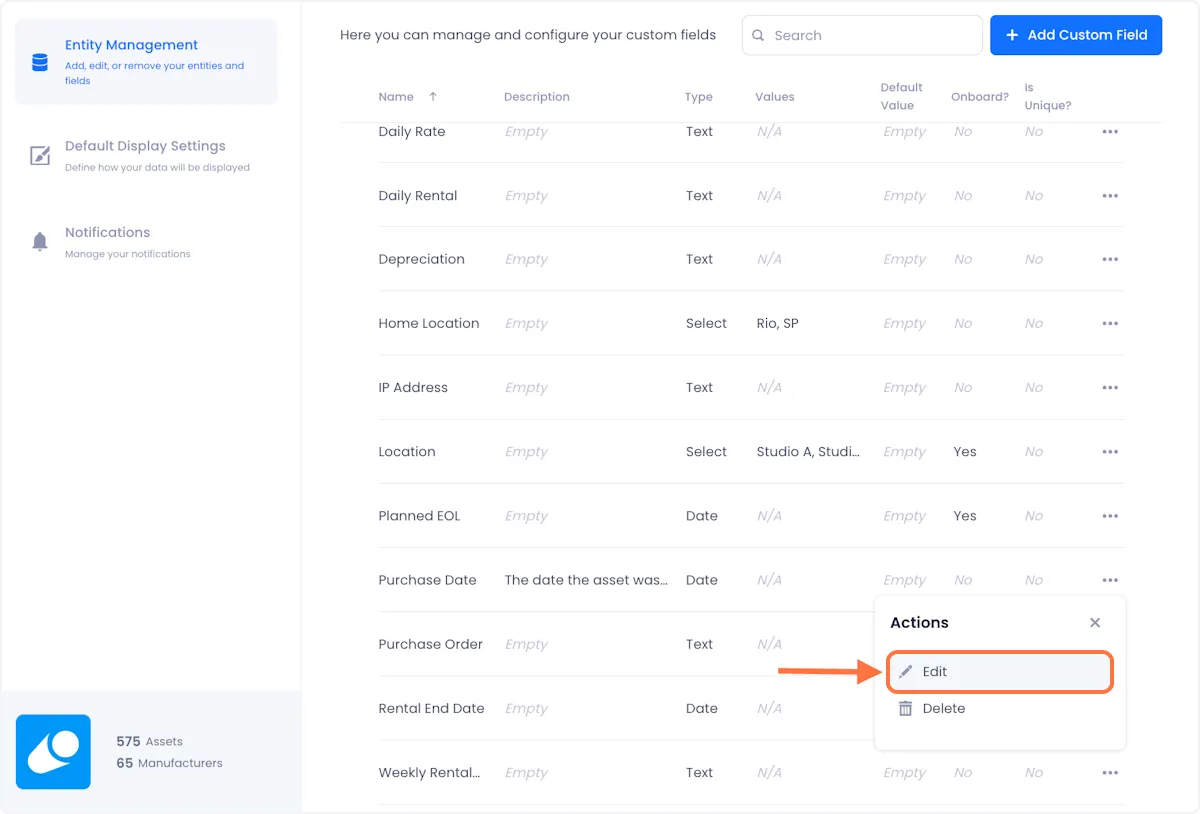
1. Click on the overflow menu next to the field that you want to edit.
2. Click on Edit from the dropdown options.
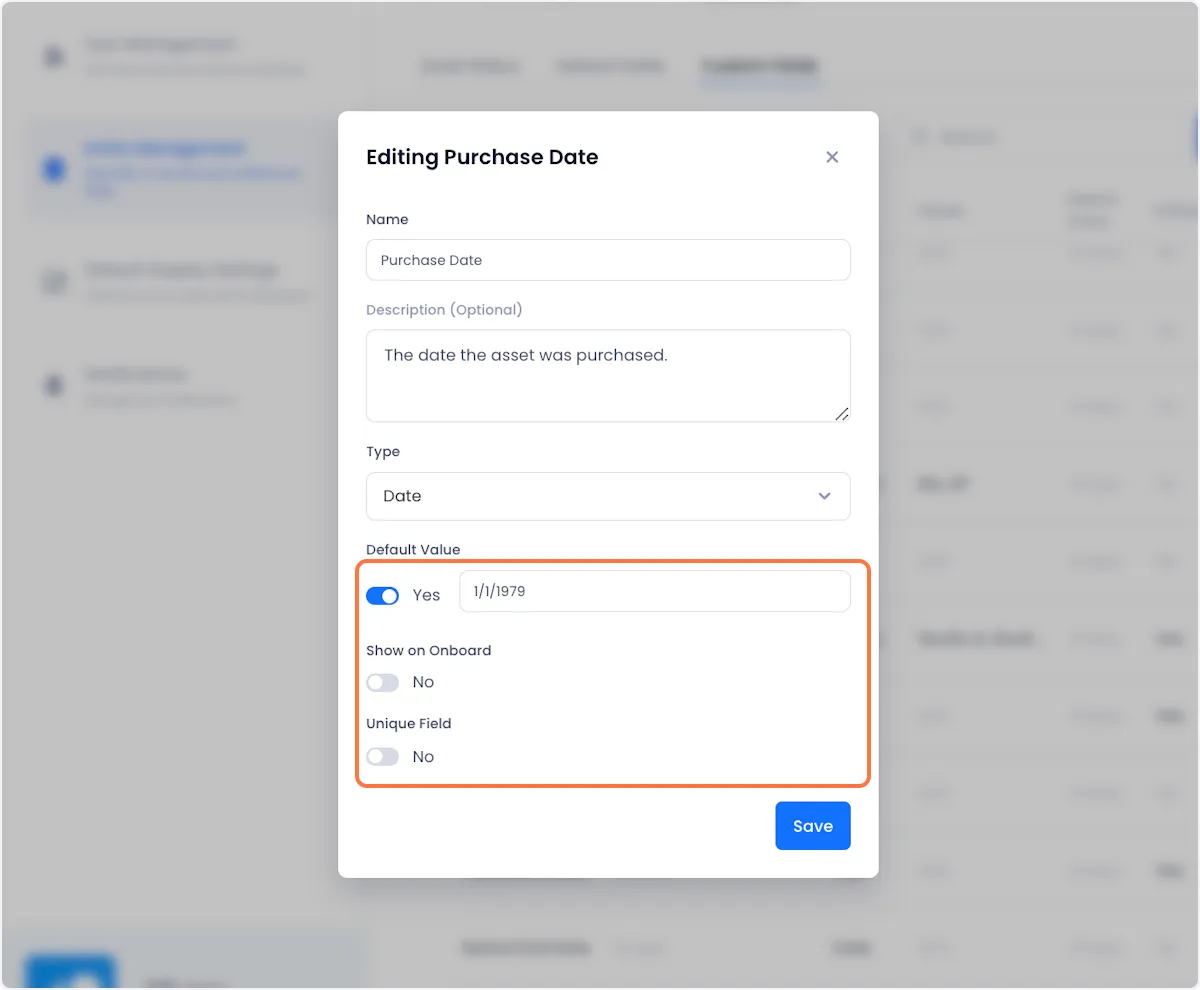
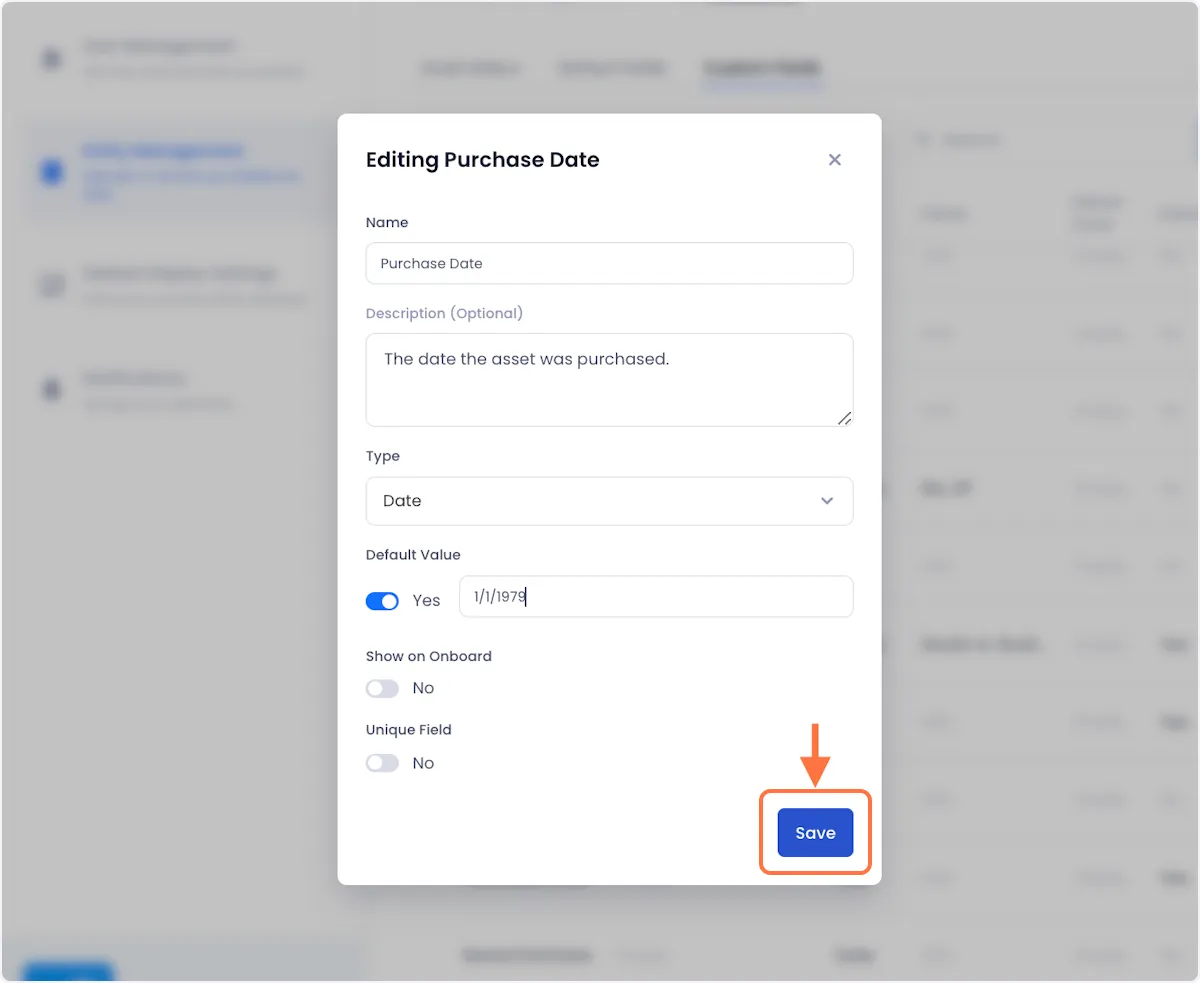
3. Edit the field.
A modal will open up with all of your selected category's attributes in editable fields.

4. When you're satisfied with your changes, click on Save to complete the editing process.
Deleting A Custom Field
1. Click on the overflow menu next to the field that you want to edit.
2. Click on Delete from the dropdown options.
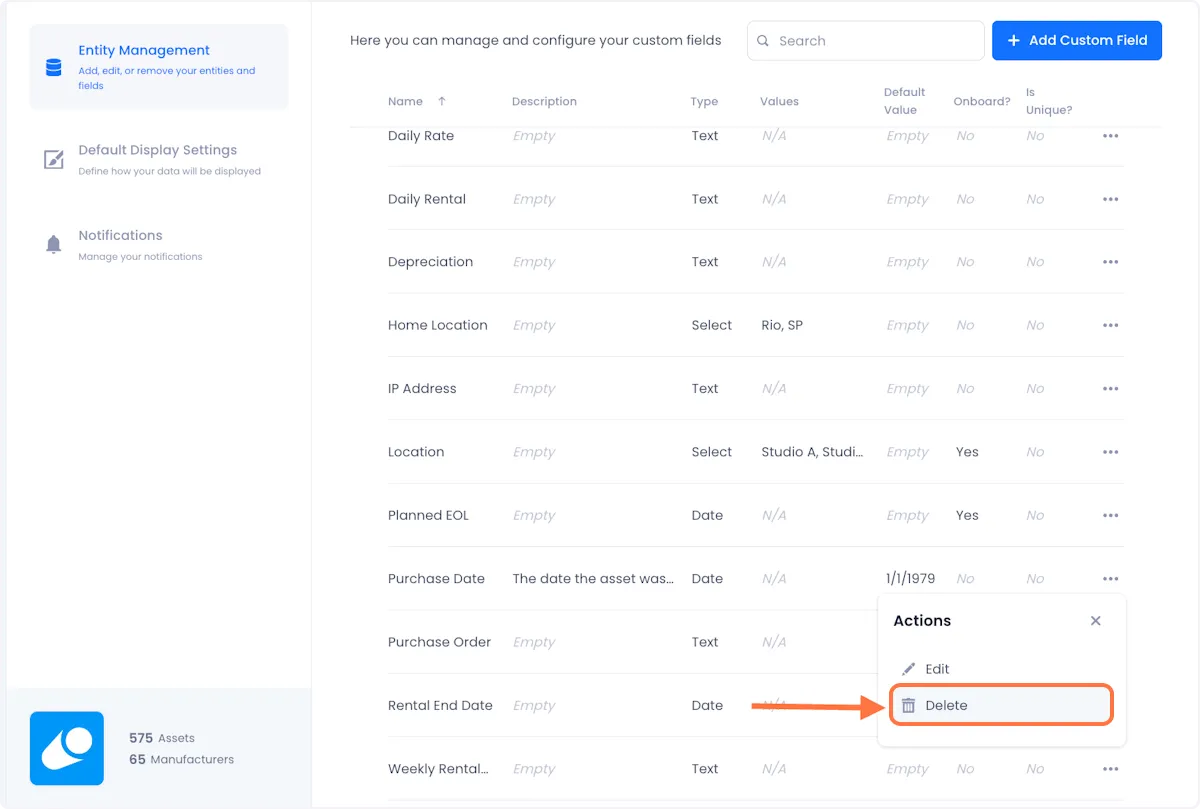
3. Confirm the deletion by clicking Delete on the next modal.


Arnav Patel
Product Marketing Specialist