Navigating In Tickets
Beam's ticketing module is your home base for service management in the Beam platform. In this tutorial, we’ll give you a basic overview of how you can access and navigate the tickets page to get you started with service management in Beam.
Accessing Tickets
The Tickets module can be accessed from the menu bar, clicking on Tickets will expand the drop down showing existing Ticket Types, from there you can select which Ticket Type you want to see in the Tickets view.

Tickets in Beam are categorized by Ticket Types based on your existing workflows that involve a ticketing system, however Tickets are presented in the same interface regardless of Ticket Type, making it easy to navigate, and move between different Ticket Types. By default an ‘Incidents’ Ticket Type is created for all accounts, this can be renamed and configured to your needs.
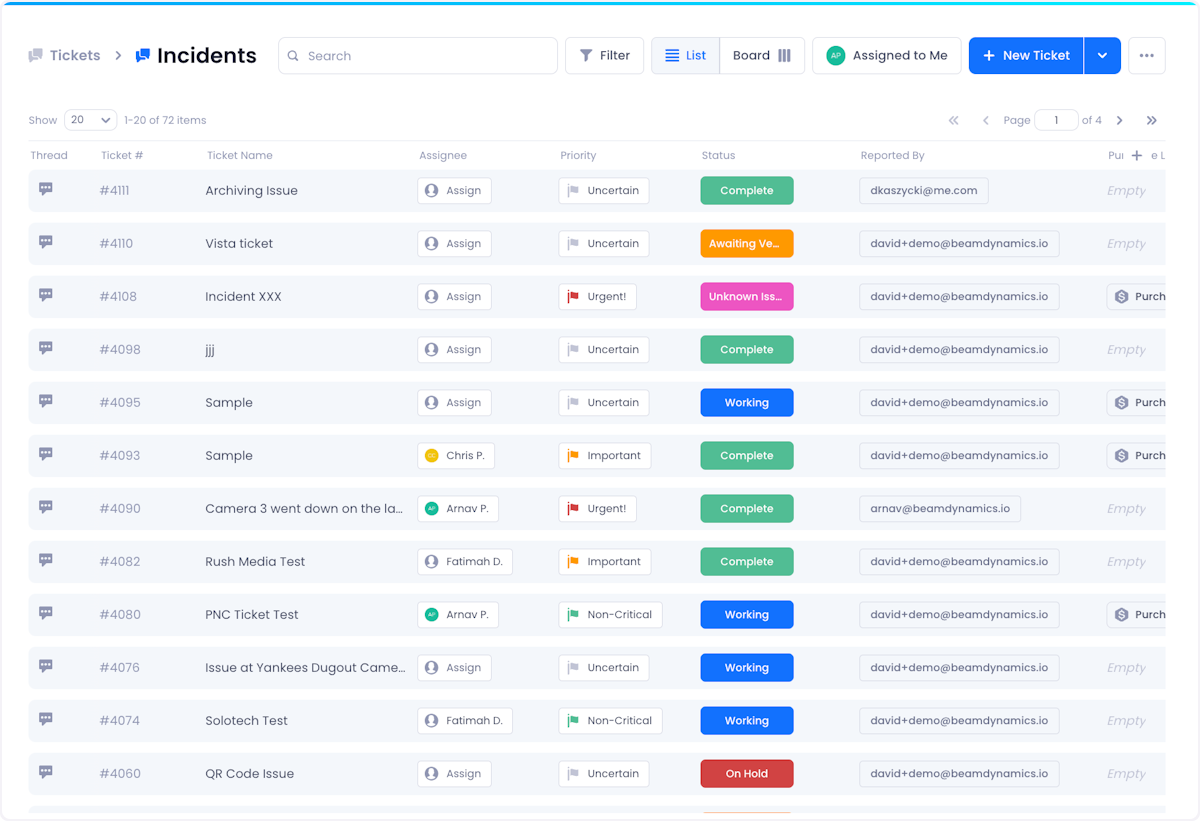
On clicking into a ticket page, you will see a table of all the tickets related to the Ticket Type that you selected.
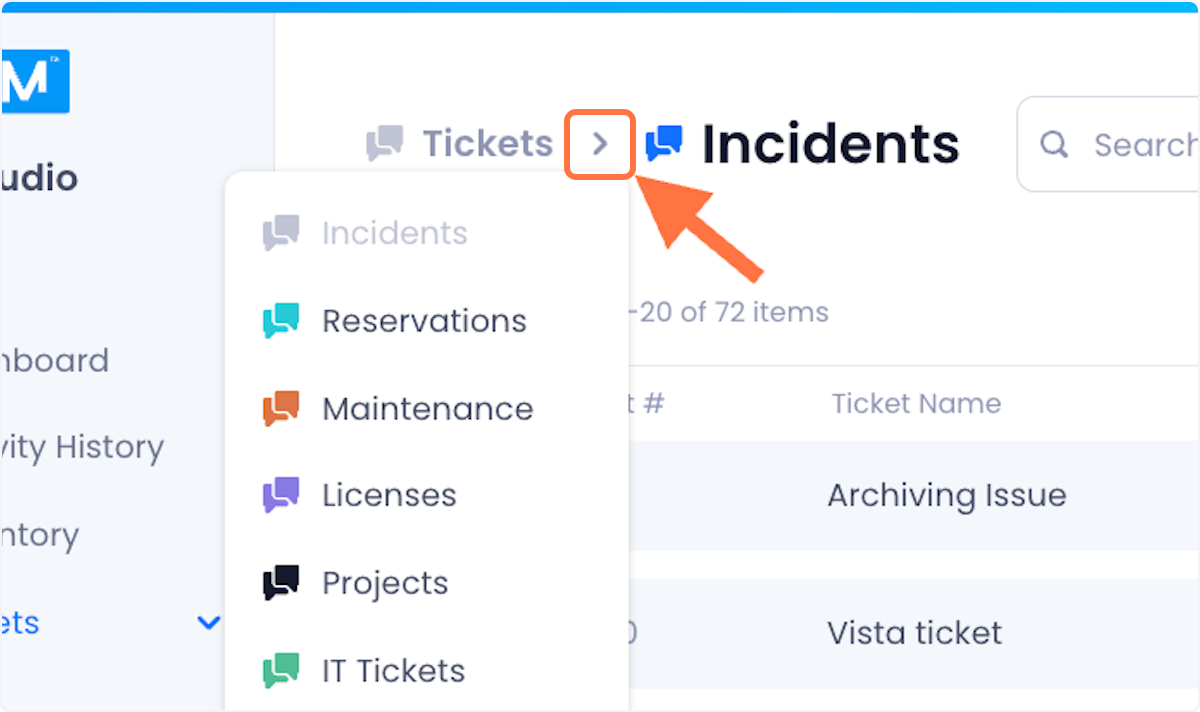
You can easily navigate to other Ticket Types by clicking the > button on the top left of the Tickets page, a pop-up window will appear showing all available Ticket Types, simply click on the Ticket Type and the Tickets page will refresh to display the appropriate Tickets.
Search and Filters
As you use Beam, the number of tickets in your workspace will accumulate making it hard to find specific tickets when you need them. This is why we built Search and Filtering into Beam
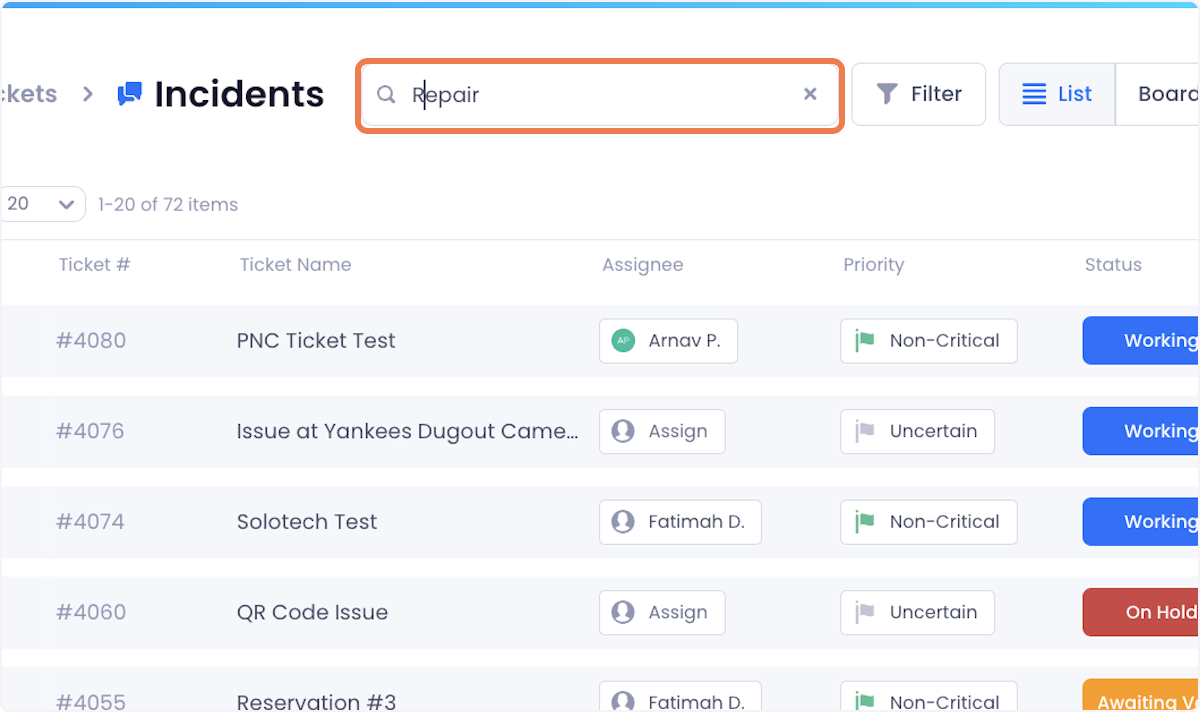
The search bar lets you search for tickets by:
- Ticket Name
- Ticket Number
You can also filter Tickets based on multiple criteria. To do so click on the Filter button at the top of the screen.
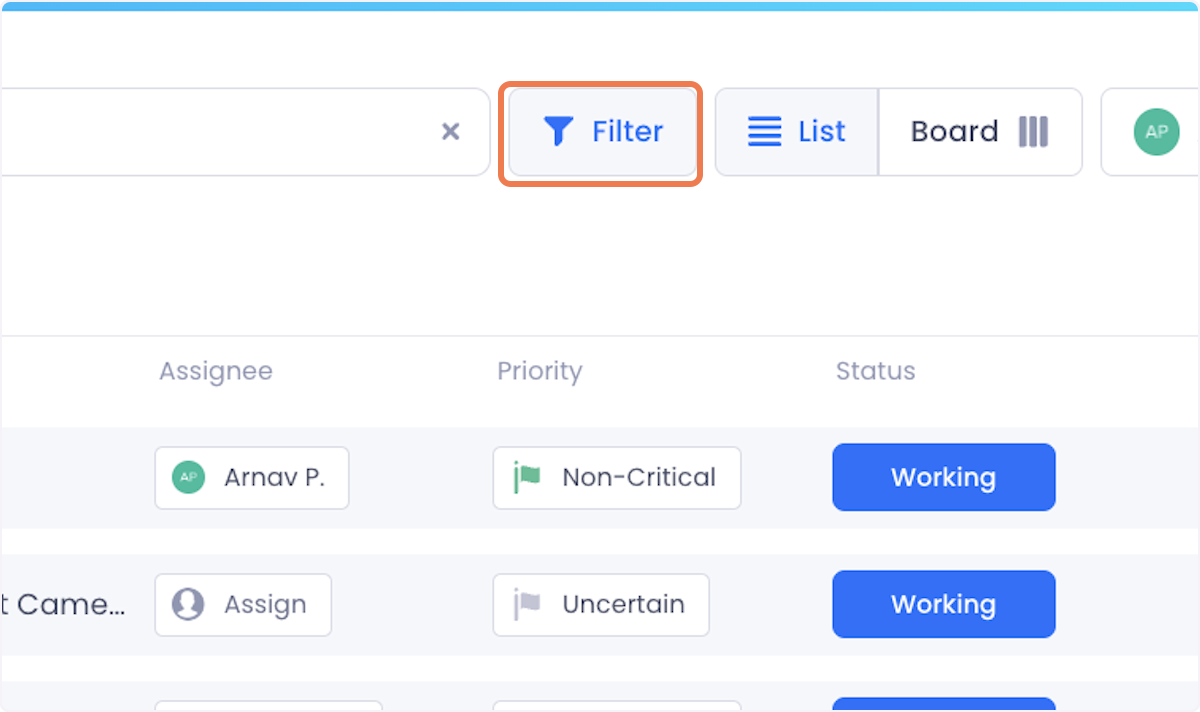
This will display a pop-up window showing the Ticket Fields you can filter by. Click into the fields you want to filter by and check the values that you want displayed. The ticket table will refresh automatically as you make your selections.

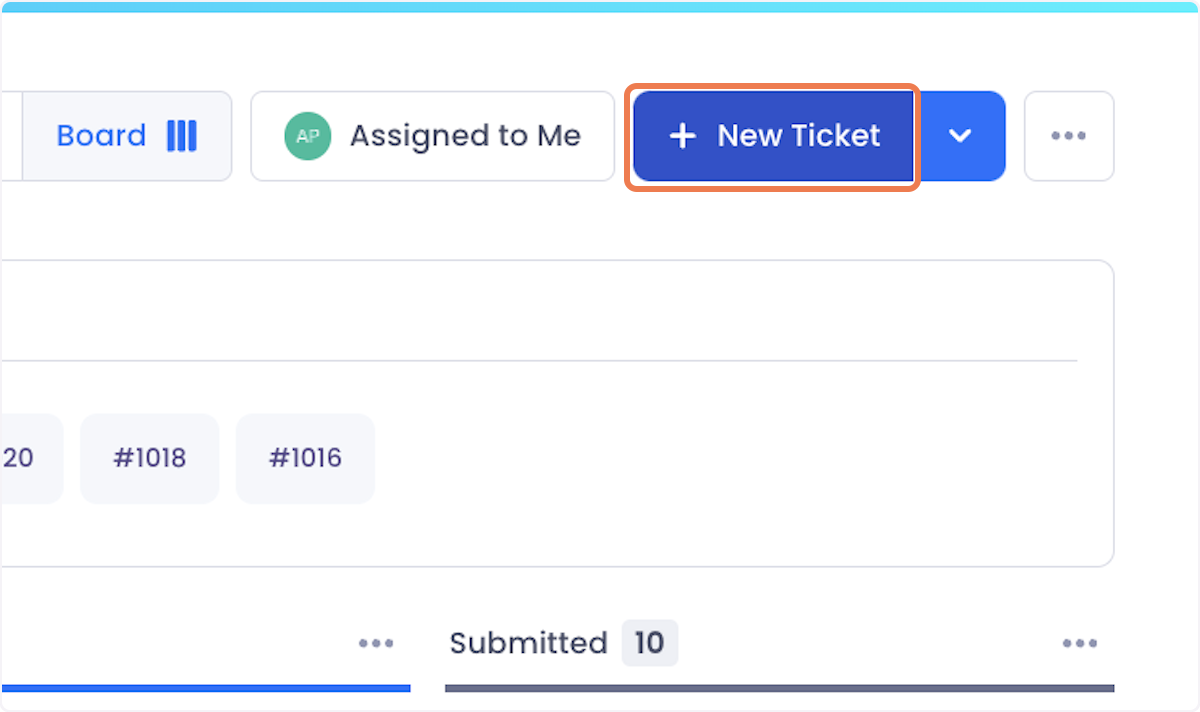
You can also quickly filter the Ticket View to only show Tickets where you are the assignee, by clicking on the ‘Assigned to Me’ button.

Page Views
To make project management easier in tickets, Beam provides you with two ways of displaying your tickets that can be found at the top of the page.
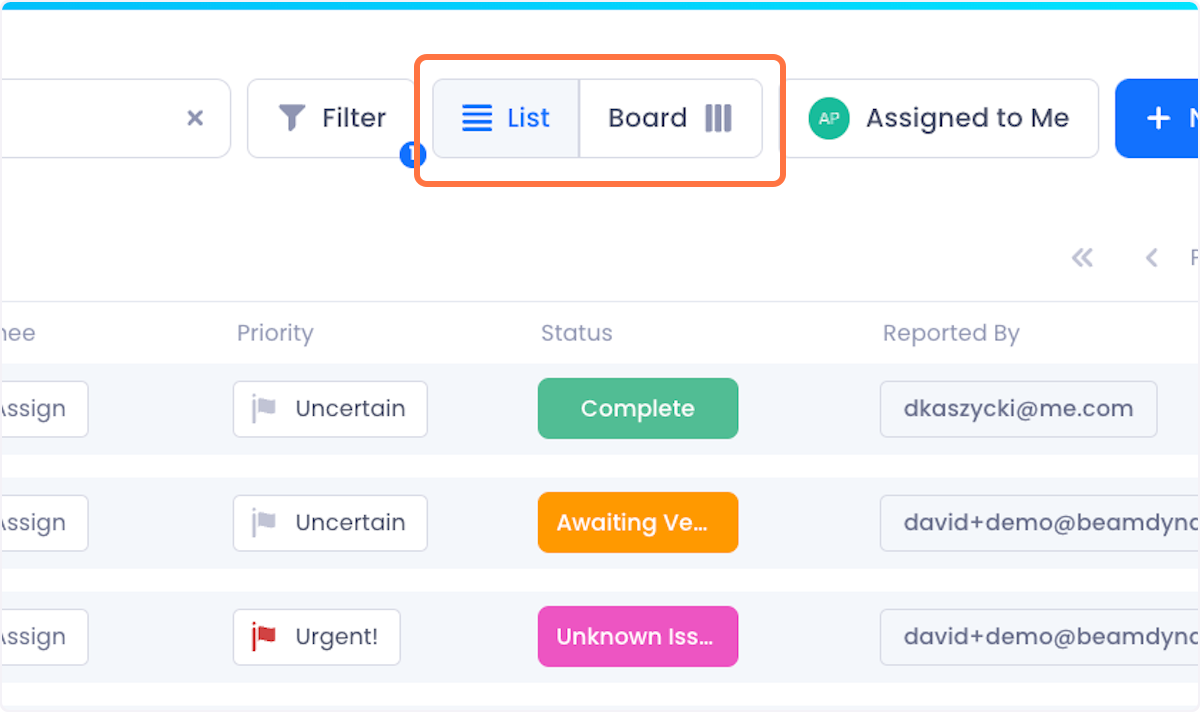
List
The default view, List, as discussed, shows you a table of all your tickets in a list.
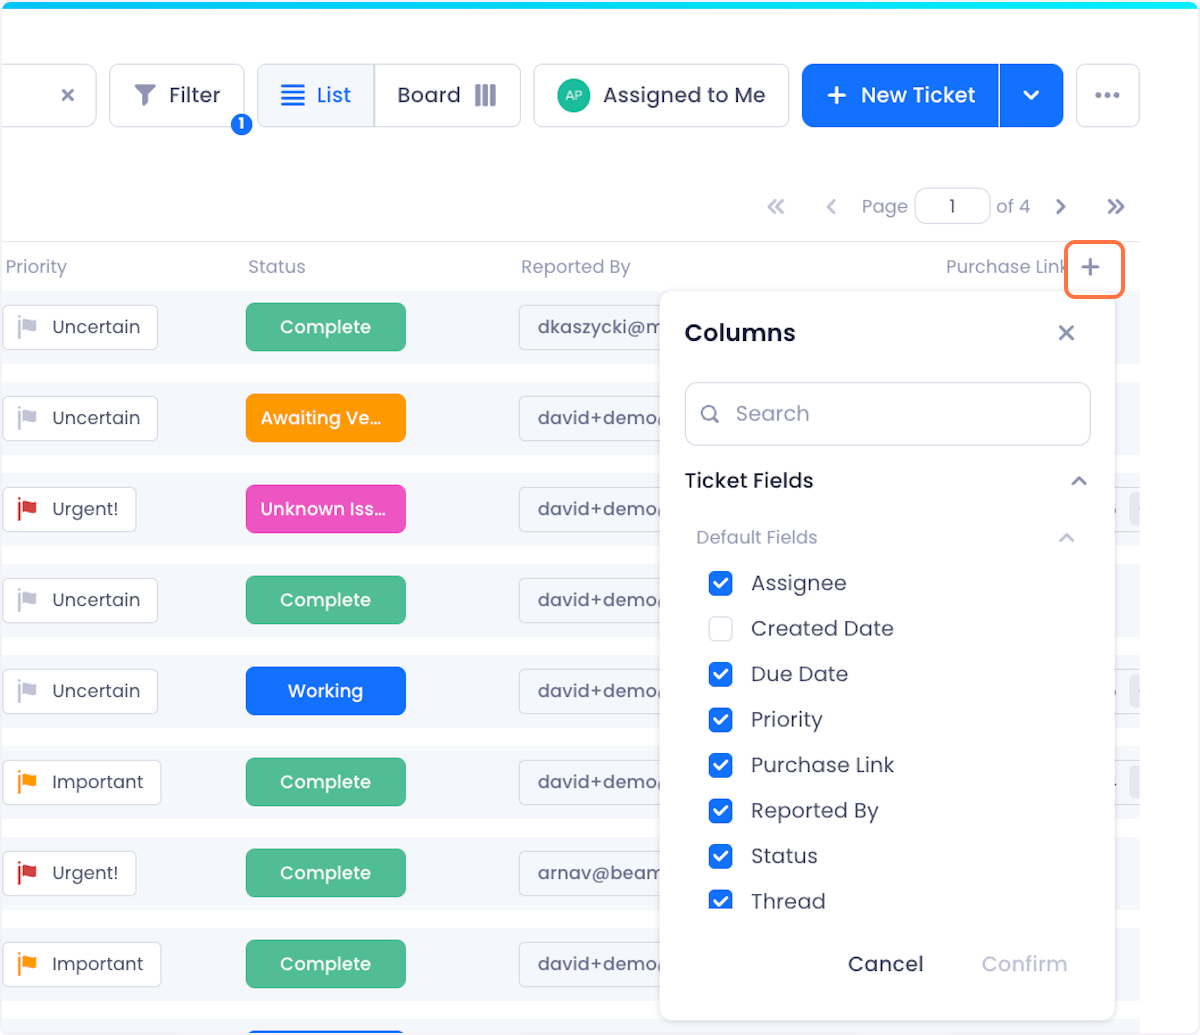
Columns in the ticket table showcase different data available for your tickets such as Ticket number, Ticket Name, Assignee, Tags. etc., additional columns can be added by clicking on the plus button at the top right of the table.
Board
The Board view shows you your tickets in a kanban format, organized by Ticket Status. Within each status column of the board view, tickets are organized by assignee.

You can assign, and move Tickets from Status to Status simply by dragging and dropping them to the corresponding Status. The same principle applies if you want to assign or reassign a Ticket to a different Assignee.
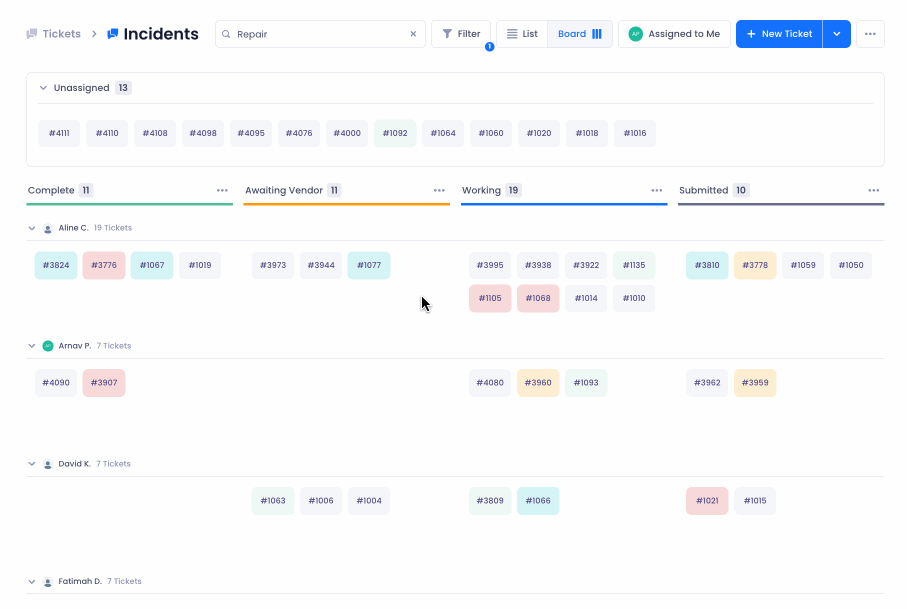
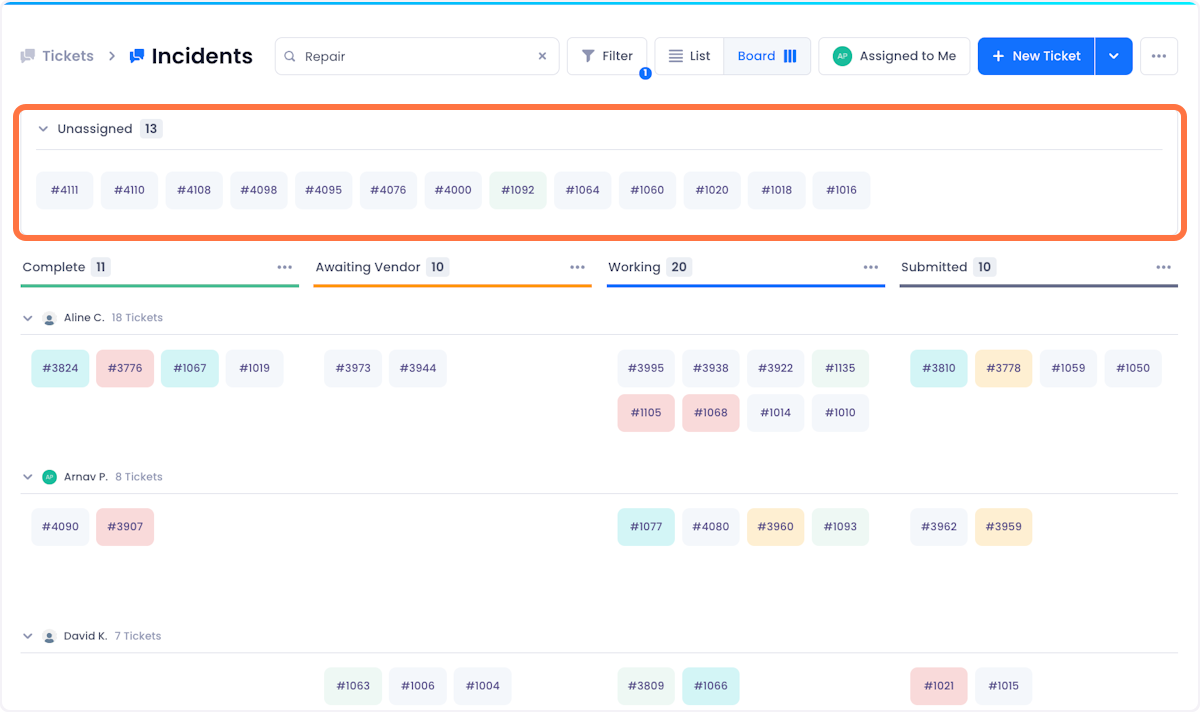
All unassigned tickets are populated at the top of the board in a dedicated unassigned section.
Creating a Ticket
Tickets can be created by clicking the New Ticket button on the top-right corner of the Tickets Page.
Clicking this button, will open a modal where you can configure your new ticket to your needs. For more information, check out our tutorial on creating tickets:
- Creating A Ticket From The Tickets Page
- Creating A Ticket Through An Email
- Creating A Ticket Through An External Form