Creating A Ticket Through Email
Beam's ticketing module gives you the option of creating tickets through several channels. One of these channels is email. Users can send an email about their issue to a workspace-specific email id. The details from that email will be converted into a ticket and the relevant workspace members will be notified. In this tutorial, we'll show you how to create a ticket via email.
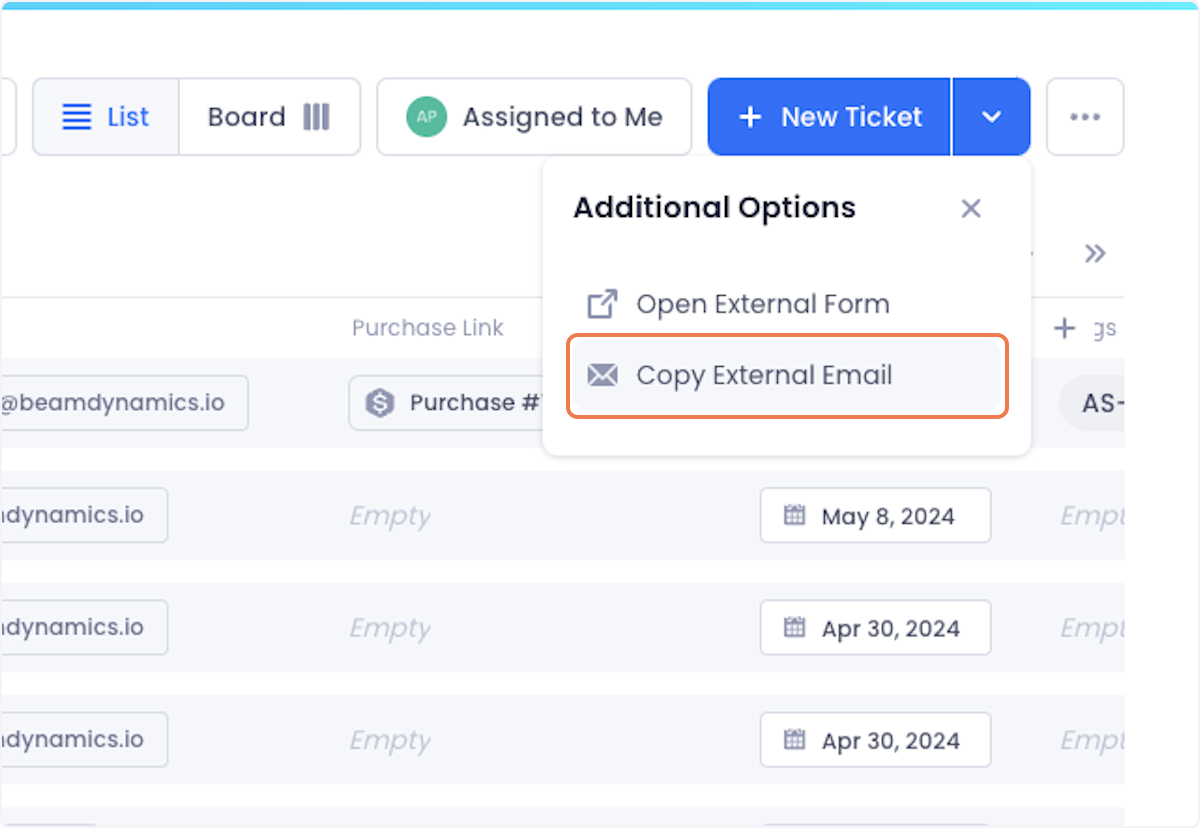
To access the workspace-specific ticketing email id, click on the arrow next to the New Ticket button at the top of your ticket page and then click Copy External Email.

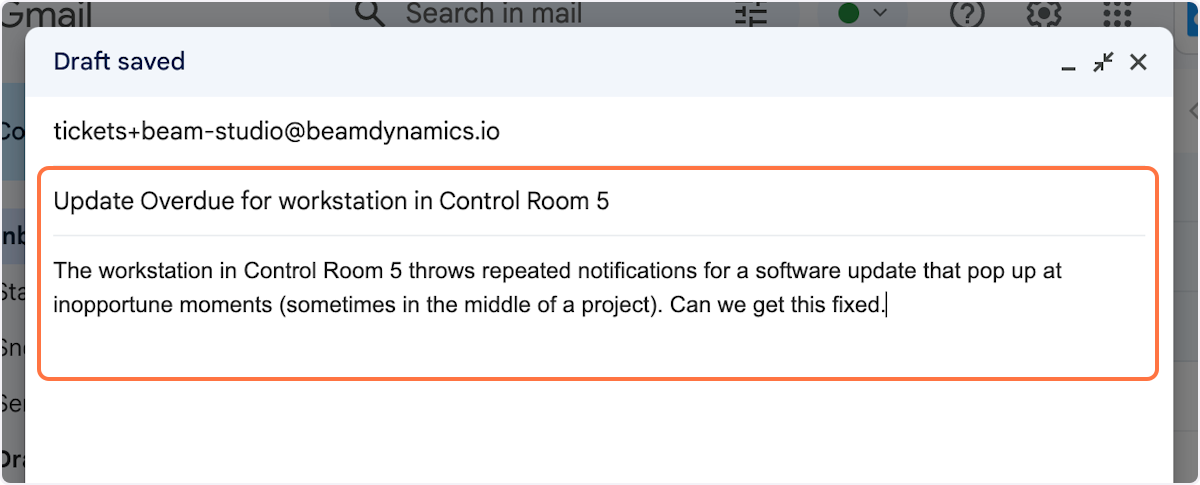
The email address will be copied to your clipboard. You can paste it into your email client to send an email to it.

Give your email a subject line and a body. These will be used to create the ticket heading and the ticket description.

When you're satisfied with your setup, send the email to complete the creation process.

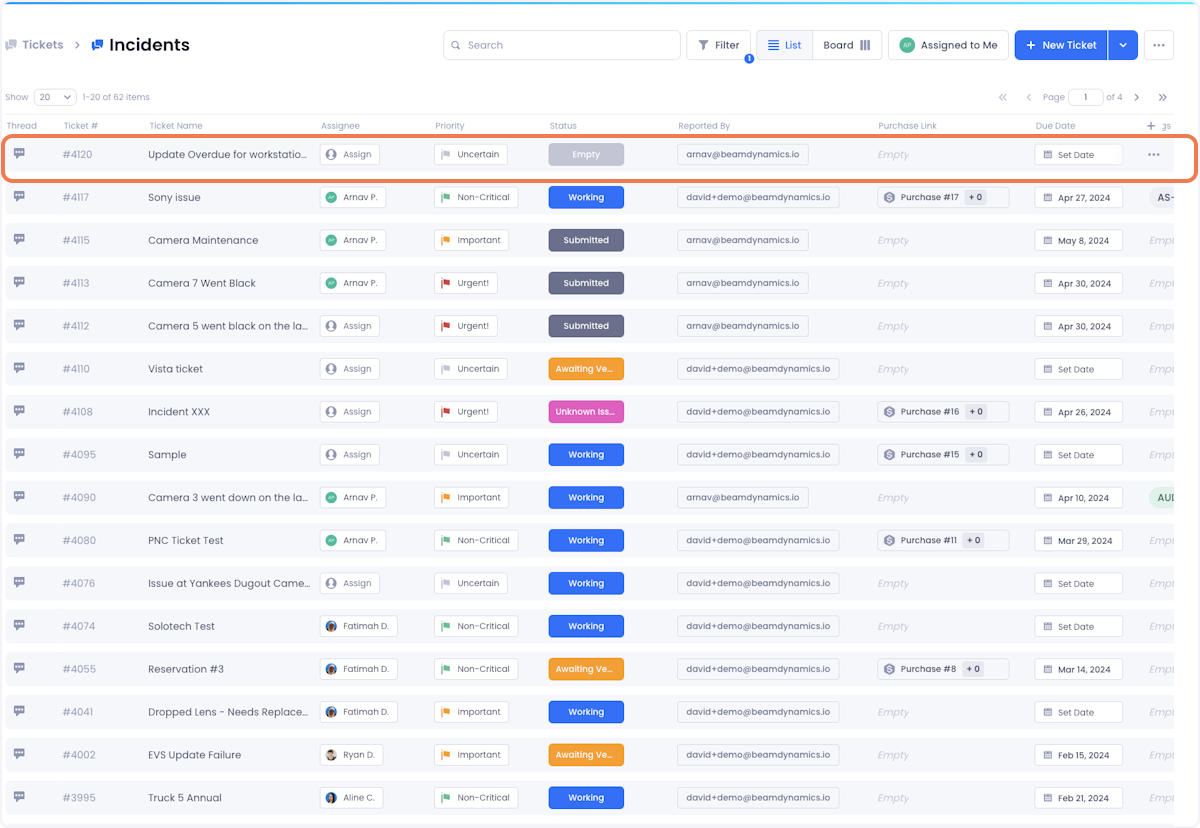
The ticket will be created and added to your workspace and an email will be sent to workspace members who have ticket notifications on.
NOTE: When email tickets are created, they are added to the ticket type that was set as the default for email tickets in your workspace settings. To learn how to set a default ticket type for emails, check out our documentation on the topic.

You can respond to tickets created via email using the Public response feature in the ticket. To learn more about this feature, check our documentation on the topic.


