Managing Ticket Types
Tickets in Beam are organized into Types. Each ticket type has its own page and can have its own statuses and fields. In this tutorial, we will show you how to create, edit and delete Ticket Types in your workspace.
2
min read
Accessing Ticket Types
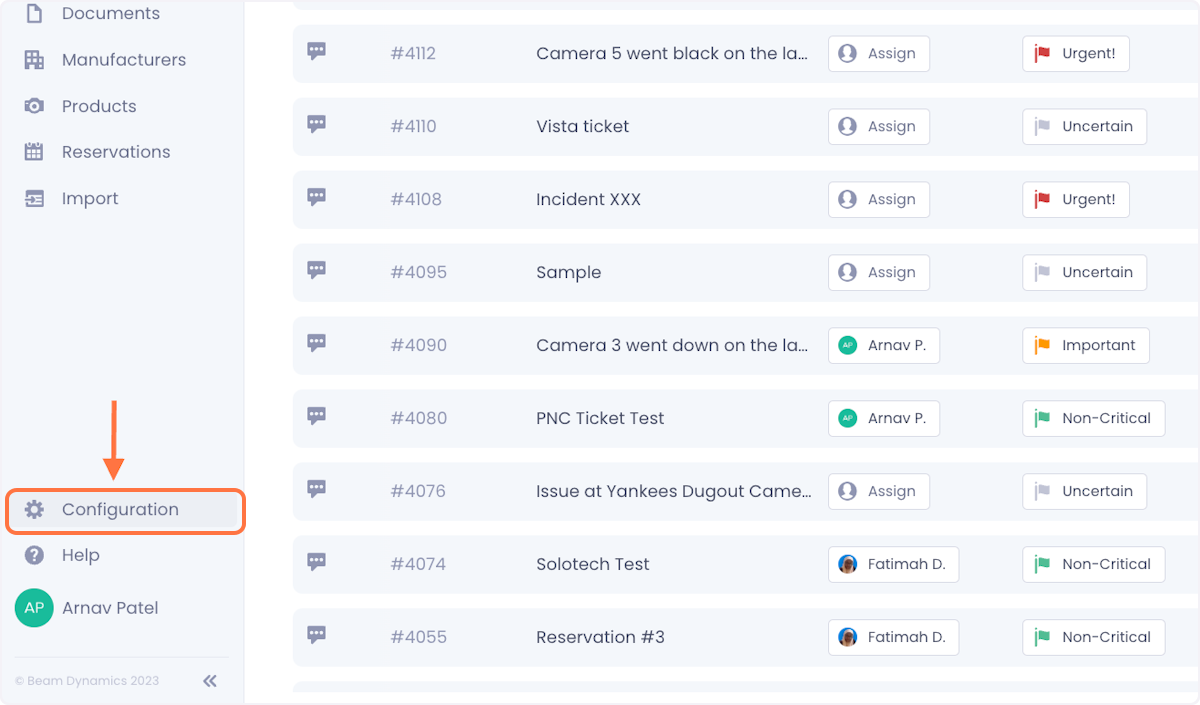
1. Click on Configuration in the side panel of your Beam workspace.
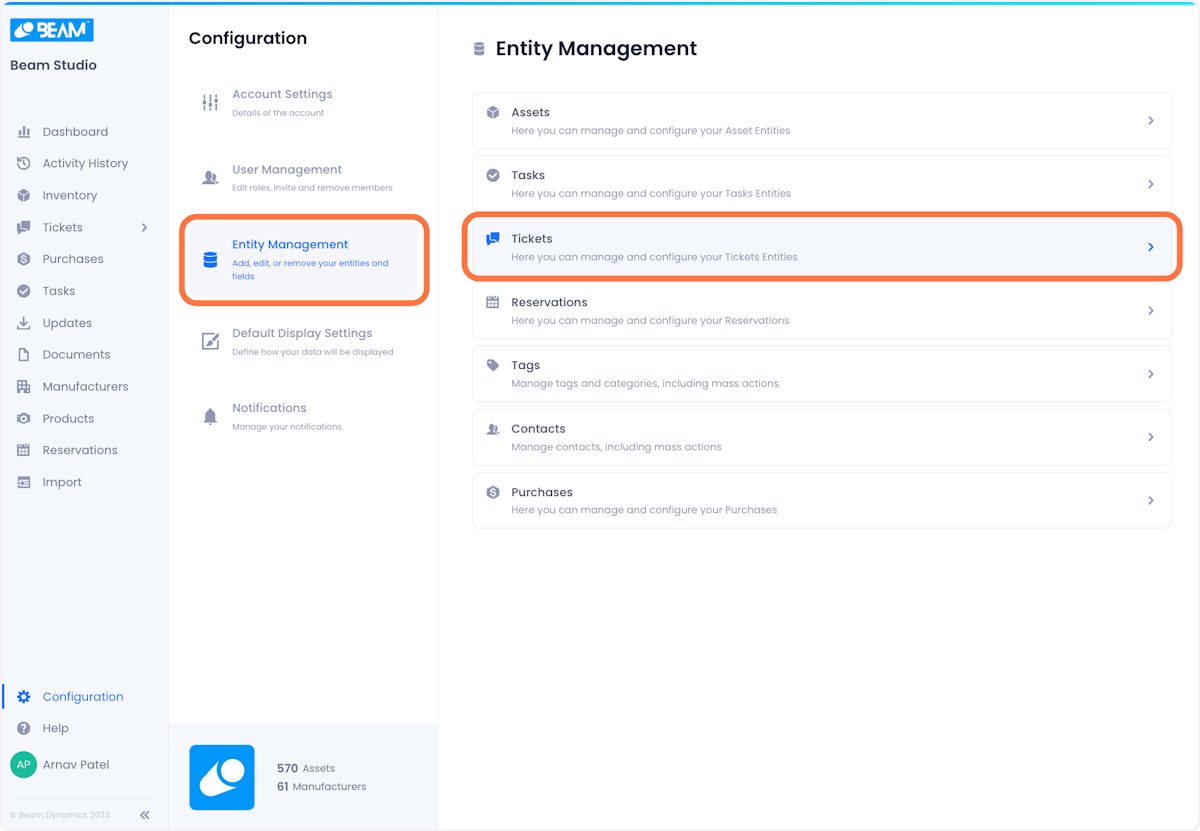
2. On the configuration page, click on Entity Management and then select Tickets from the list of entities.
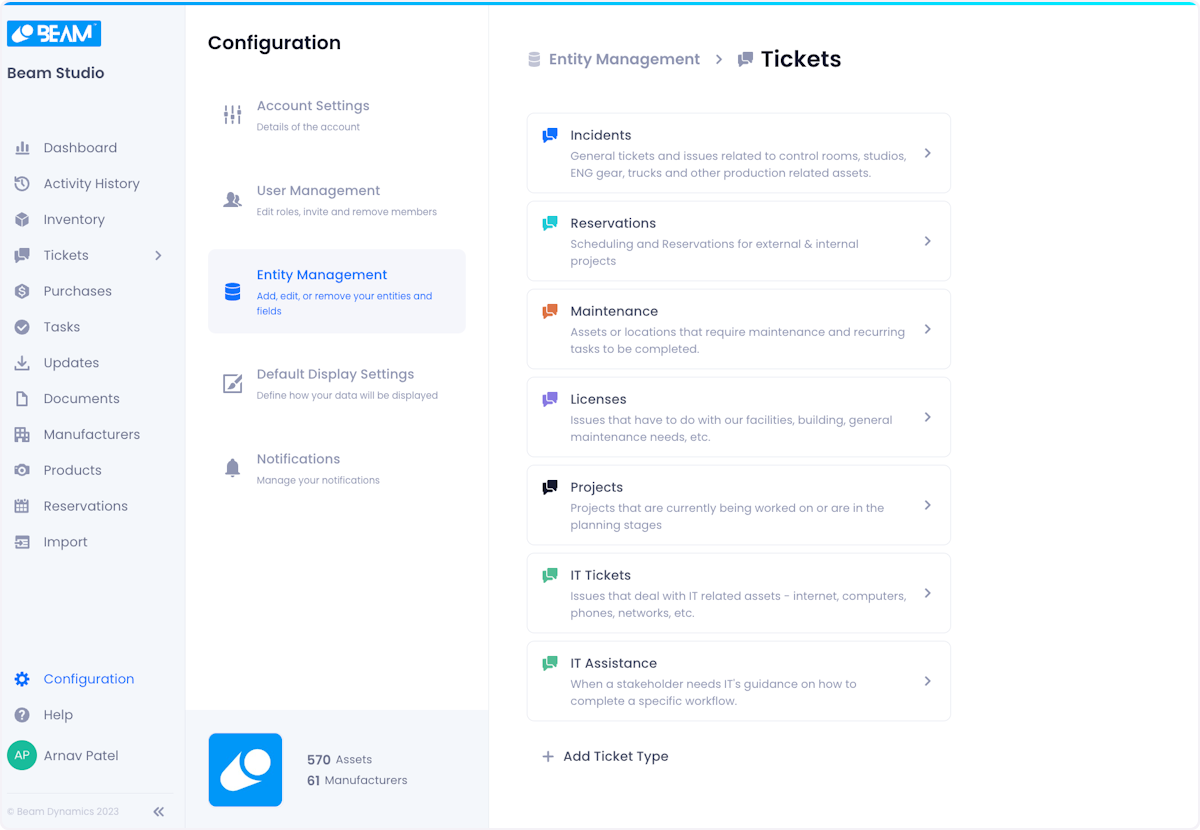
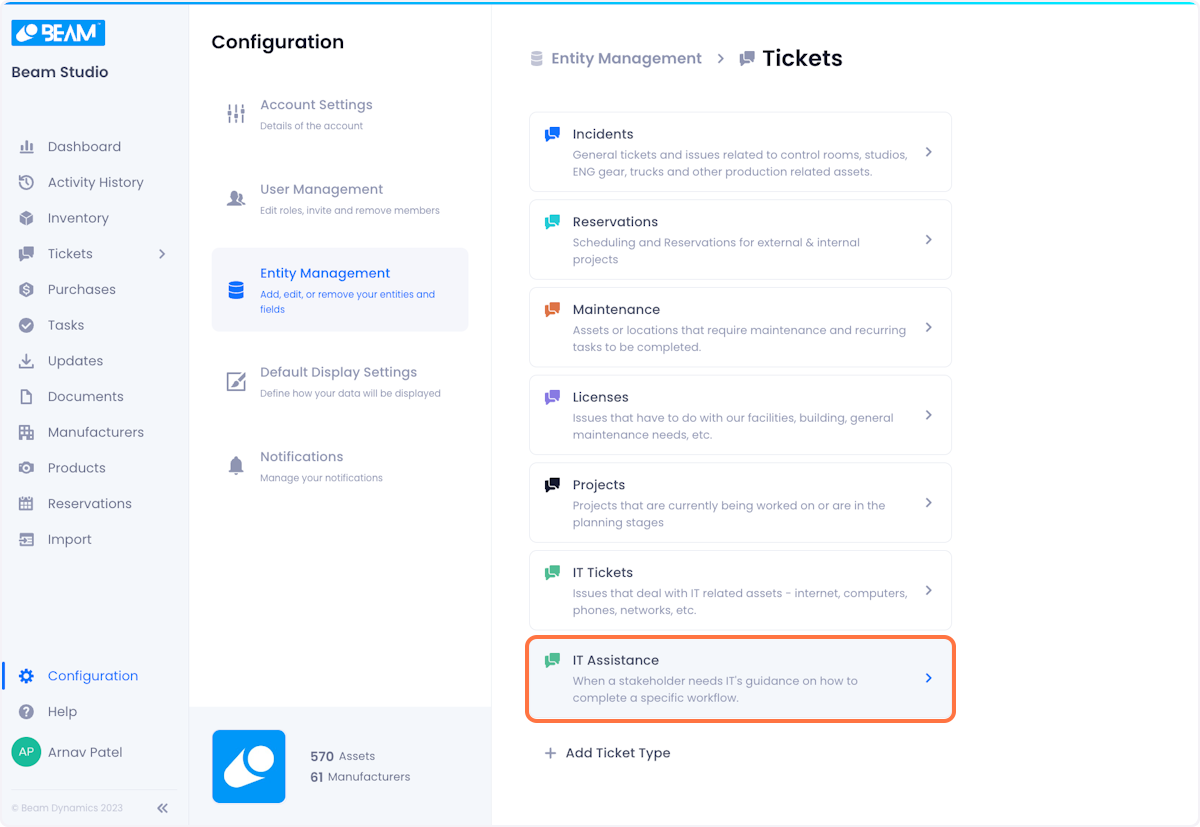
3. You will be dropped on a page that displays all your Ticket Types.
Creating A Ticket Type
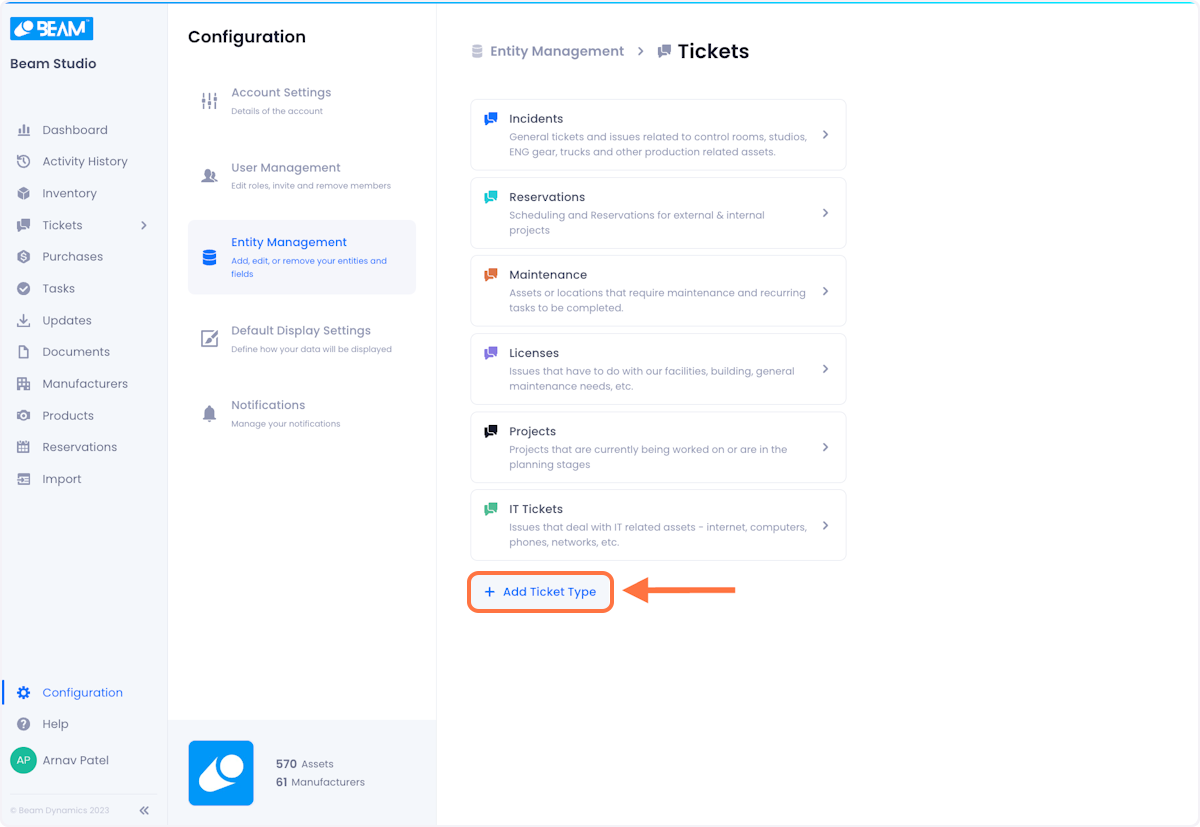
1. On the Ticket Types page click on Add Ticket Type.
2. A popup will appear where you can configure your ticket type. Give your Ticket Type a Mame, Description, and a Custom Color (optional).

3. If you want to save time and copy Statuses for your new ticket type from an existing status in your workspace, toggle Copy Statuses from on and select the type you want to copy from the dropdown.

4. If you want to save time and copy Custom Fields for your new ticket type from an existing status in your workspace, toggle Copy Custom Fields from from on and select the type you want to copy from the dropdown.

5. When users create tickets by email, they don't have a way to define the ticket type within the email. This is why Beam let you configure which ticket type will be automatically applied to any new email tickets.
If you want to make your new ticket type the default for email tickets, toggle the Default for email on. You can learn more about creating tickets by email by checking out our documentation on the topic.
NOTE: If another ticket type was previously set as the default for tickets, that setting will be overwritten.

6. When you're satisfied with how your tickets are setup, click Add Ticket Type to complete the creation process.

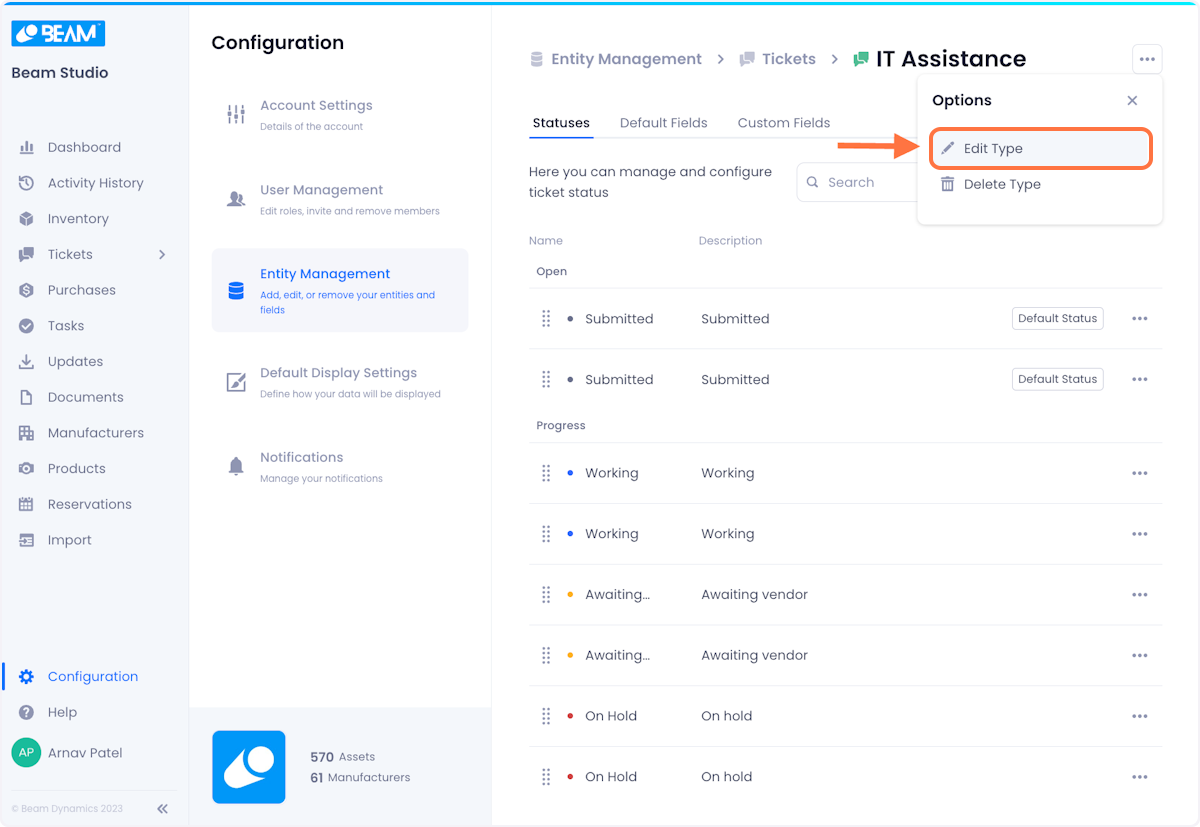
Editing A Ticket Type
1. Click on the ticket type you want to edit.
2. In the overflow menu at the top right of the page, click on Delete Type.
3. A popup will appear where you can edit your type. When you're satisfied with your changes click Save Changes.

Deleting A Ticket Type
1. Click on the ticket type you want to edit.
2. In the overflow menu at the top right of the page, click on Delete Type.

3. Confirm your deletion by clicking on Delete in the ensuing popup.


Arnav Patel
Product Marketing Specialist