Managing Workspace Display Settings
As a Beam user you can configure how Asset data will be presented to you in the Inventory module and on asset pages. In this tutorial we will show you how to configure your display settings
Accessing Display Settings
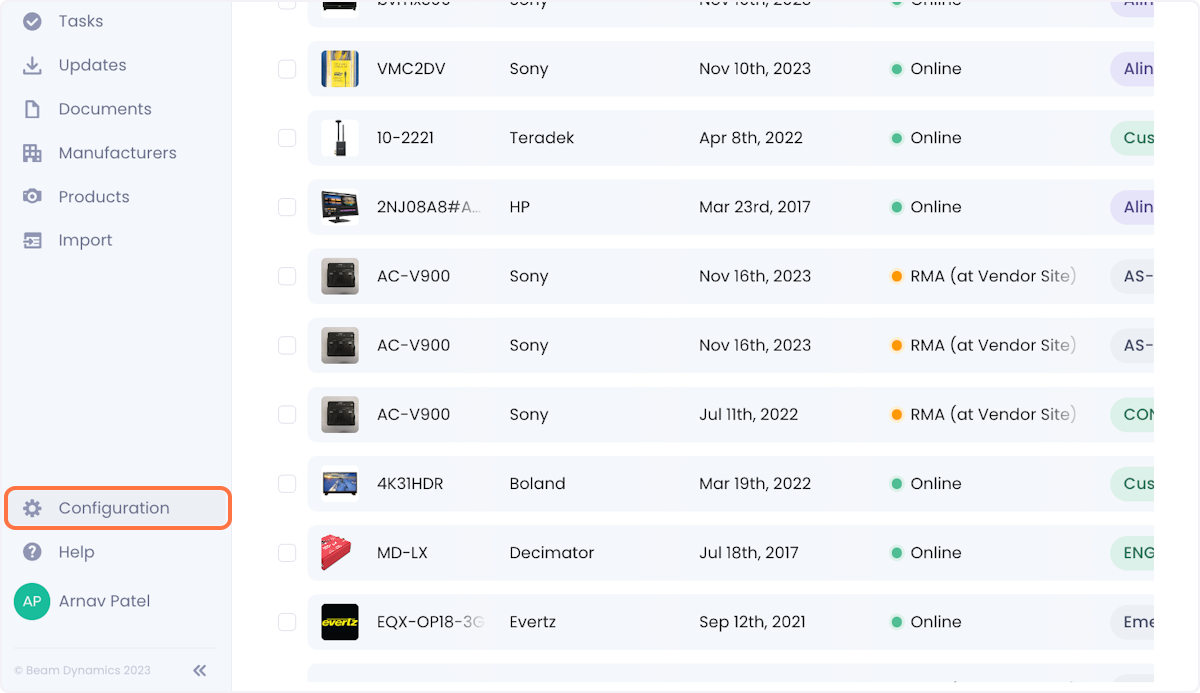
To access your display settings, first click on the Configuration button in the navbar on the left side of your Beam workspace.
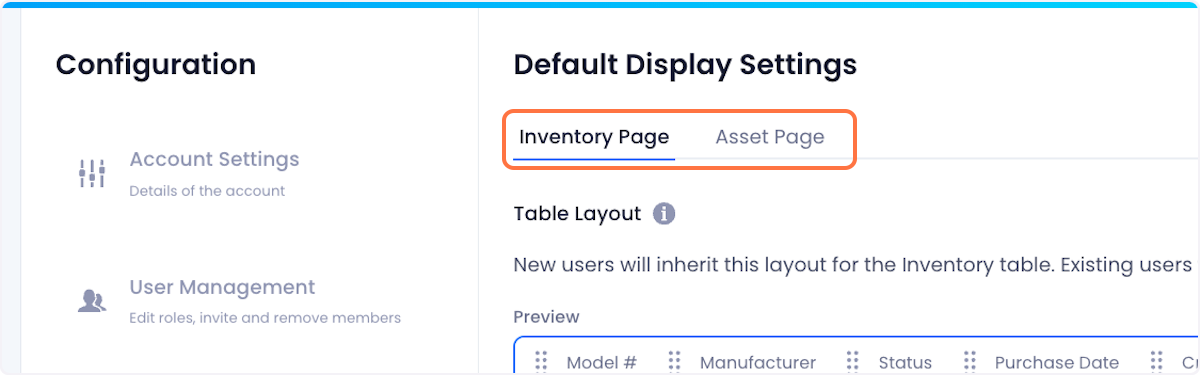
Once on the configuration page, click on the Default Display Settings option. Doing so will open up a page where you can configure your display settings.

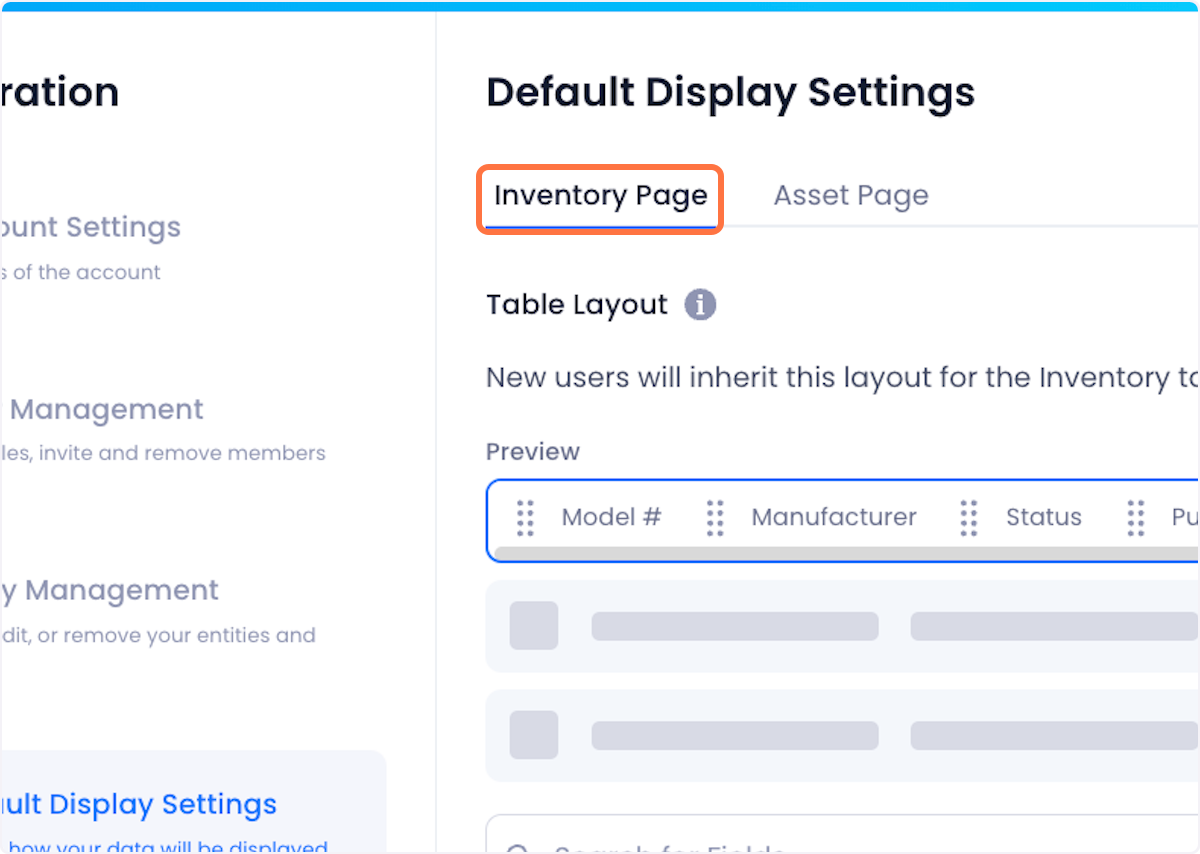
At the top of this page, you will see tabs that let you toggle between the display settings of the Inventory Page and the display settings of individual Asset Pages.
Managing Inventory Page Display Settings
The inventory page displays a table of all the assets that live in your inventory.
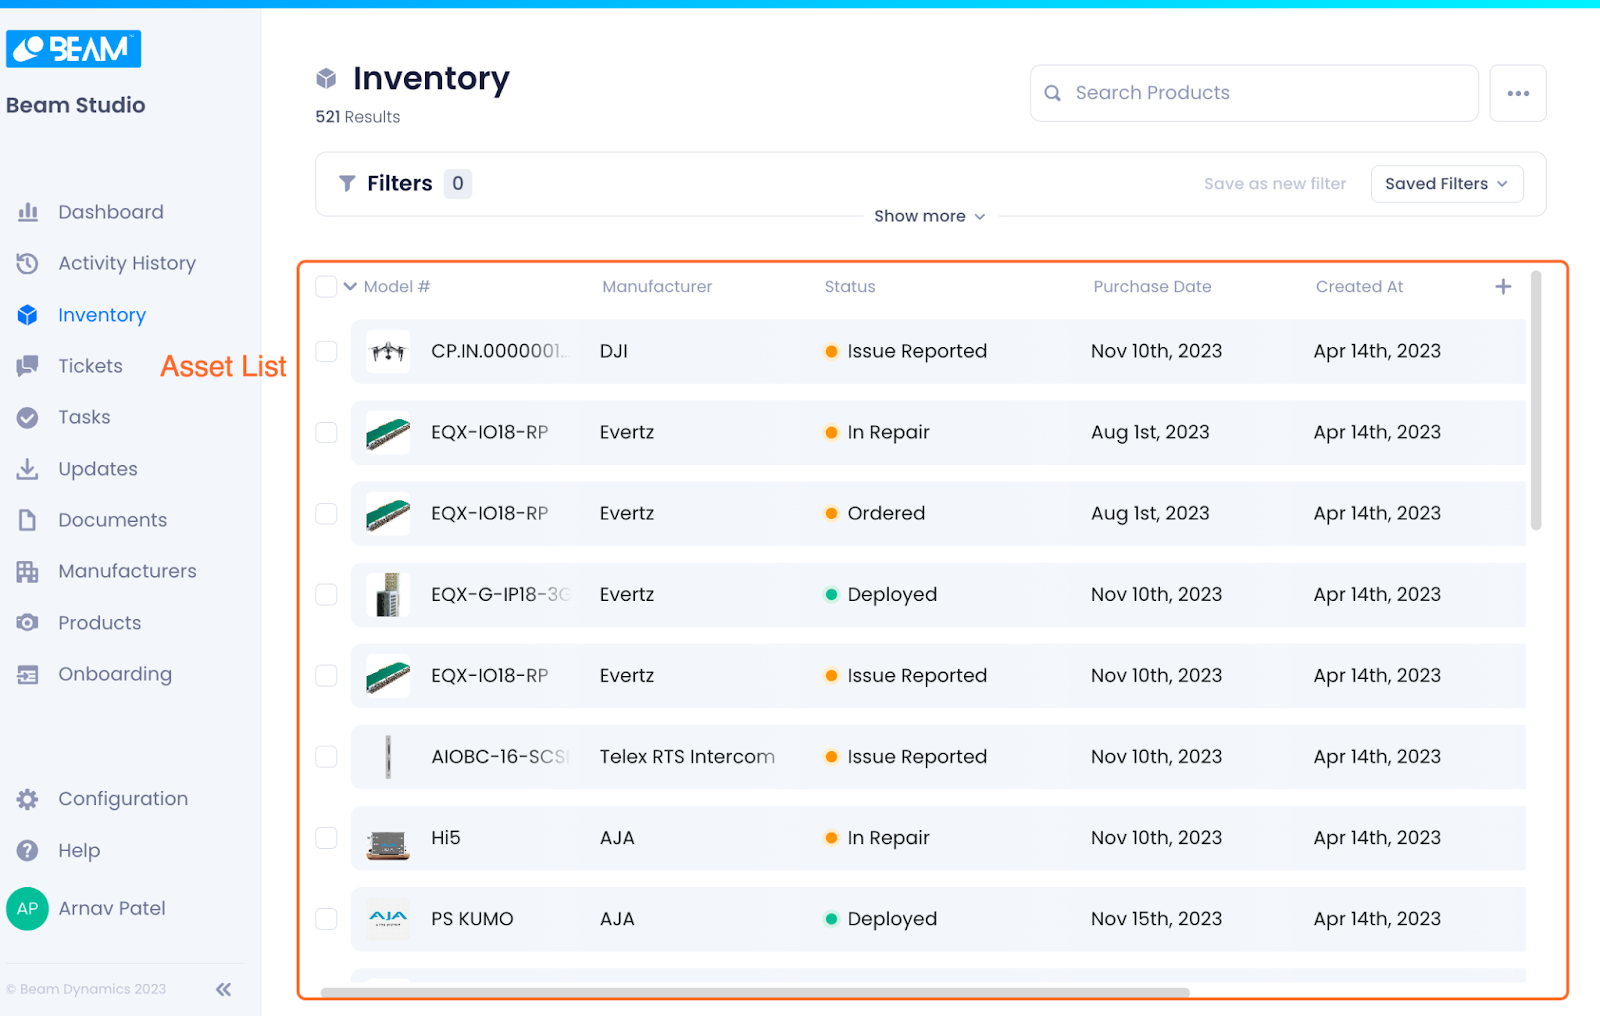
Using the Display Settings, you can configure which fields will appear as columns in this table of assets.
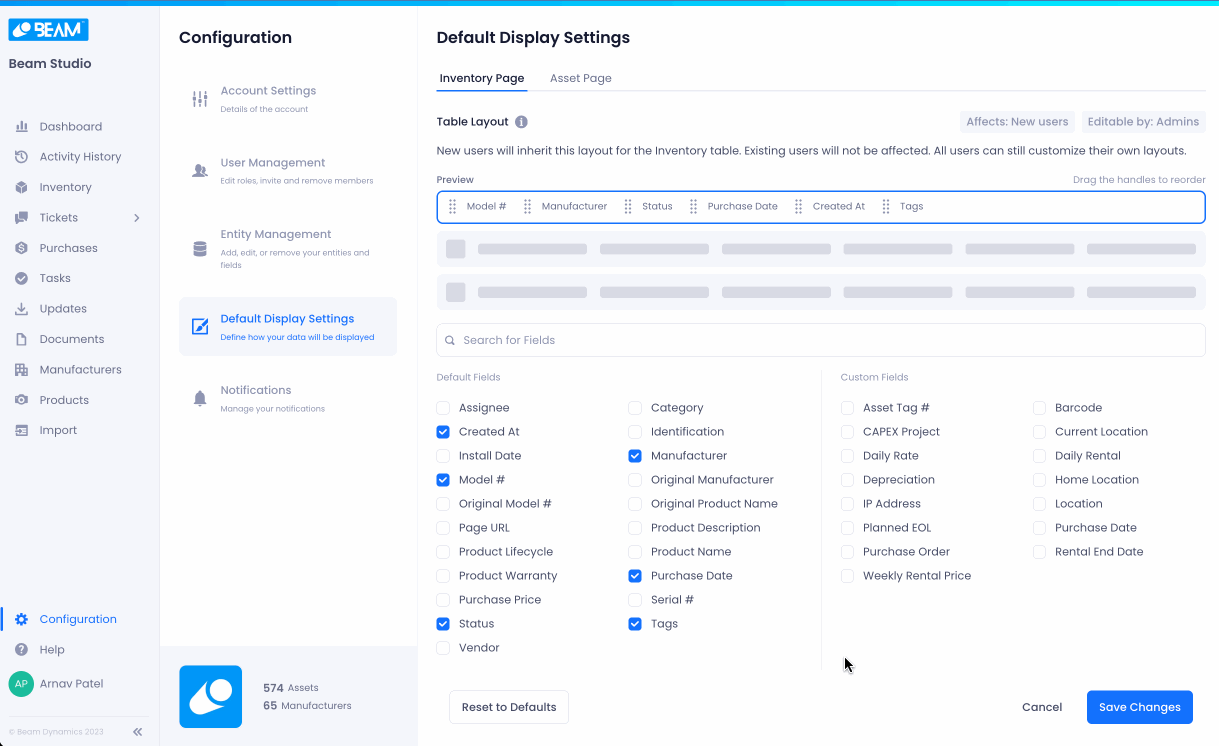
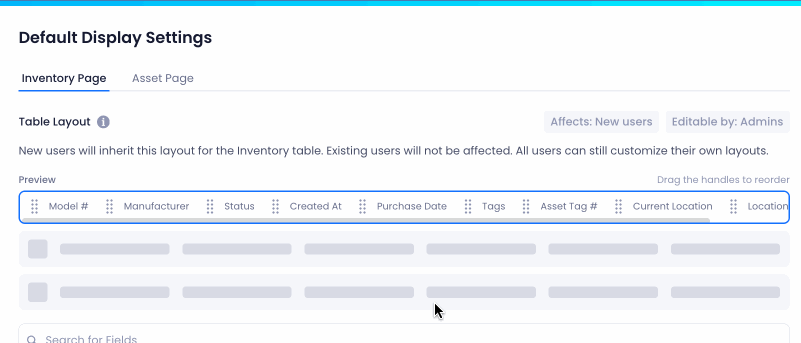
To access Inventory Page Display settings, ensure that you are on the Inventory Page tab of the Display Settings Configuration page.
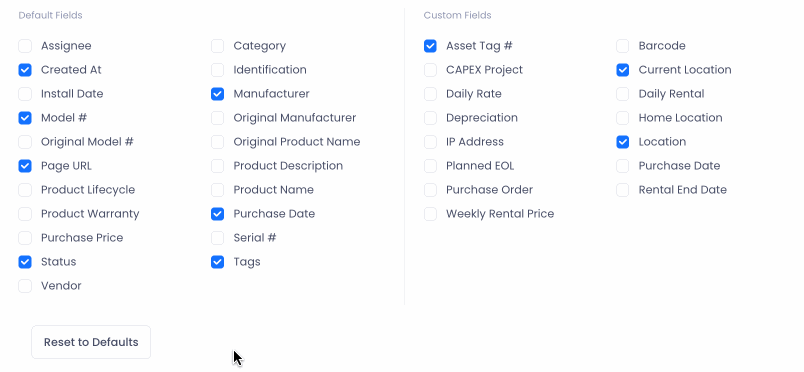
In the Inventory tab, you will be presented with a comprehensive list of all the default and custom fields that exist in your workspace at the bottom, a search bar to quickly find specific fields from this list of fields, and finally a preview bar at the top of the page that show you what your selected fields will look like on the Inventory page.
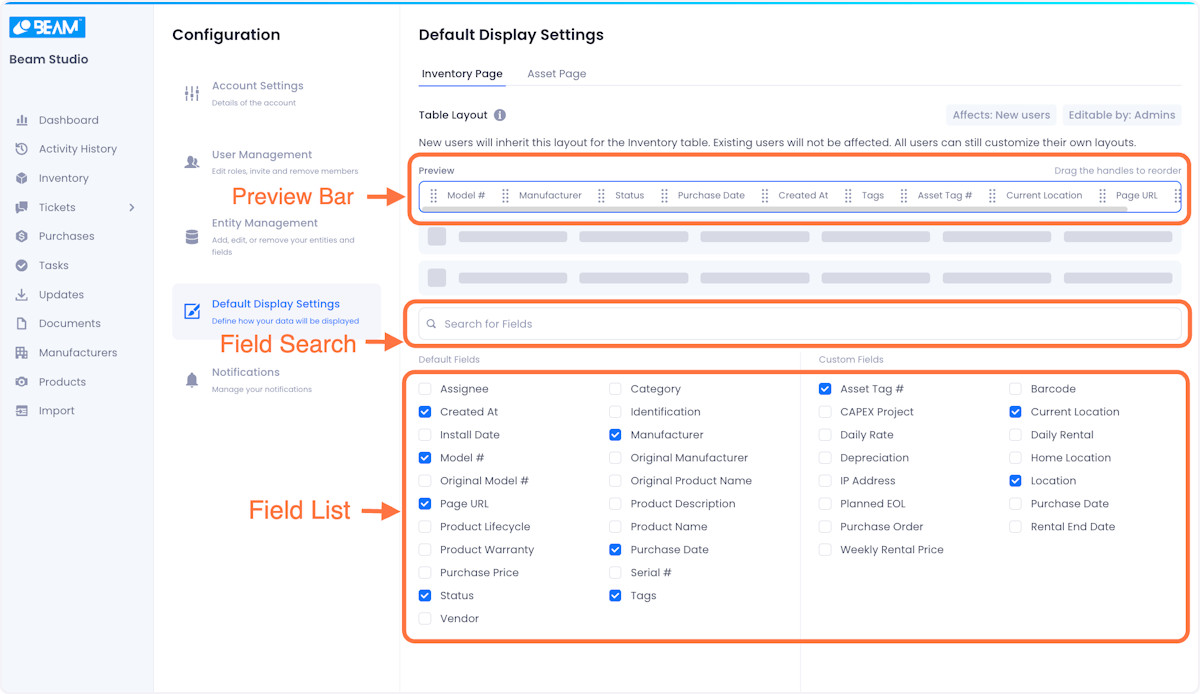
You can configure which fields will be displayed on your inventory page by checking/unchecking the boxes associated with the fields that you want to be shown or not shown on the inventory page.
As you change these selections, the preview bar at the top of the page, will adjust accordingly to show you what your Inventory Page table columns will look like.
You can reorder the columns by clicking and dragging the columns in the preview bar.
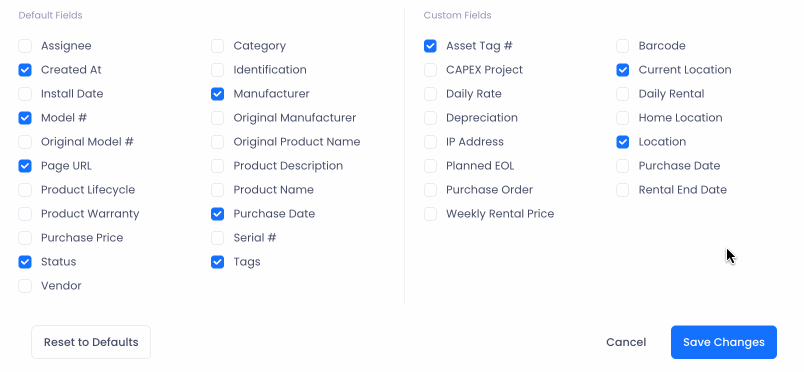
If you ever want to reset your changes to the system default settings, click on the Reset to Defaults button in the bottom left corner of the screen
When you’re satisfied with your selection, click on the Save Changes button at the bottom right of the page.
Asset Page Display Settings
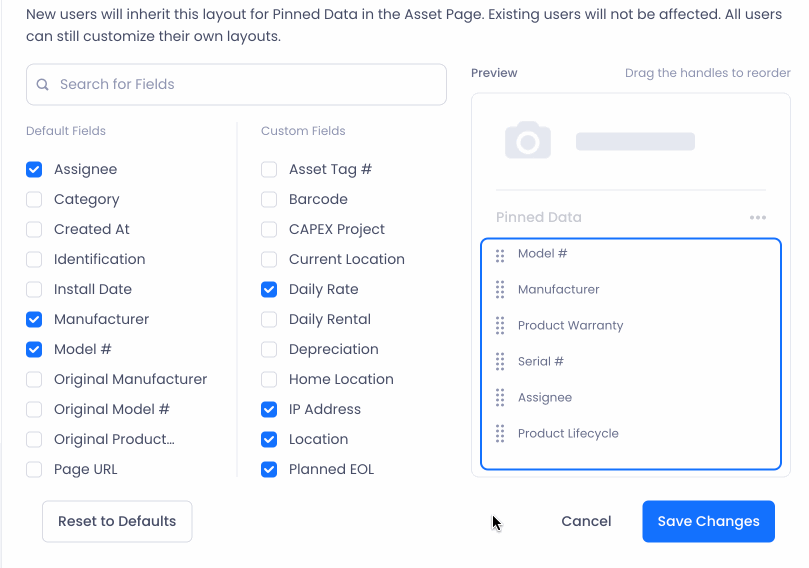
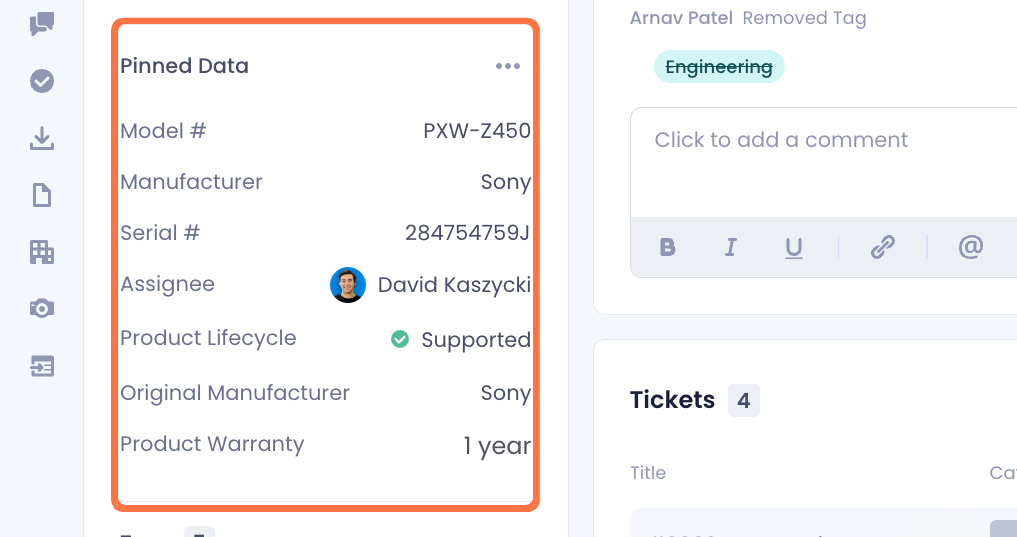
Each asset in your Beam inventory has a dedicated page that aggregates all product data and related tickets, purchases, etc associated with it. On the left side of each of these asset pages is a side panel that displays all the tags, fields and specs associated with your product. At the top of this side panel is a customizable Pinned Data section that displays frequently referenced data.
To access Asset Page Display settings, ensure that you are on the Asset Page tab of the Display Settings Configuration page.
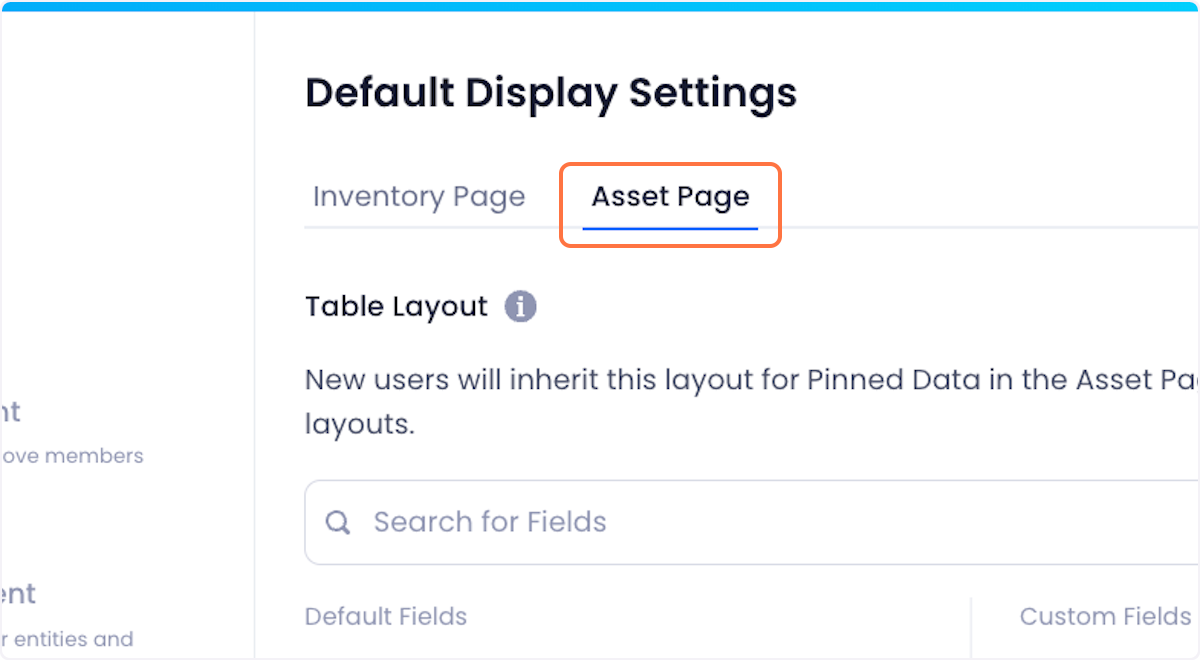
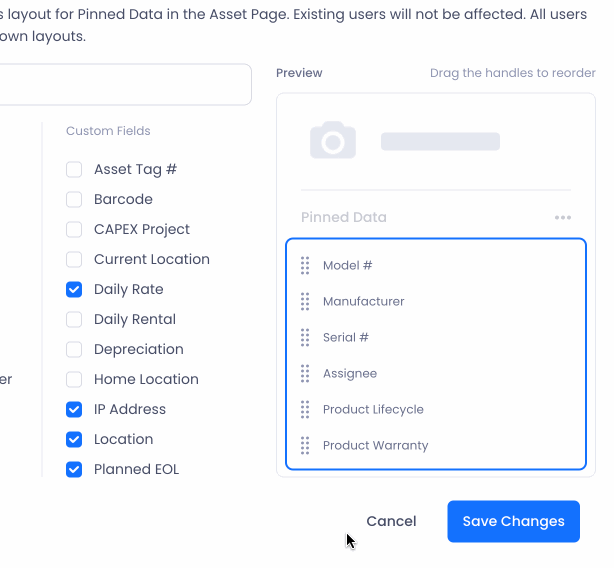
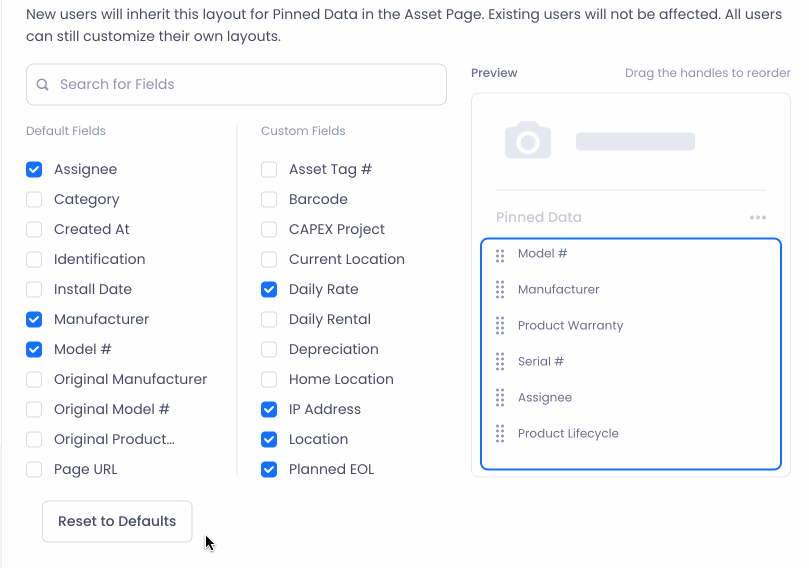
In the Asset Page Tab, you will see a list of all the custom and default fields that exist in your workspace, a search bar to find a specific field from this list, and a preview bar on the right side of the screen showing you what the pinned data section will look like based on your configuration.
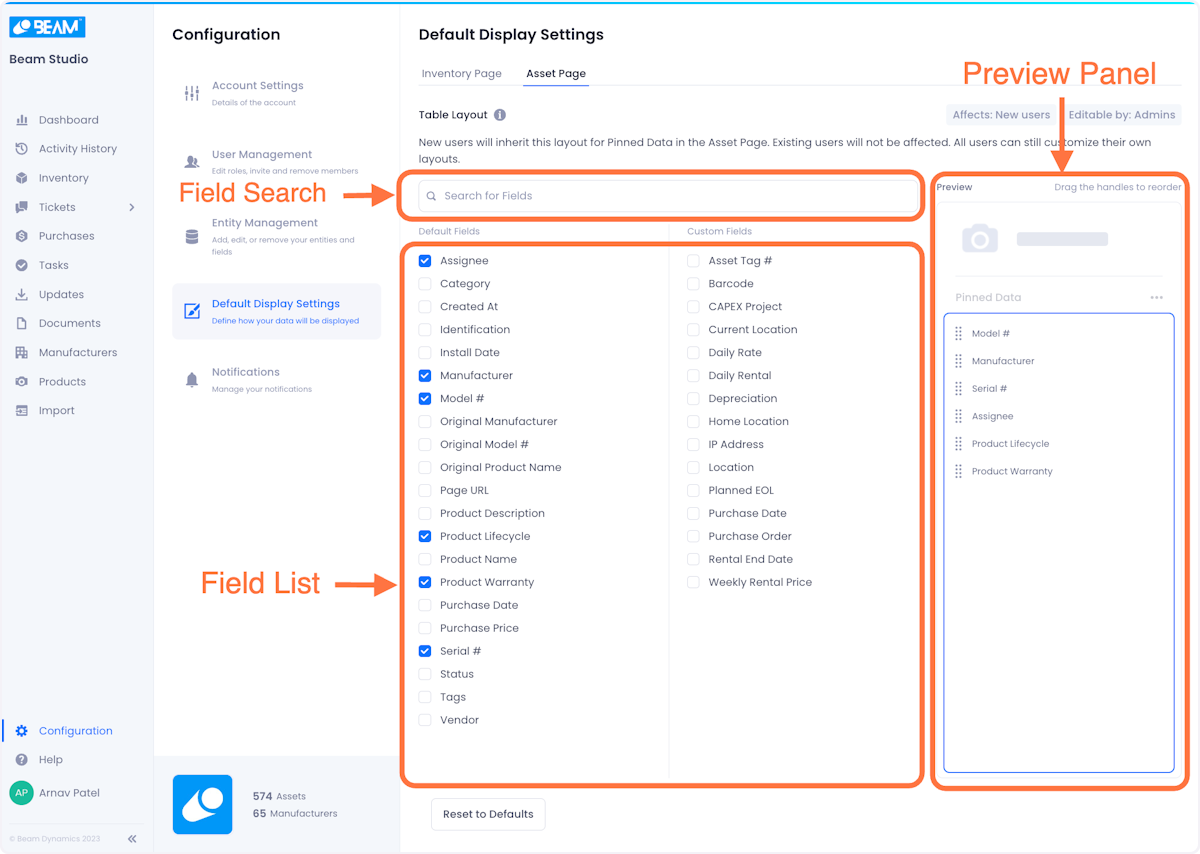
You can configure which fields will be displayed on your asset page by checking/unchecking the boxes associated with the fields that you want to be shown or not shown.
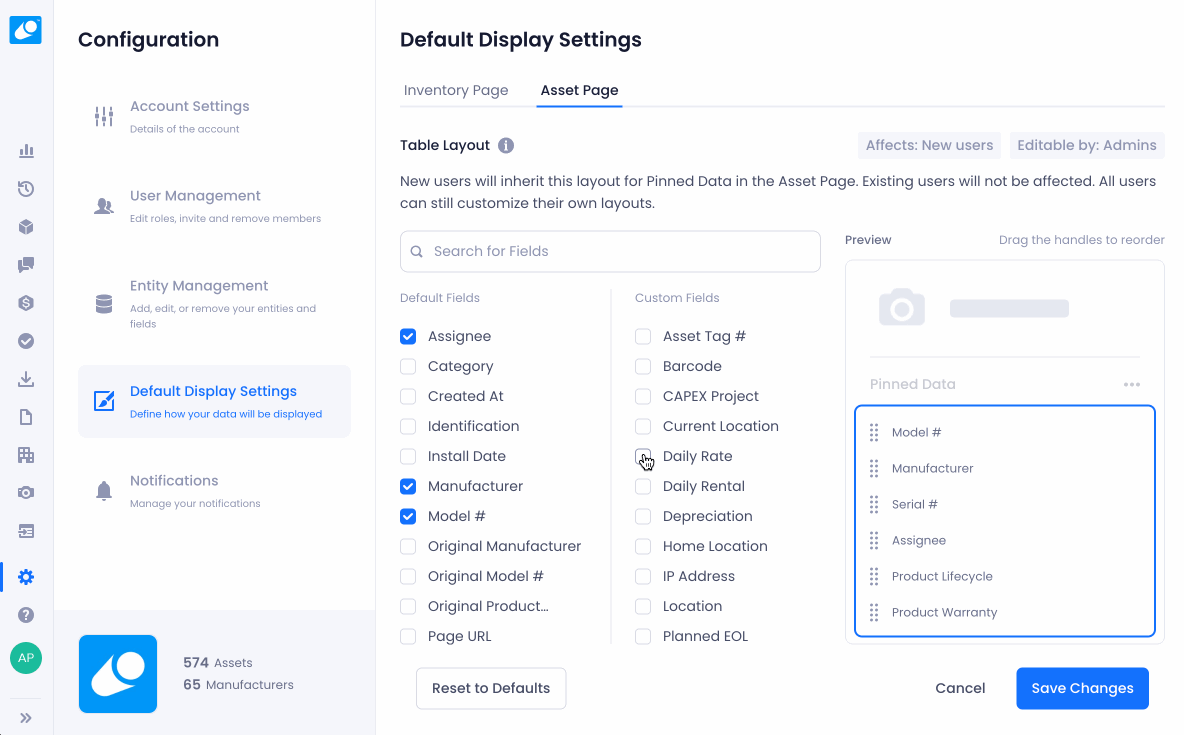
You can reorder the displayed fields by clicking and dragging the columns in the preview bar.
If you ever want to reset your changes to the system default settings, click on the Reset to Defaults button in the bottom left corner of the screen
When you’re satisfied with your selection, click on the Save Changes button at the bottom right of the page