Managing Ticket Statuses
Ticket statuses are essential for tracking how a ticket is progressing through your service workflow. Since every organization has a unique service workflow, Beam lets you customize your ticket statuses to match your preferences. In this tutorial, we'll show you how to access and manage your ticket statuses.
2
min read
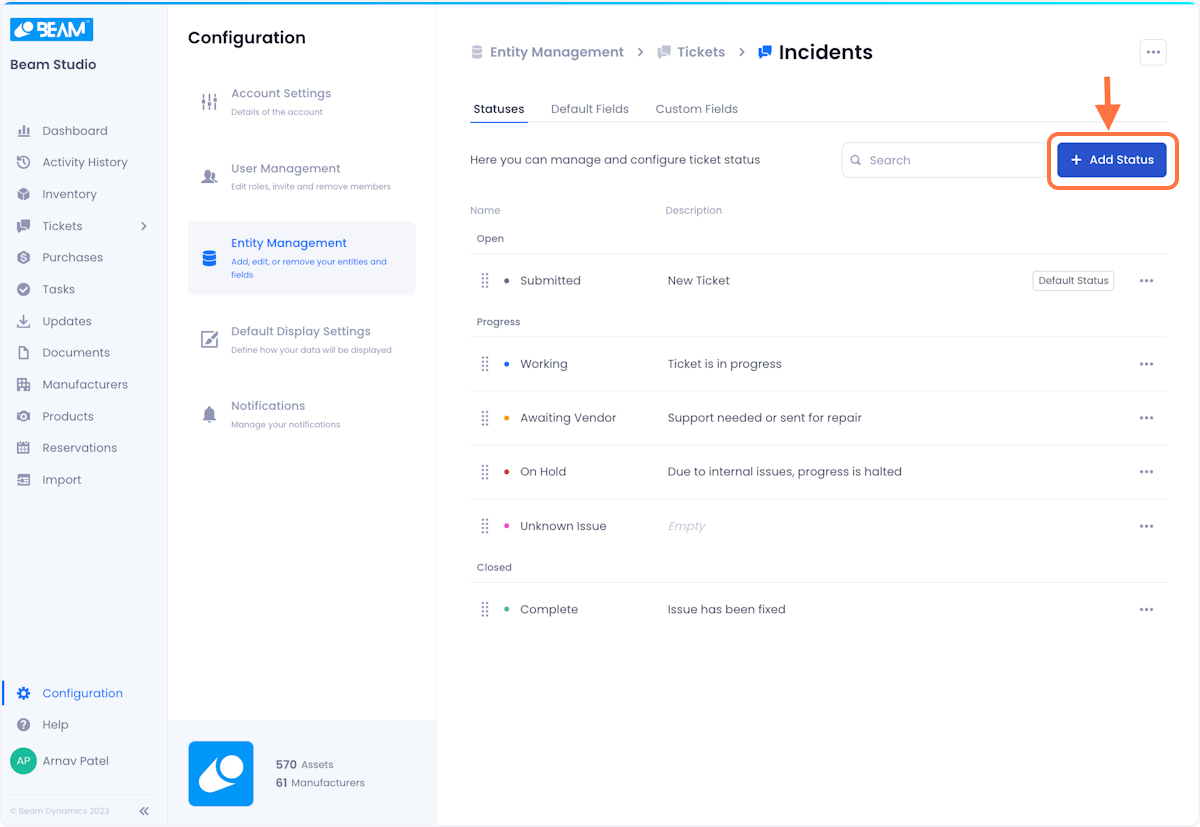
Accessing Ticket Statuses
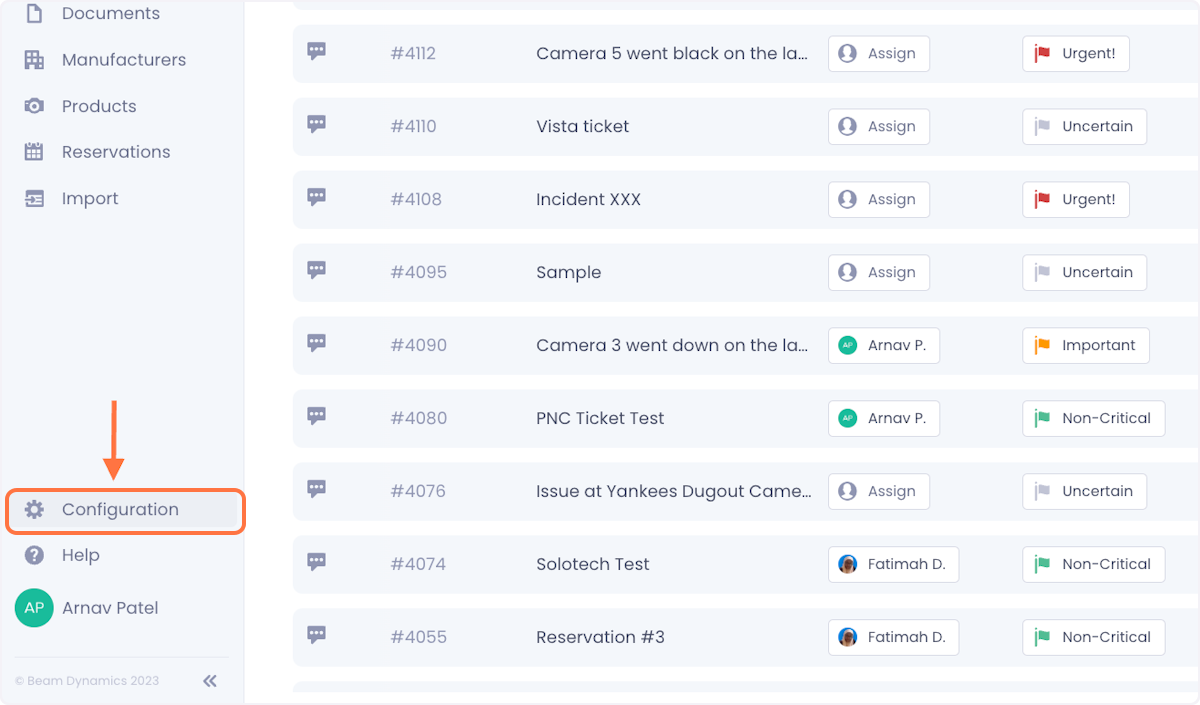
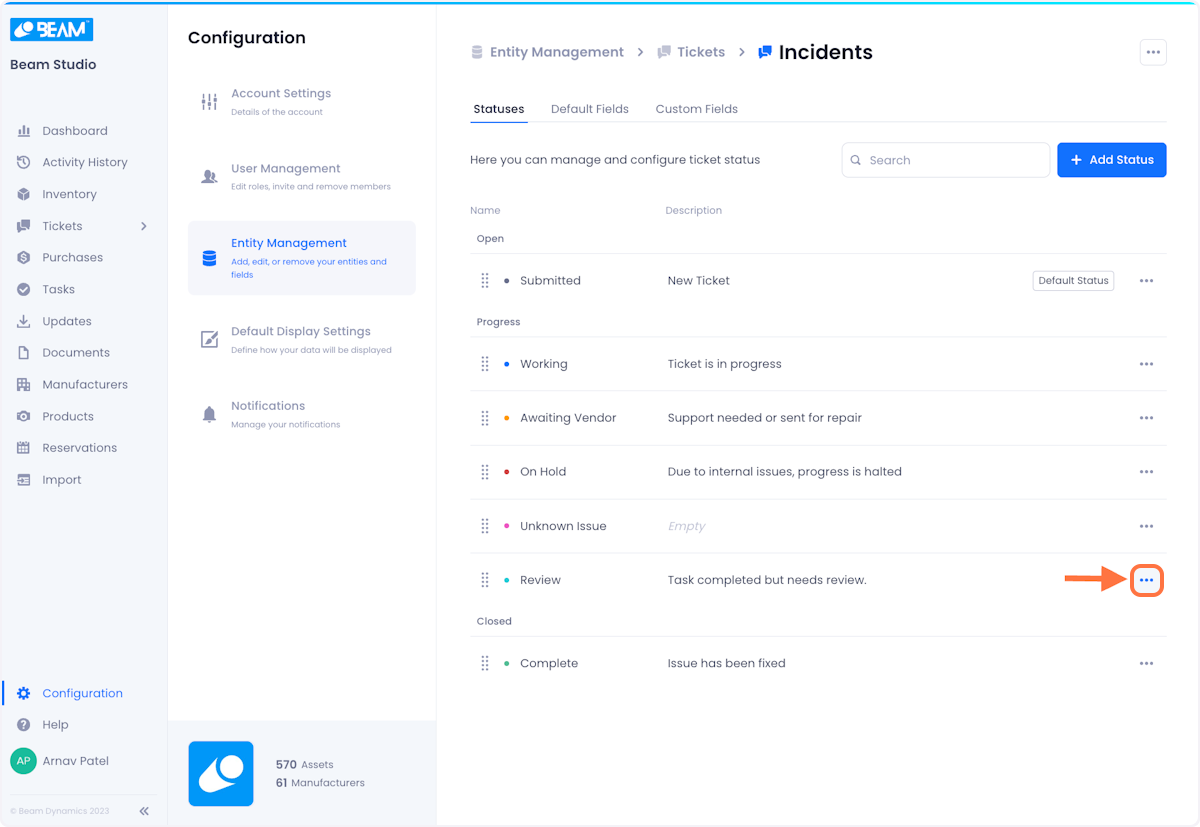
1. Click on Configuration in the side panel of your Beam workspace.
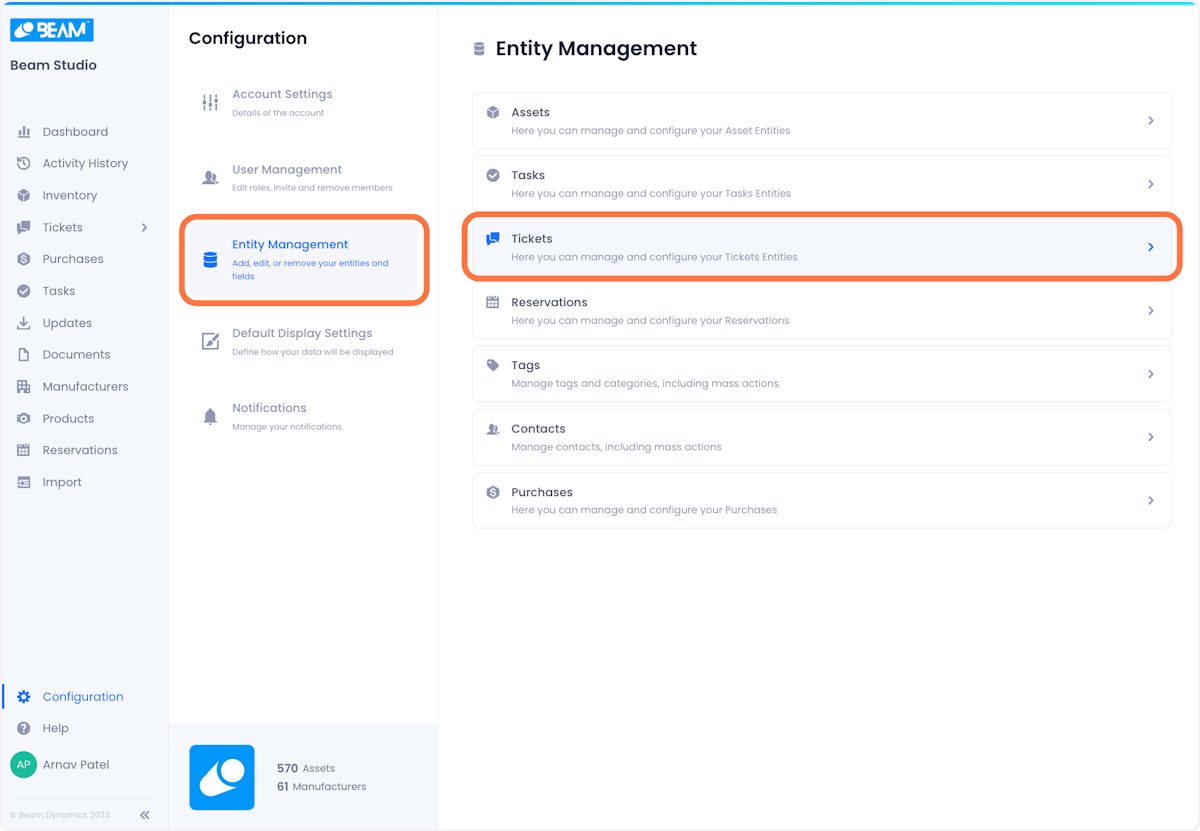
2. On the configuration page, click on Entity Management and then select Tickets from the list of entities.
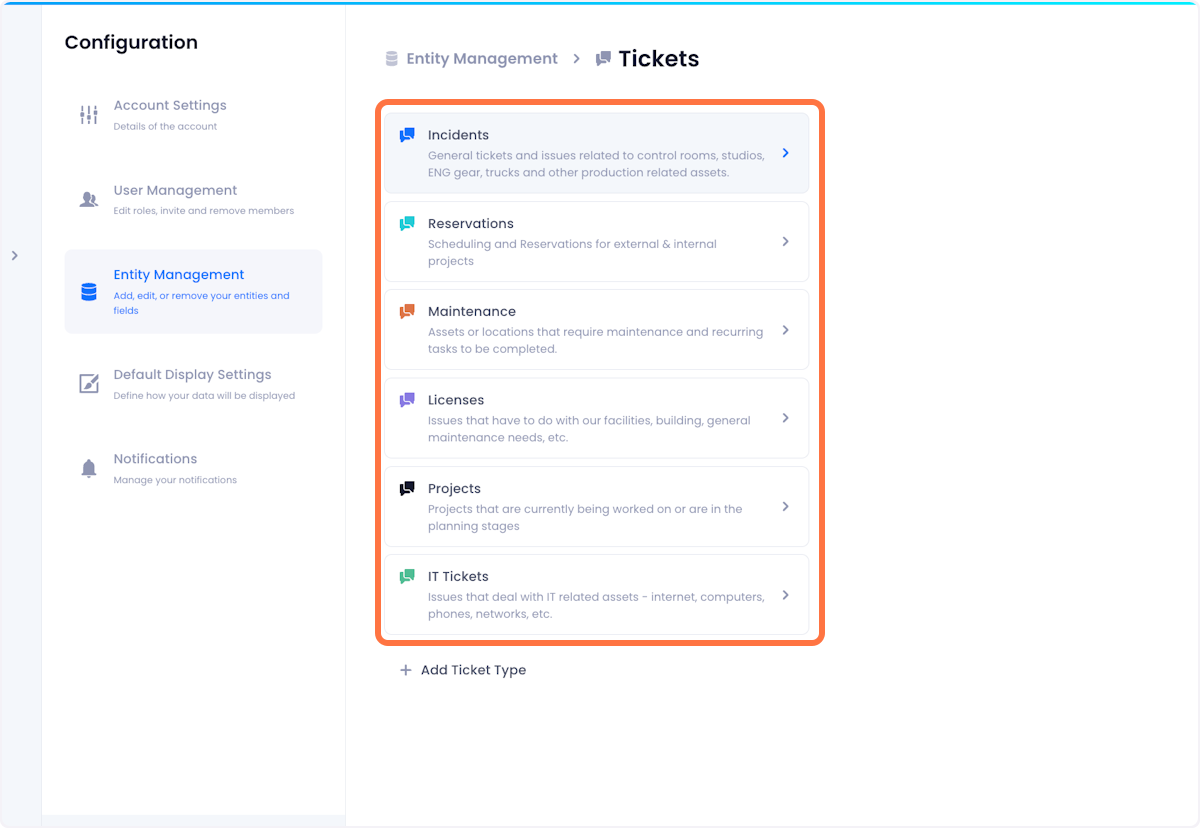
3. Each ticket type is managed separately and can have its own set of statuses. Click on the ticket type whose statuses you want to edit.
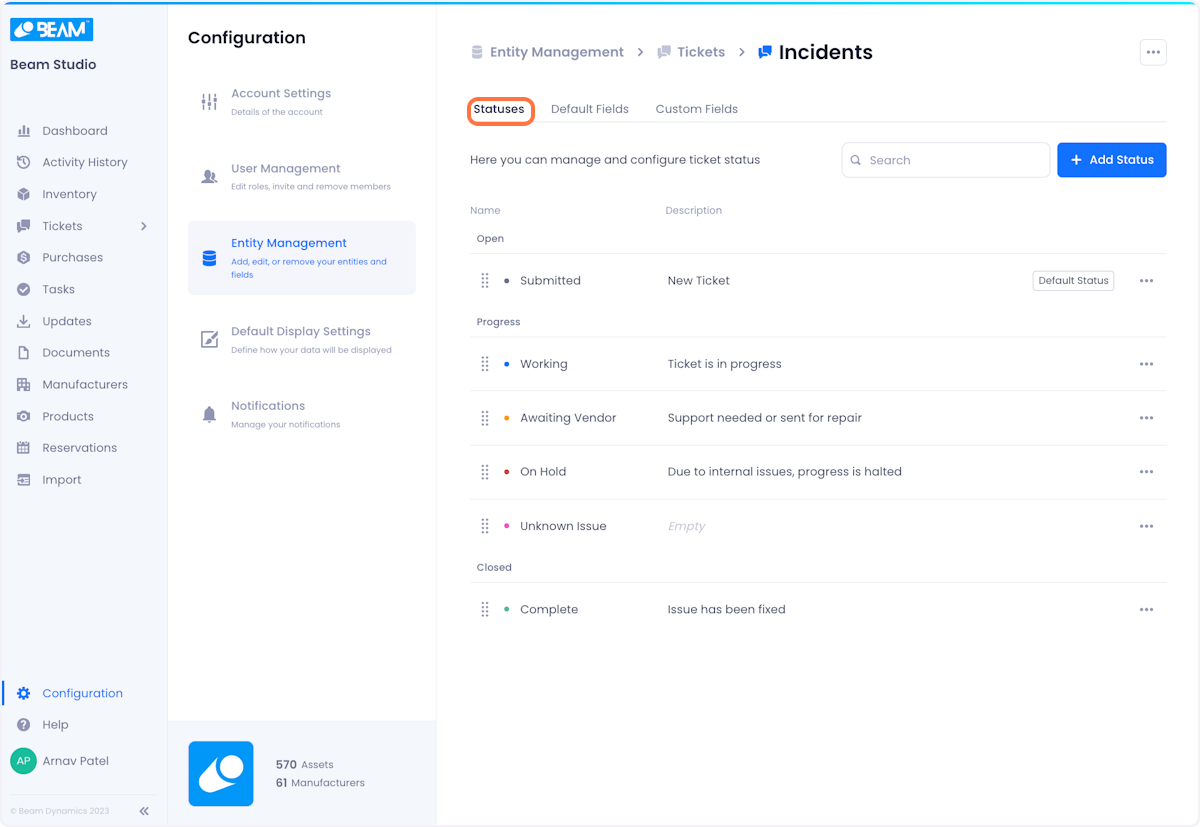
4. You'll be dropped onto a page where you can view the statuses associated with your ticket type
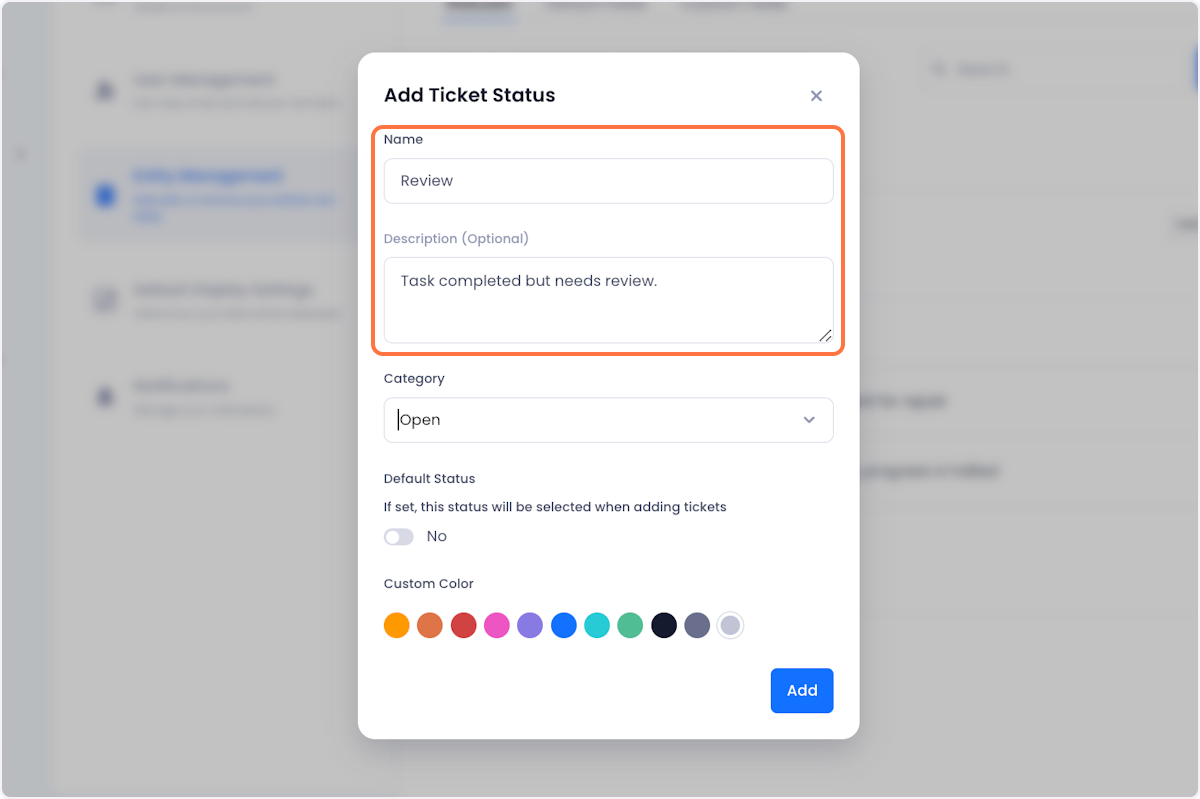
Creating A Ticket Status
1. Click on the Add Status button at the top right of the page.
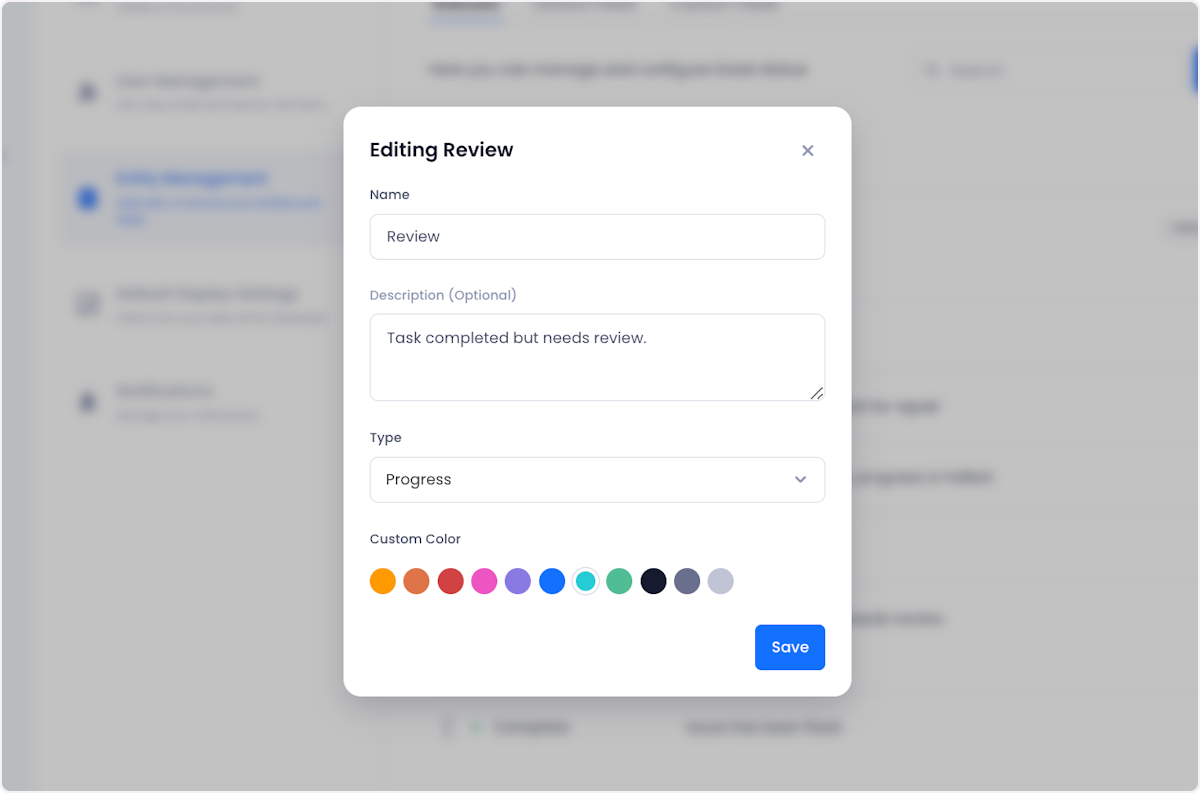
2. In the status configuration modal, give your status a name and description.
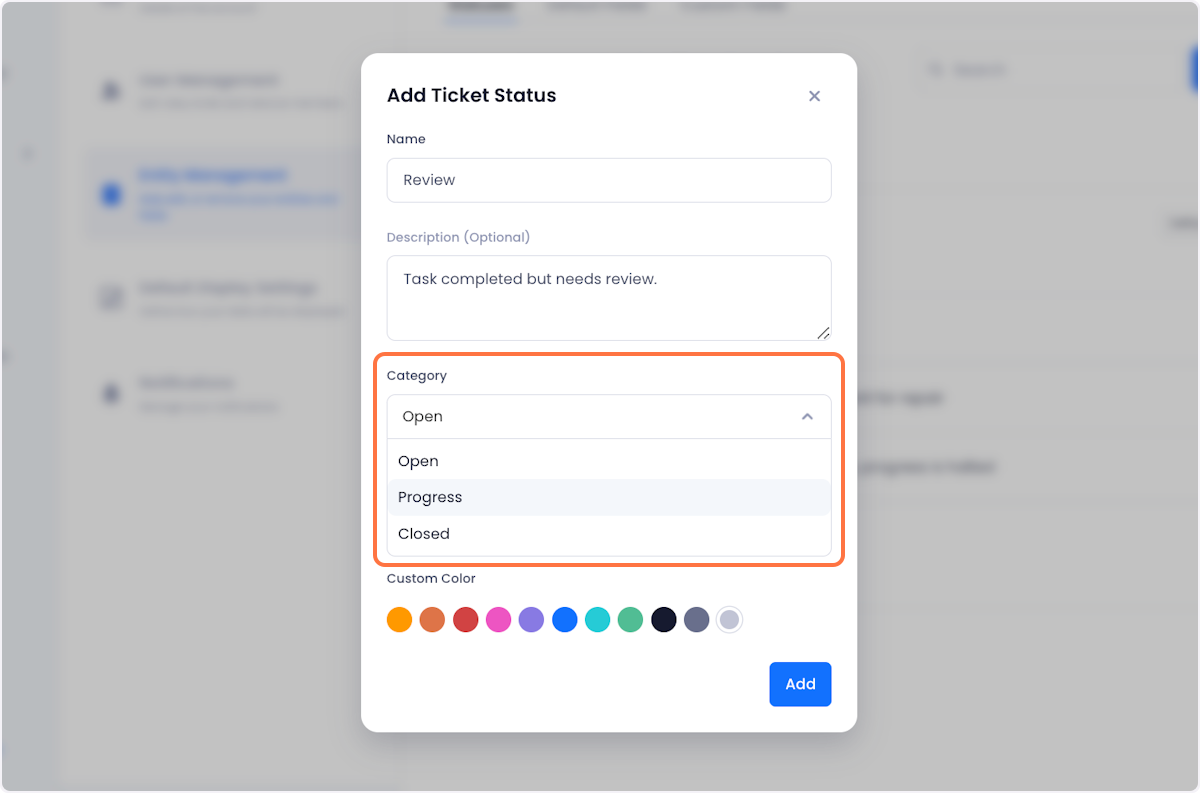
3. Select a status category for your status.
This is what each category means:
Open - Tickets with an open status have been submitted but no meaningful work has begun to resolve the ticket.
Progress - Meaningful work has occurred to resolve the ticket but it has not been resolved
Closed - The ticket has reached some sort of resolution (whether that is a proper resolution or a decision that the ticket will no longer be worked on despite a lack of a solution)
4. Give your status a color to make it easily identifiable.

5. When you're satisfied with your setup, click Add to complete the creation process.

Editing a status
1. Click on the overflow menu next to the status that you want to edit.

2. Click on Edit from the Actions menu.
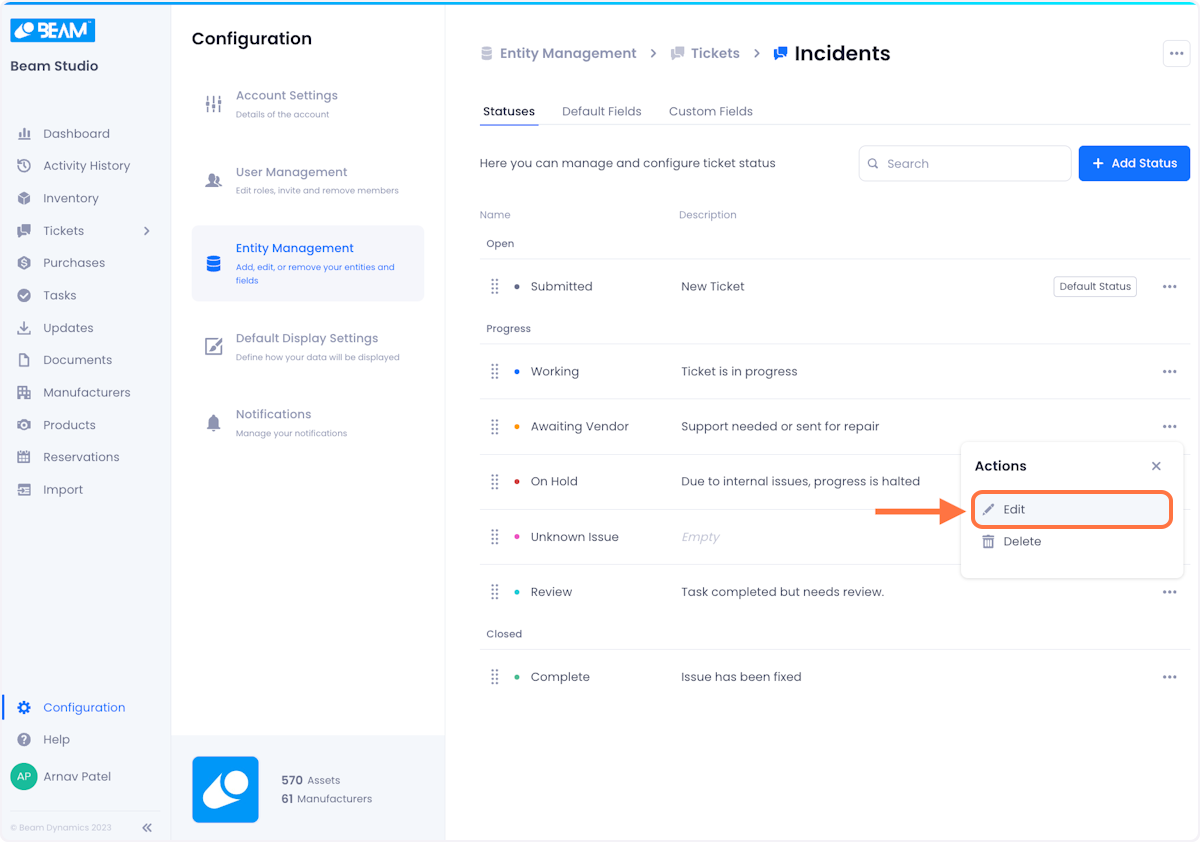
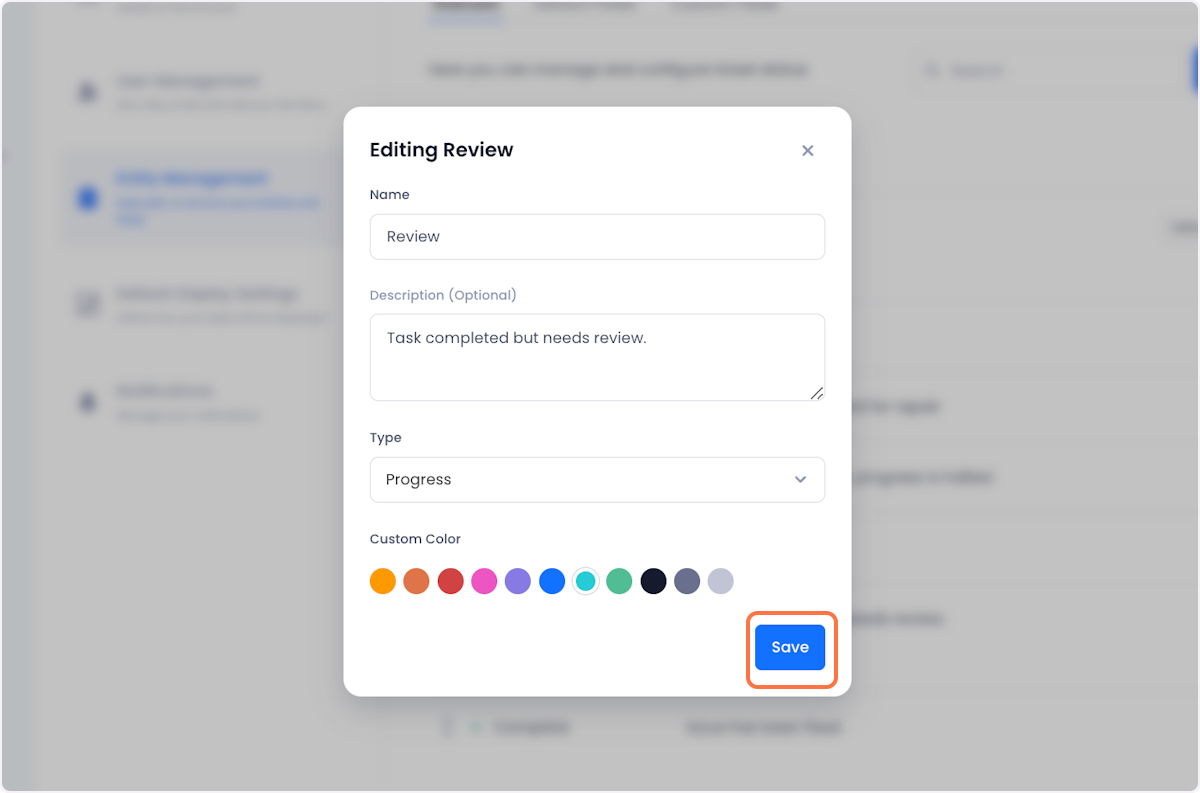
3. In the status configuration modal, edit the status.
4. Click on Save, when you're satisfied with your changes.
Deleting a status
1. Click on the overflow menu next to the status that you want to edit.
2. Click on Delete from the Actions menu.
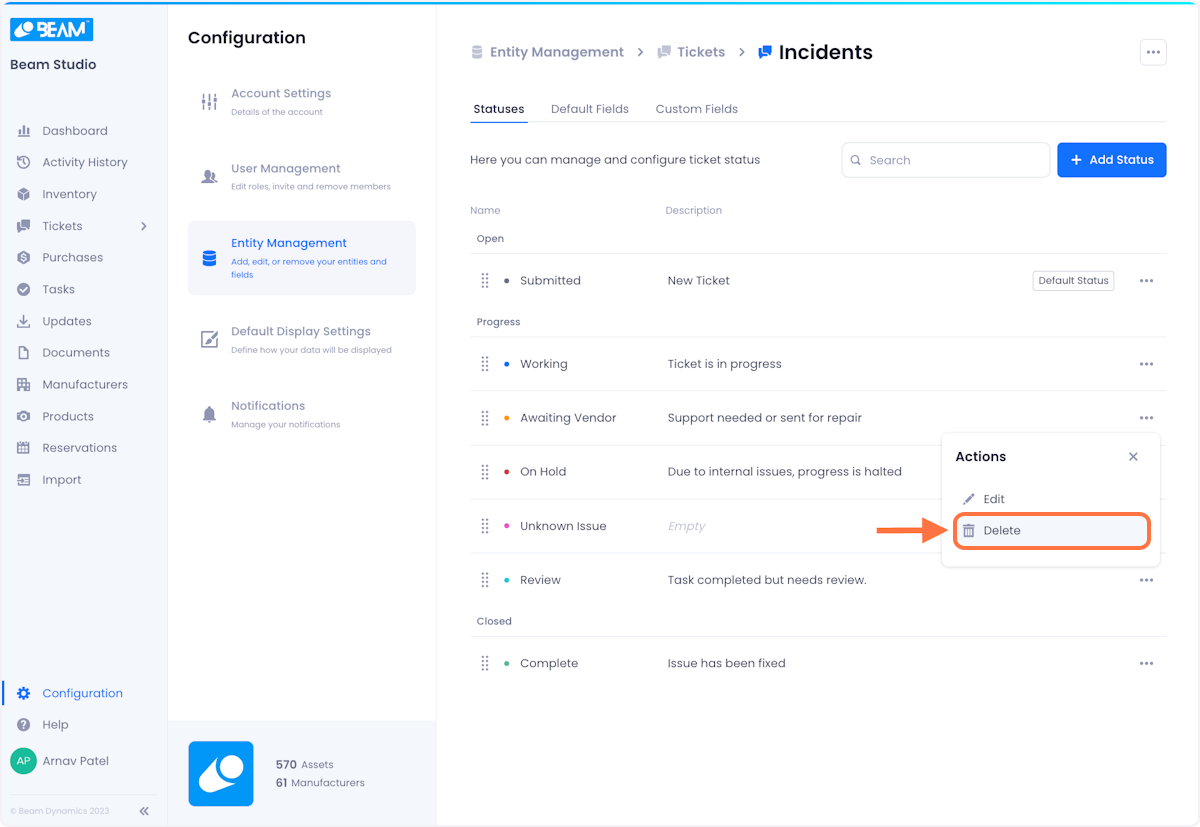
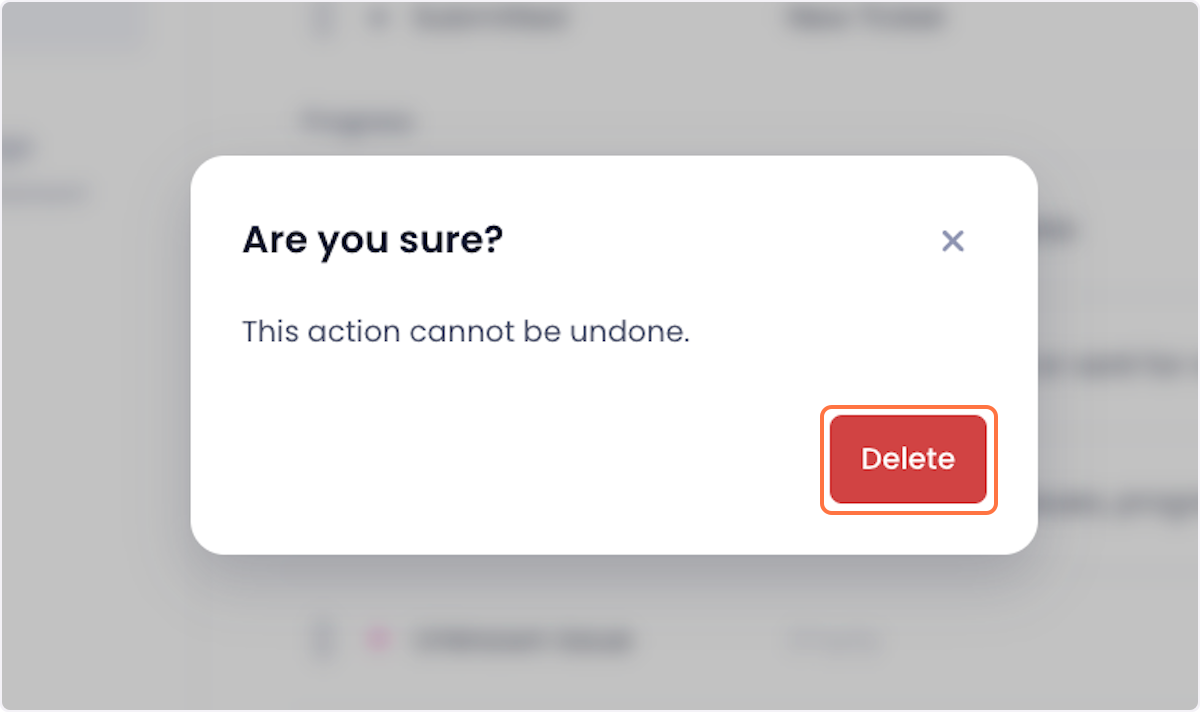
3. Confirm your deletion by clicking on Delete in the ensuing popup.

Arnav Patel
Product Marketing Specialist