Managing Purchase Statuses
Purchases created in your Beam inventory can be assigned statuses to track their progress through the procurement process. In this tutorial, we will show you how to customize the purchase statuses in your workspace so that they fit the needs of your internal processes.
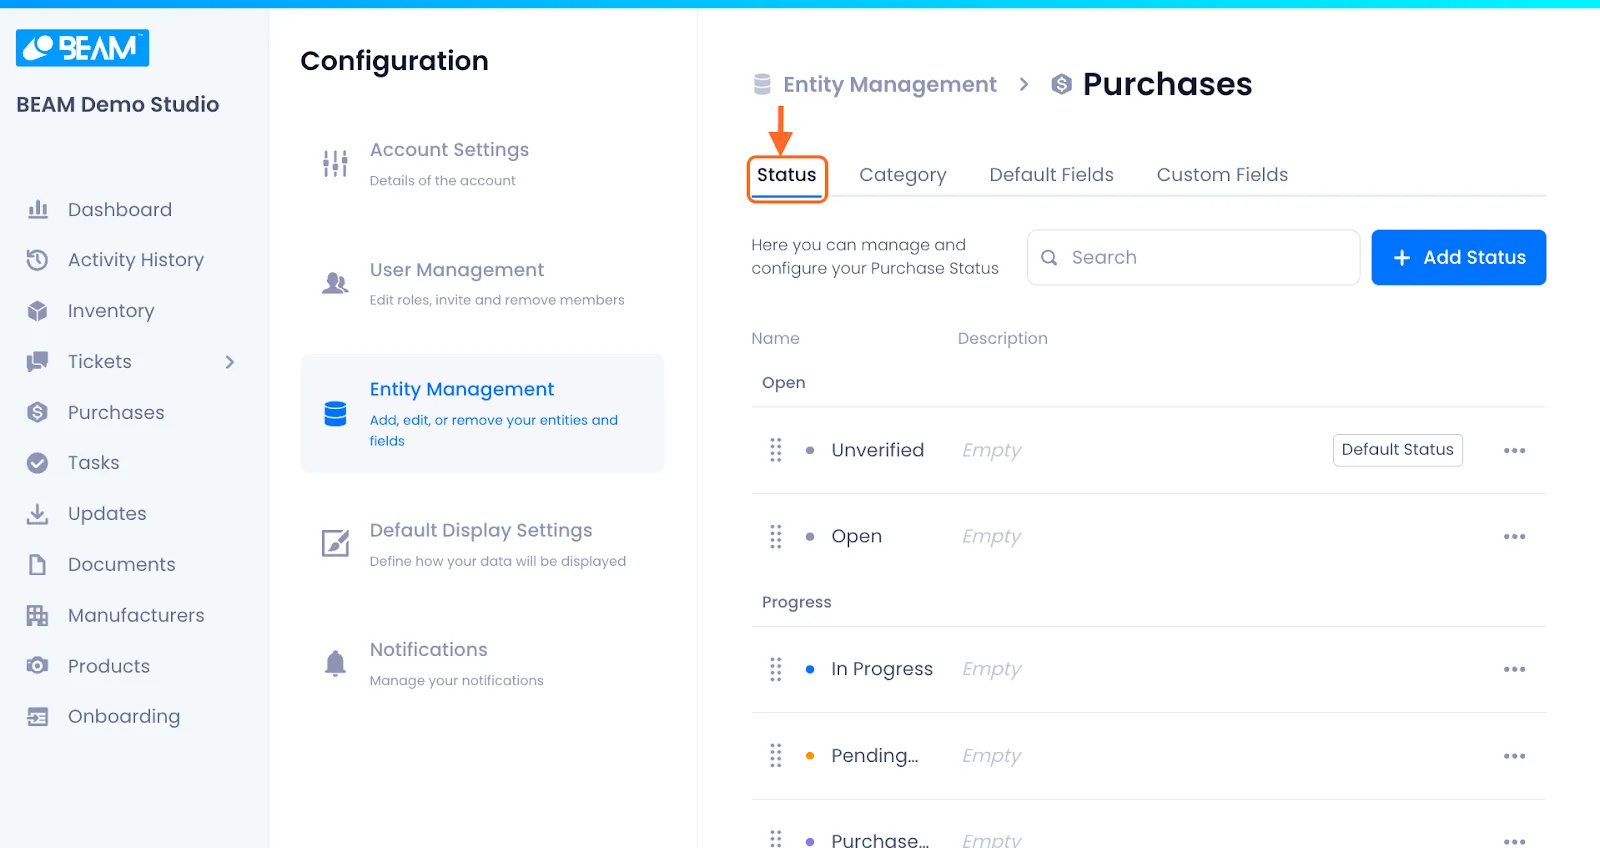
Accessing Purchase Status Configuration
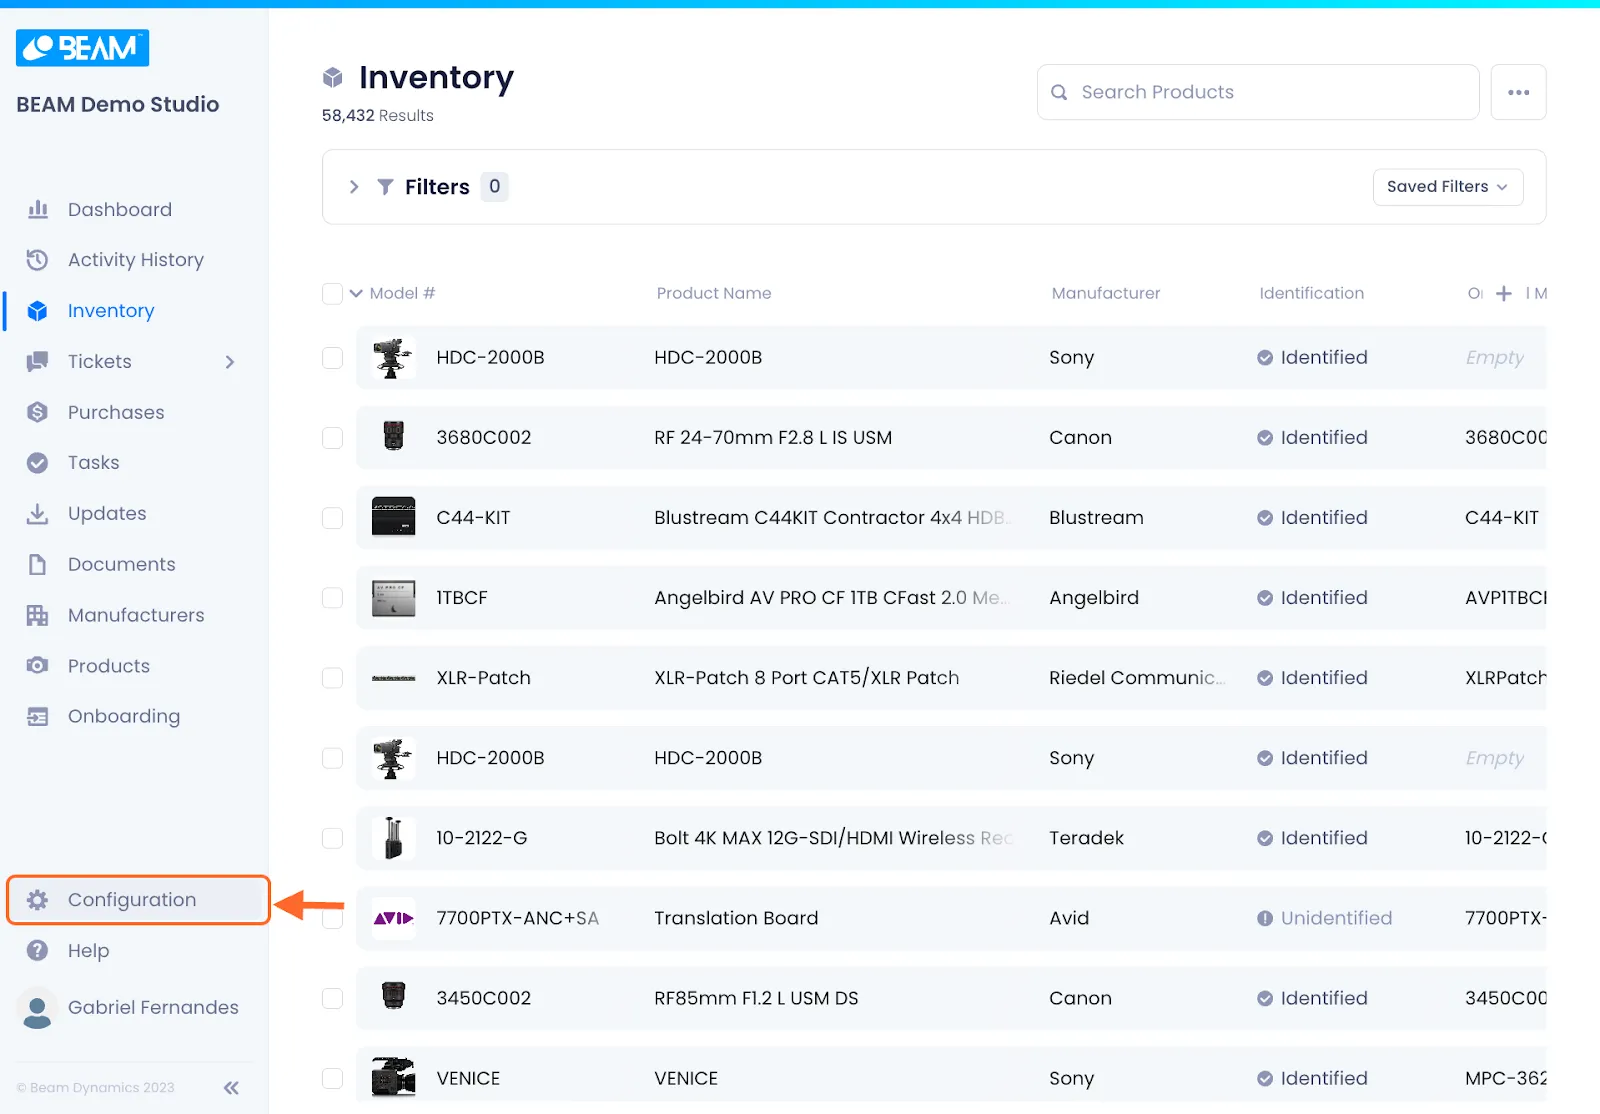
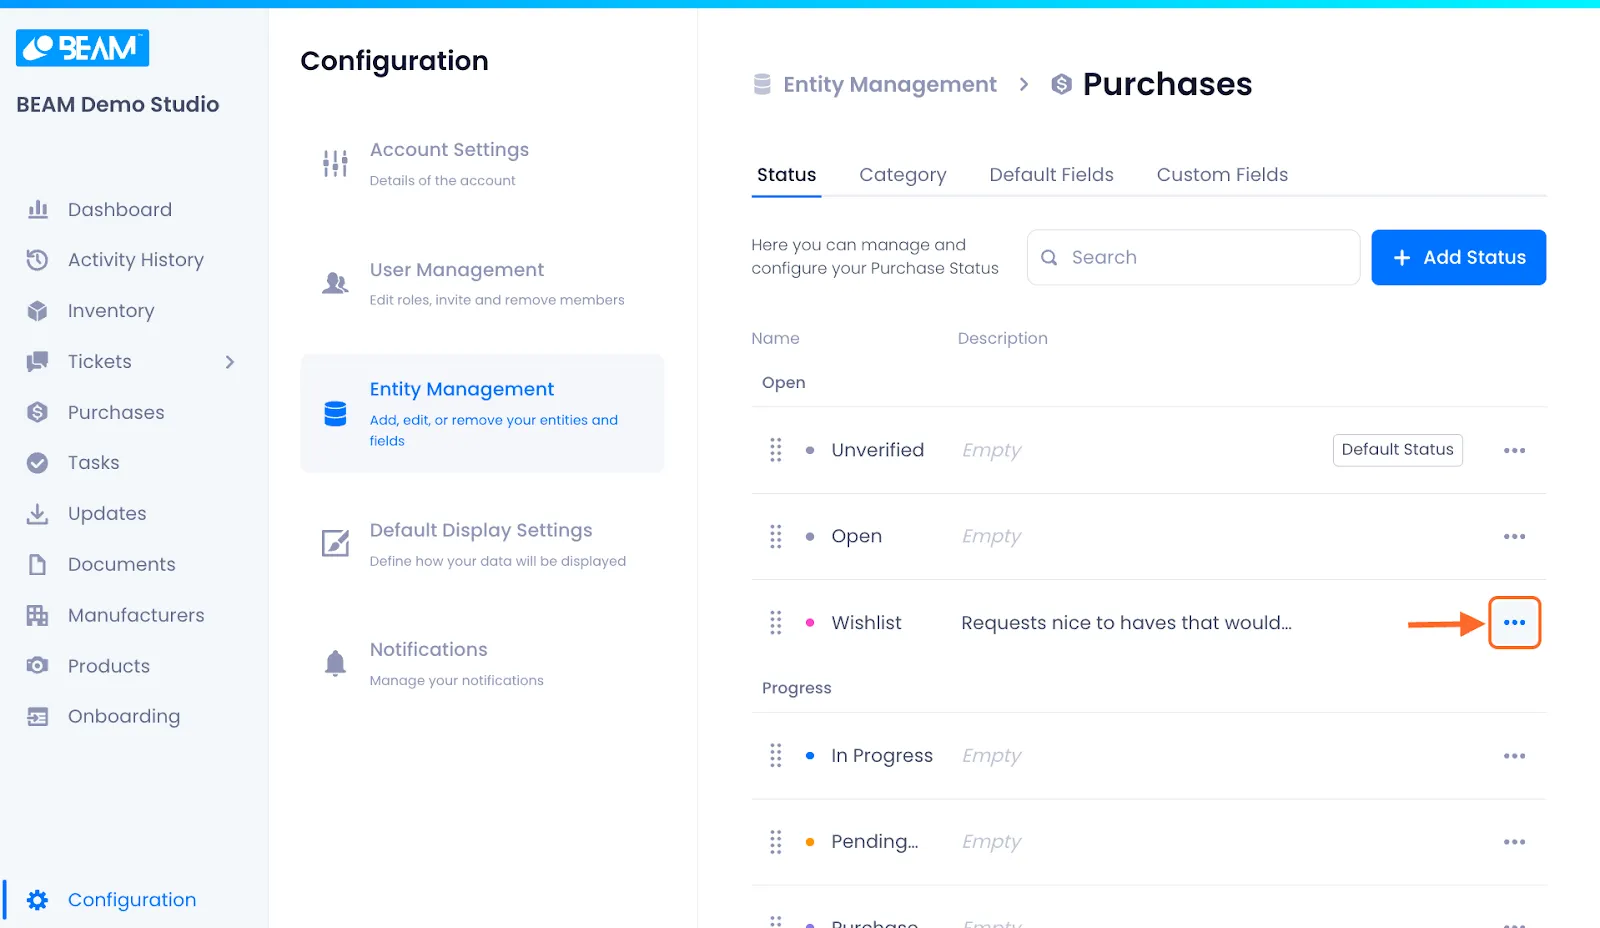
1. Click Configuration in the sidebar of your Beam workspace.
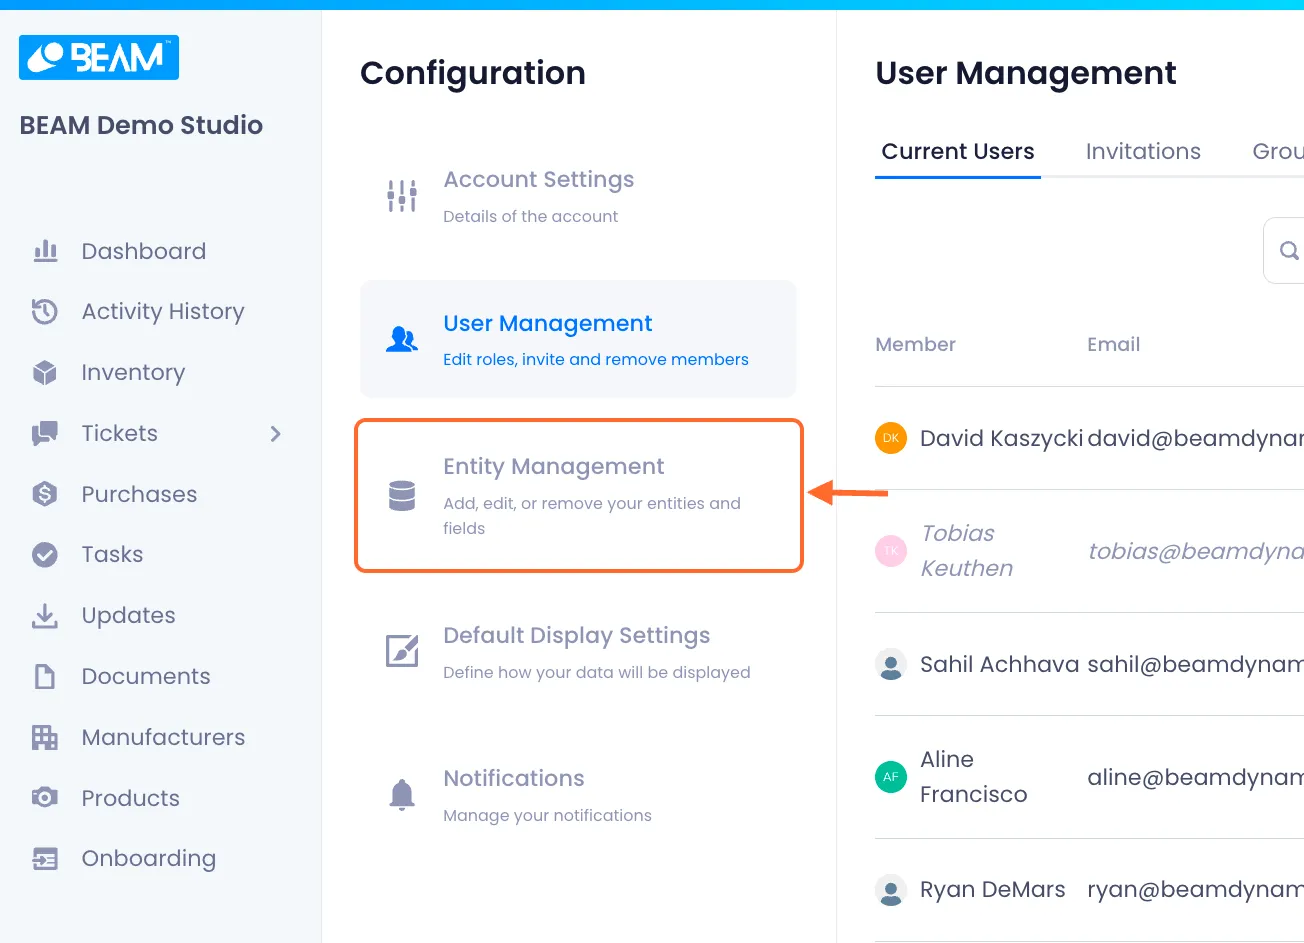
2. On the configuration screen, click Entity Management.
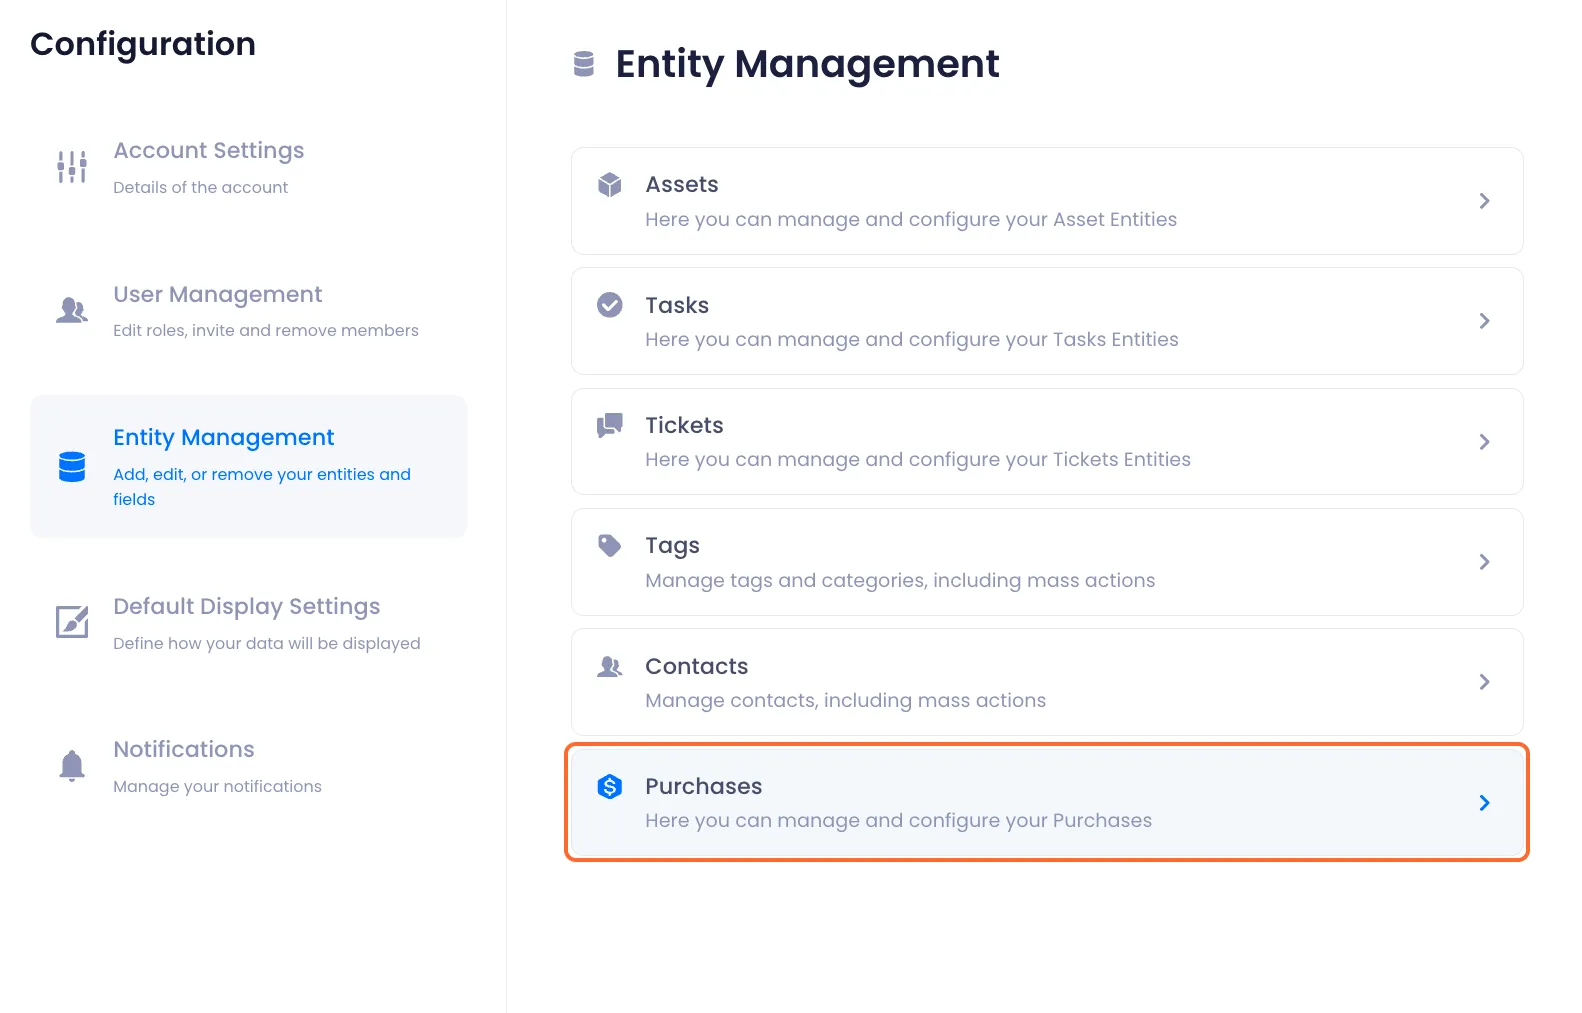
3. Select the Purchases Entity.
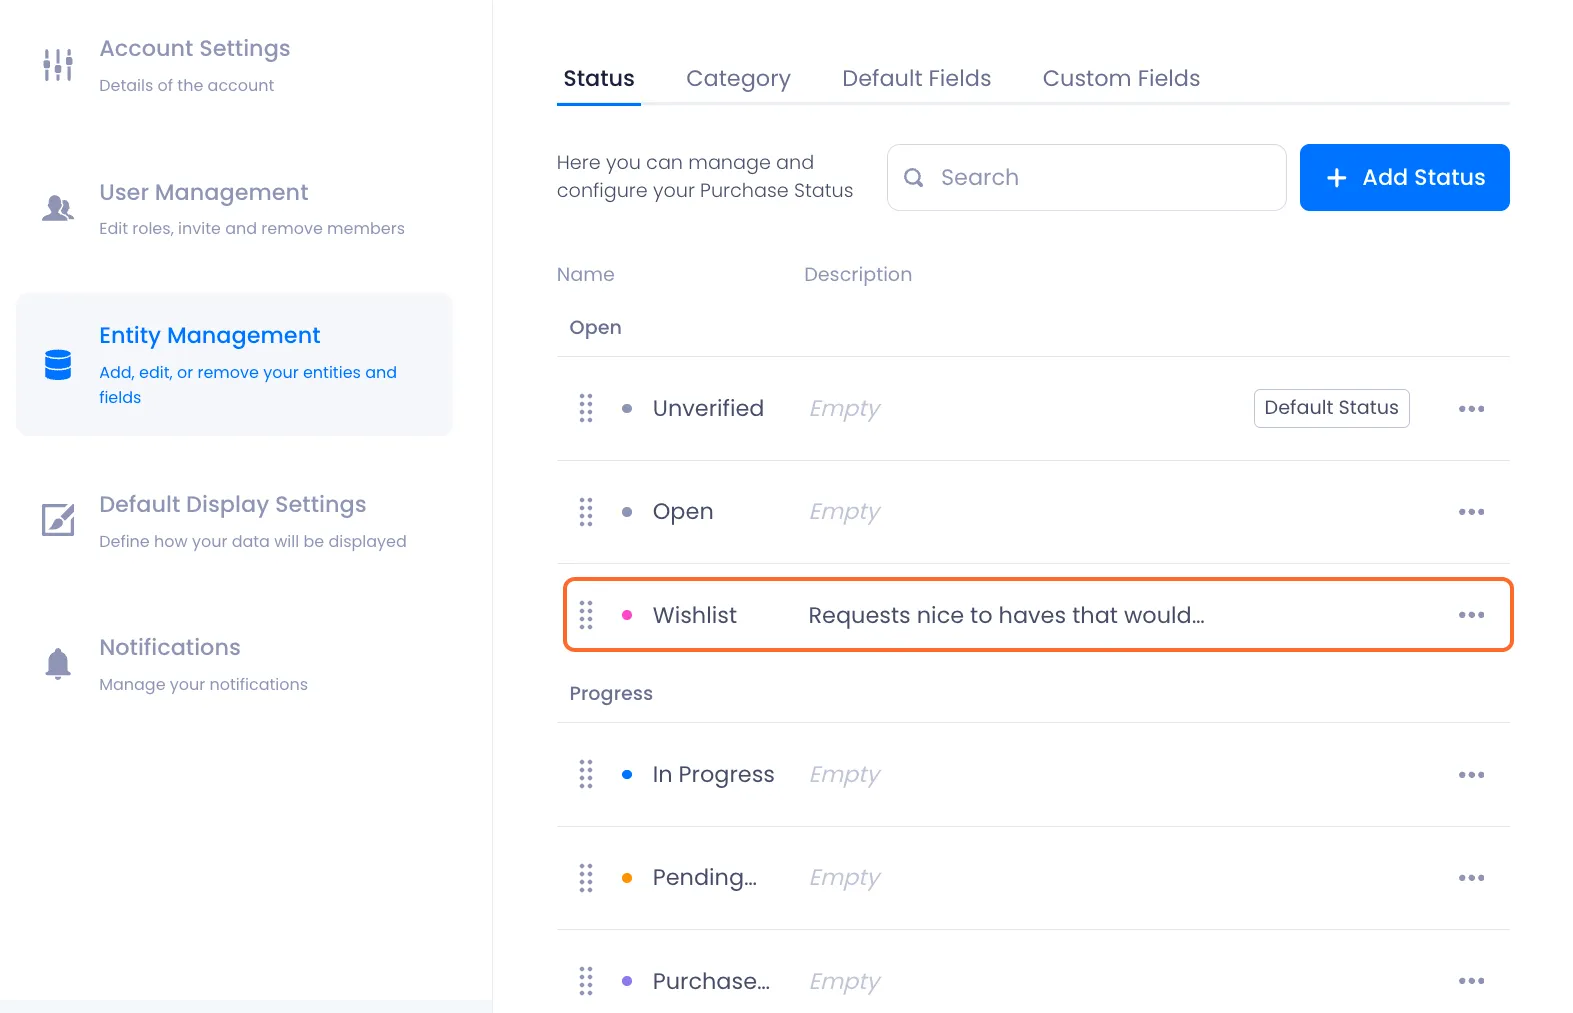
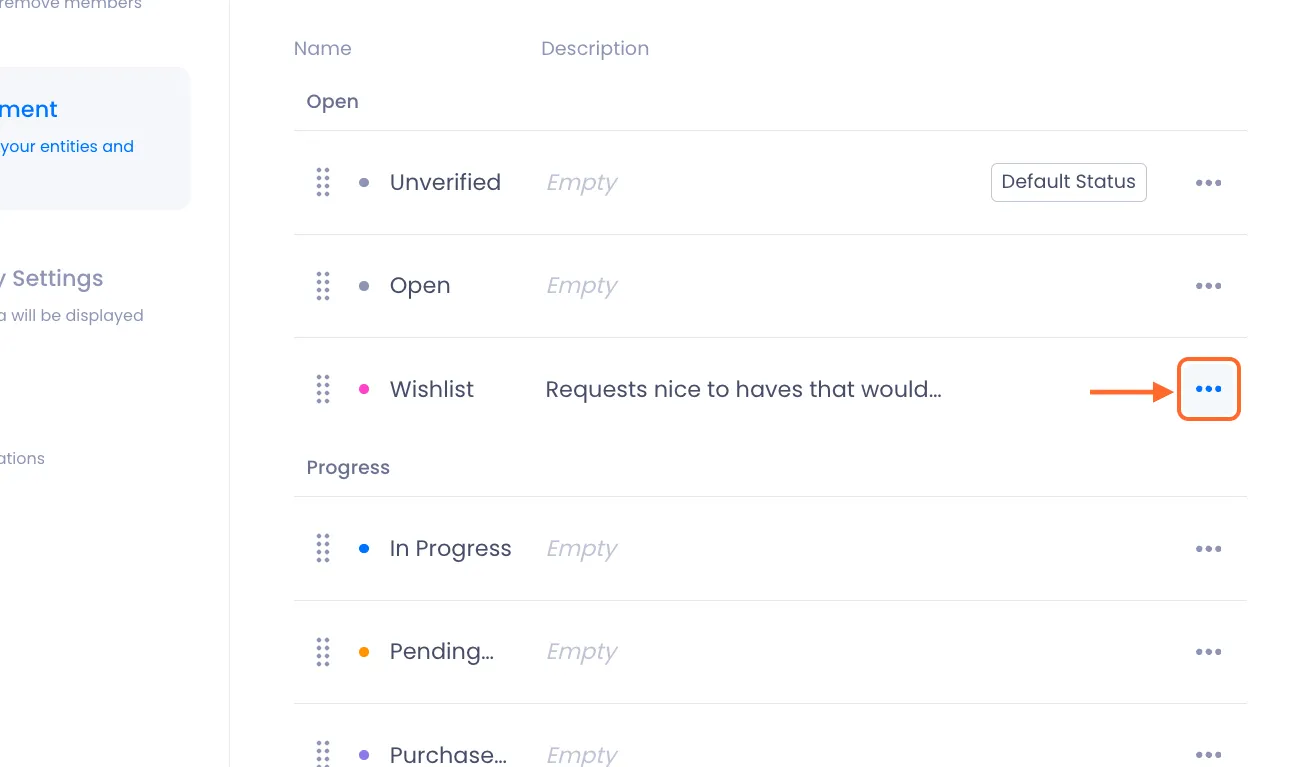
This will open a page where you can view and edit the purchase statuses in your workspace.
Adding A Status
1. Click Add Status.
Doing so will open a modal where you can configure your new status.

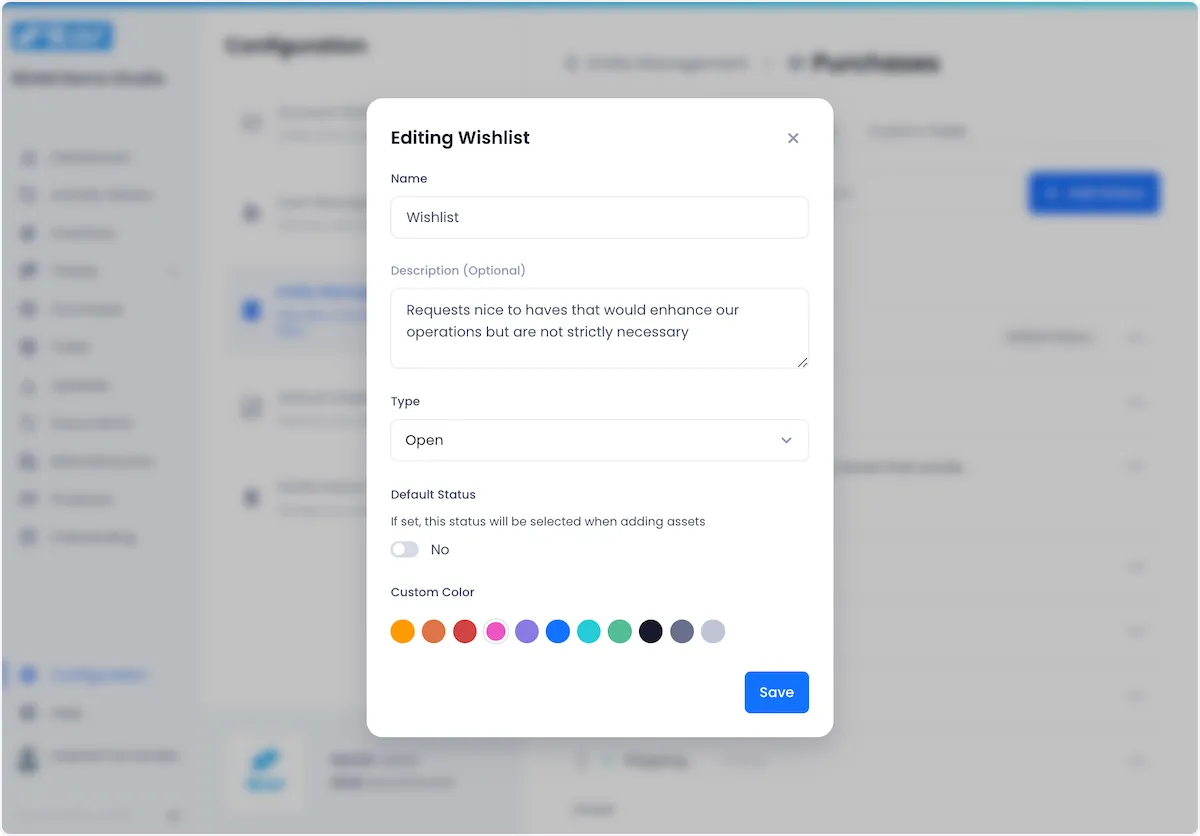
2. Give your new status a name and a description
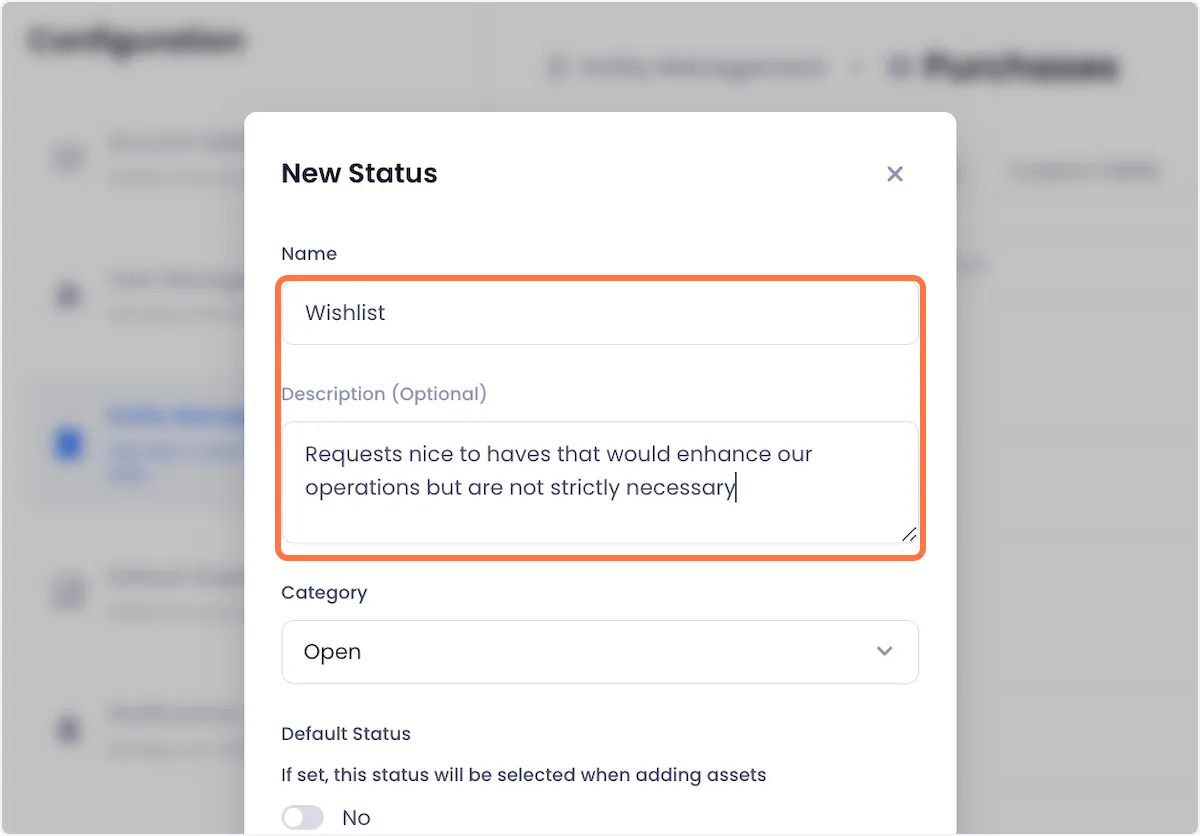
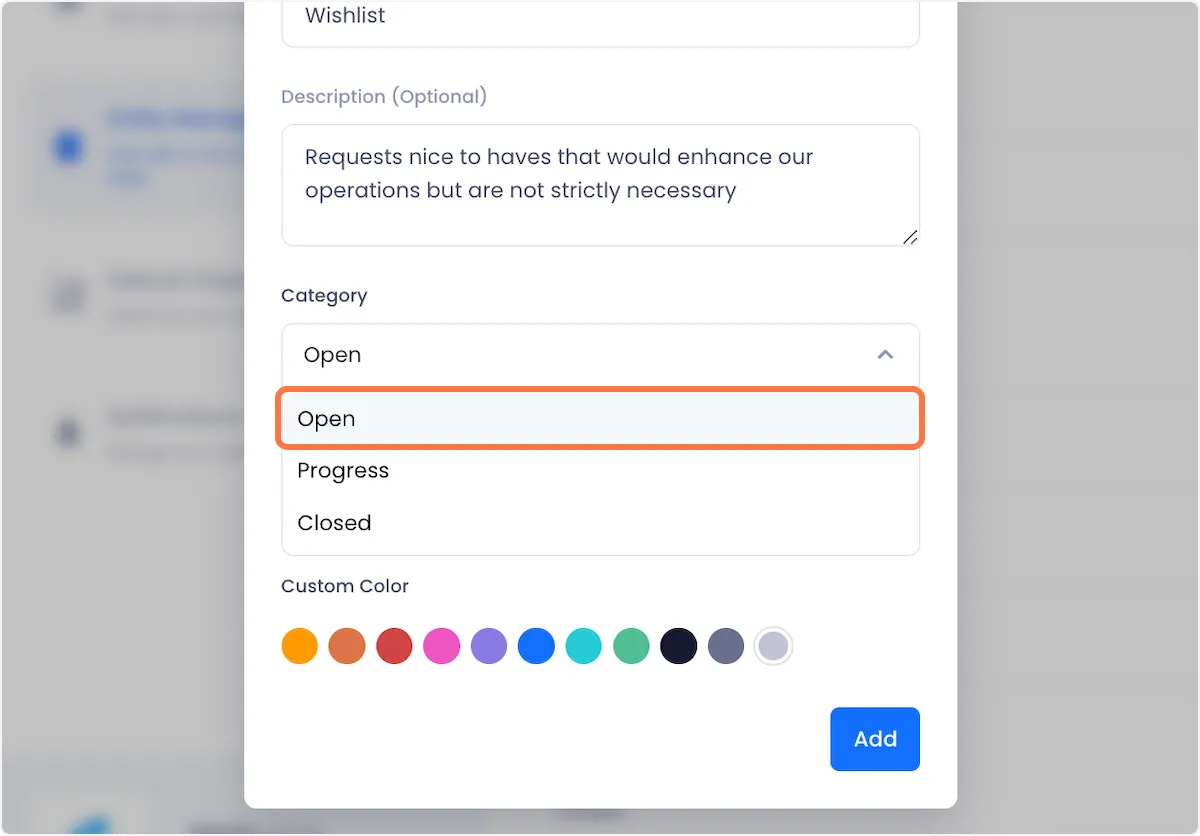
3. Select a category for your status
Categories define which part of the procurement process the status is in. This is how they are defined
Open - Open statuses indicate that the associated purchase has been opened but has had no other action taken with it.
Progress - Progress statuses indicate that the associated purchase is making its way through the procurement process
Closed - Closed statuses indicate that the associated purchase requires no further action (e.g. received, rejected)
4. If you'd like the status to be the default status for your workspace check the default status toggle to Yes.
When creating a new purchase, the default status is automatically applied to that purchase, if you don't specify a status.
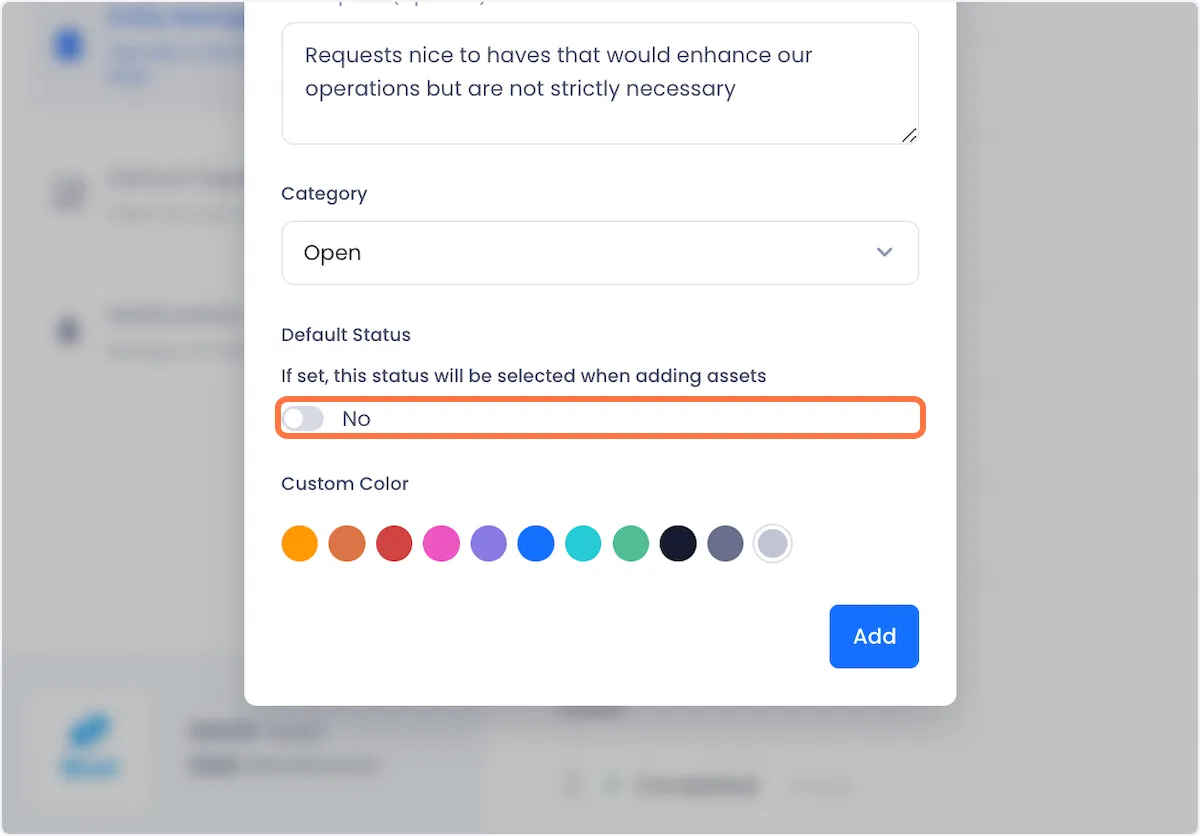
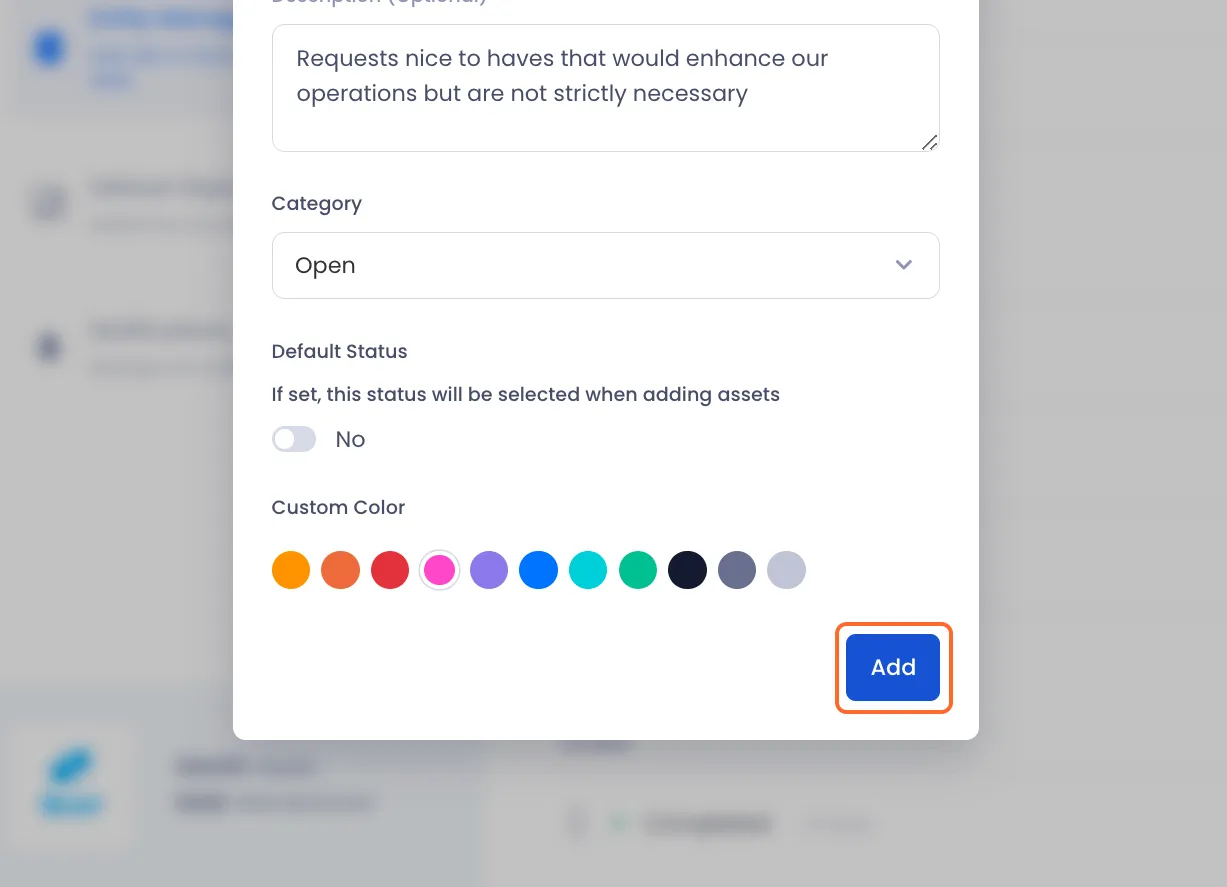
5. Select a color for your status to make it easily visually identifiable.
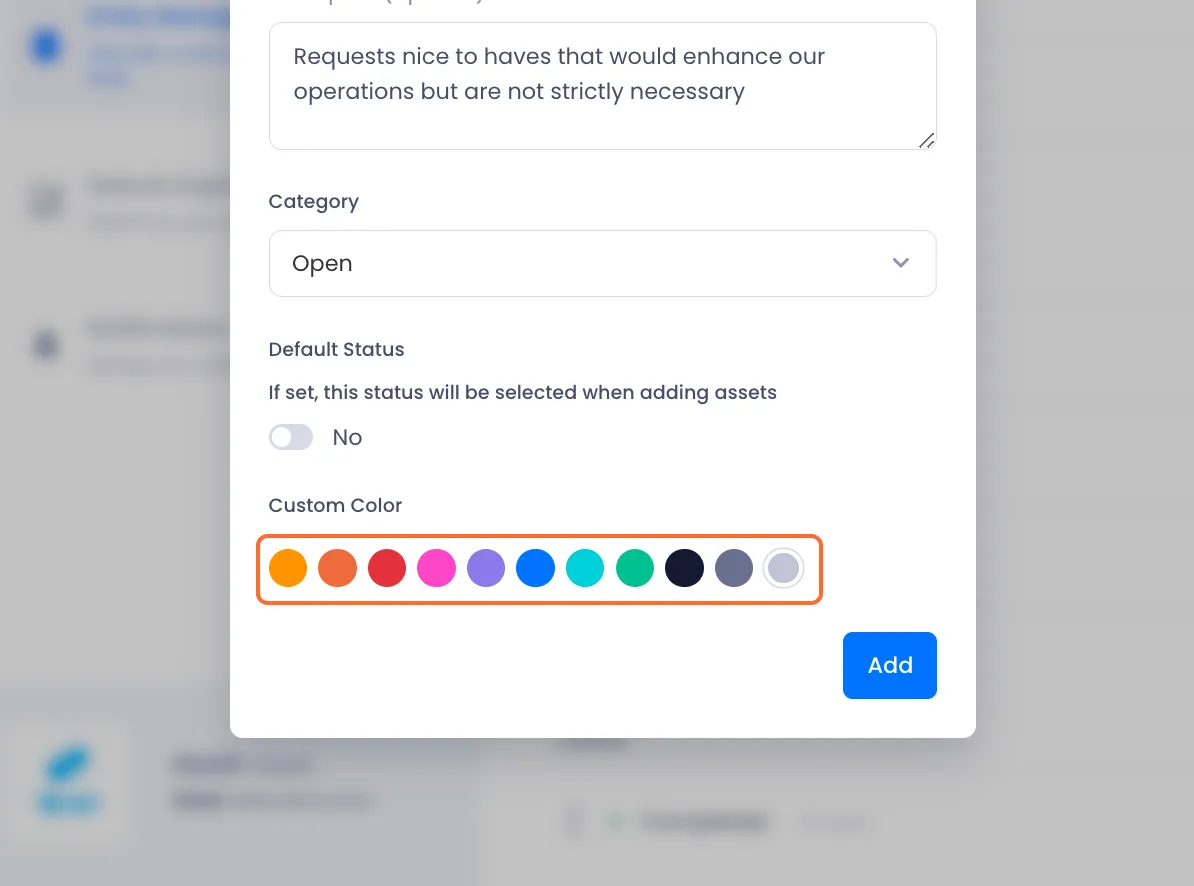
6. When you're satisfied with your setup, click add to complete the process of adding the new status.
7. Your new status will appear in the list of purchase statuses
Editing A Status
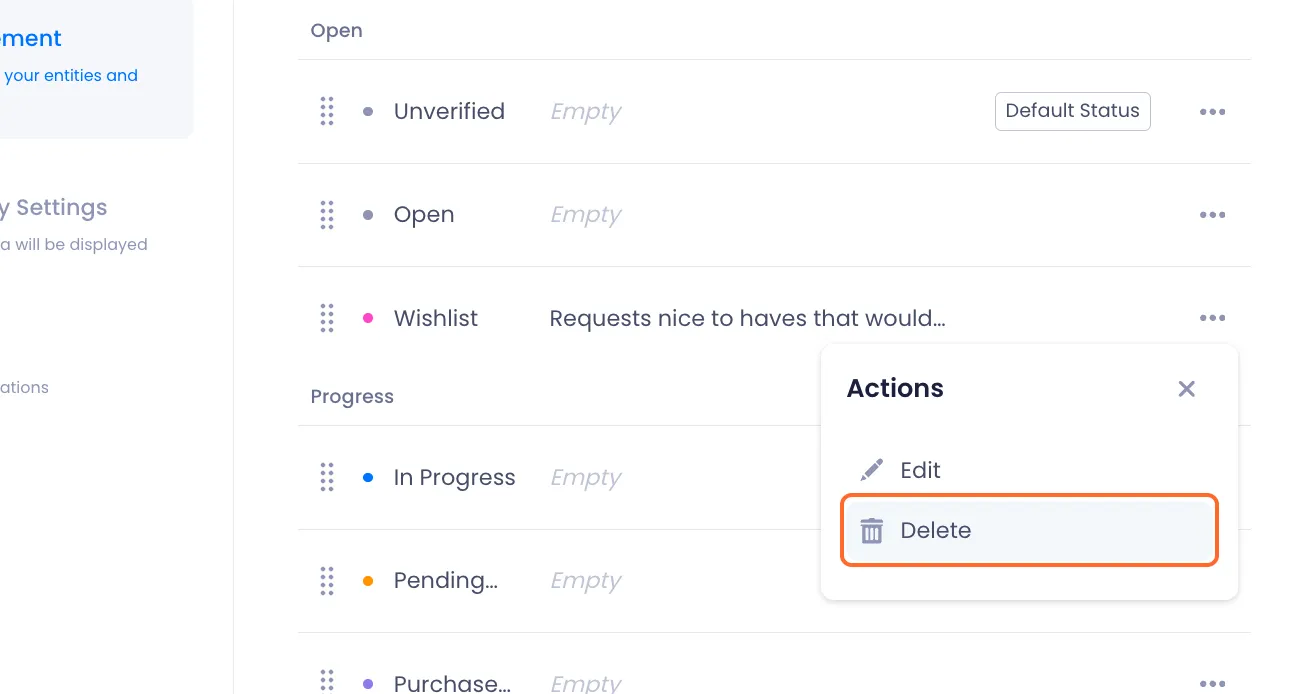
1. Click the overflow menu next to the status that you want to edit.
2. Click Edit.

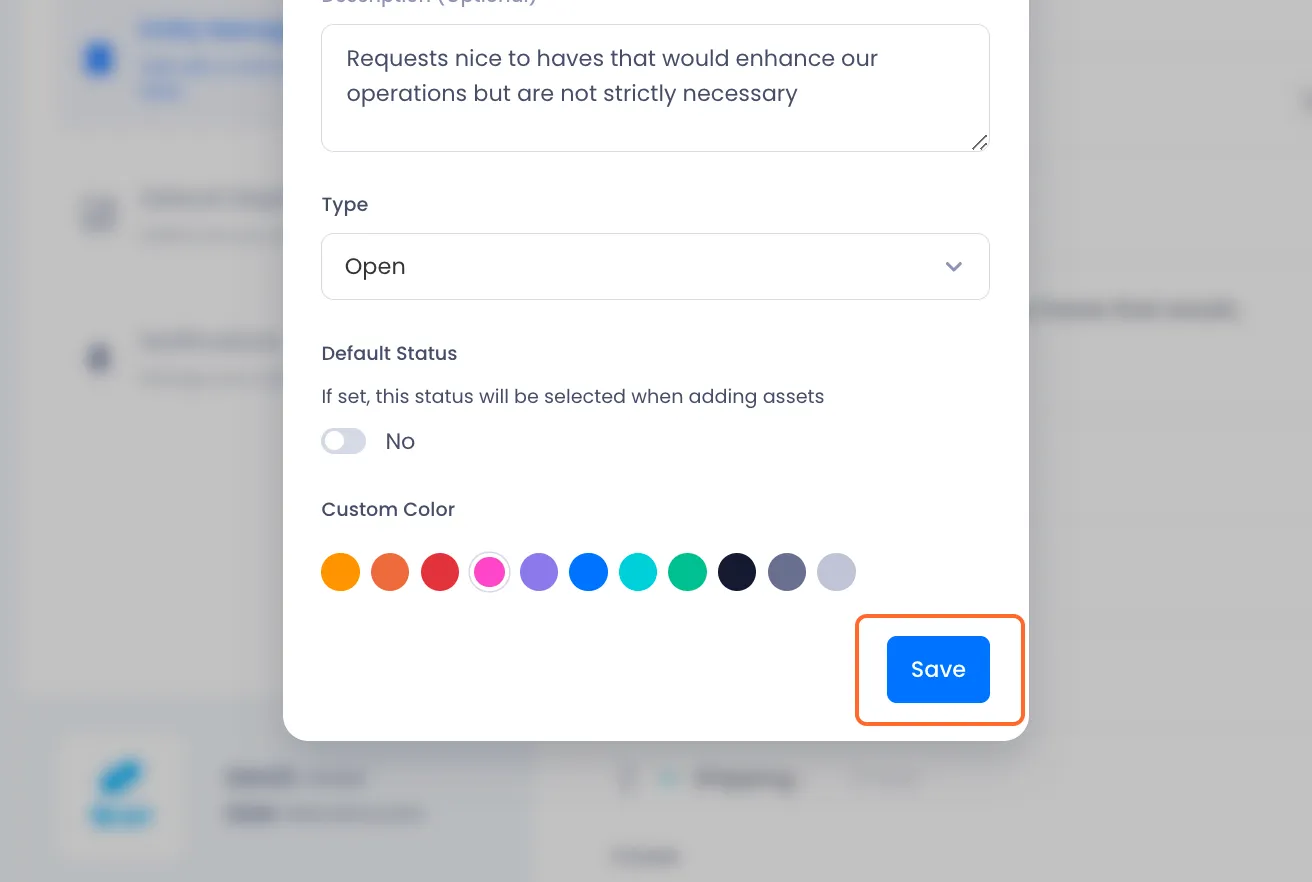
3. Edit the status.
A modal will open up with all of your selected status' attributes in editable fields.
4. When you are satisfied with your changes, click Save to complete the process.
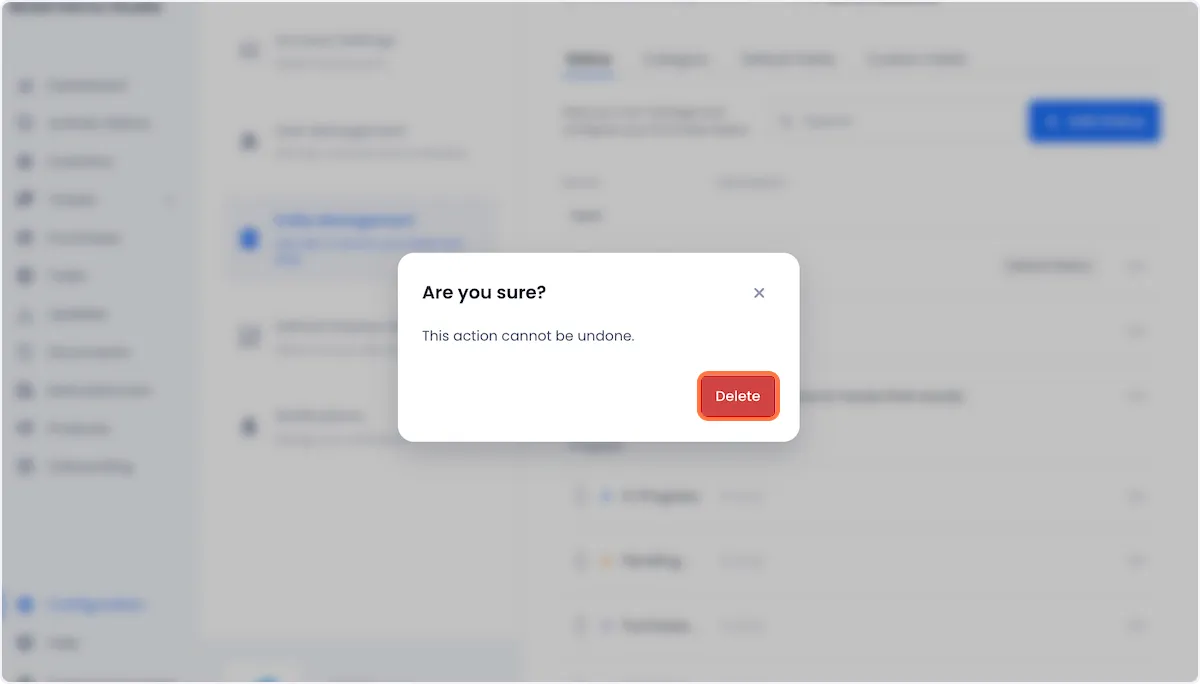
Deleting A Status
1. Click the overflow menu next to the status that you want to edit.
2. Click on Delete.
3. Confirm the deletion by clicking delete on the ensuing modal.