Organizing Product-related Documentation
The Beam product matching algorithm searches manufacturer websites for documents that are relevant to your products, saving you time and effort. With that in mind, we also recognize that organizations often have their own internal documents that they want to associate with products in their inventory. In this tutorial, we'll show you how to create, edit, and delete documents in Beam.
Before You Start
In this tutorial, we show you how to organize documents from the Documents page. You can also add, remove, and edit documents from Product and Asset pages. We have separate documentation for those processes:
Uploading A New Document
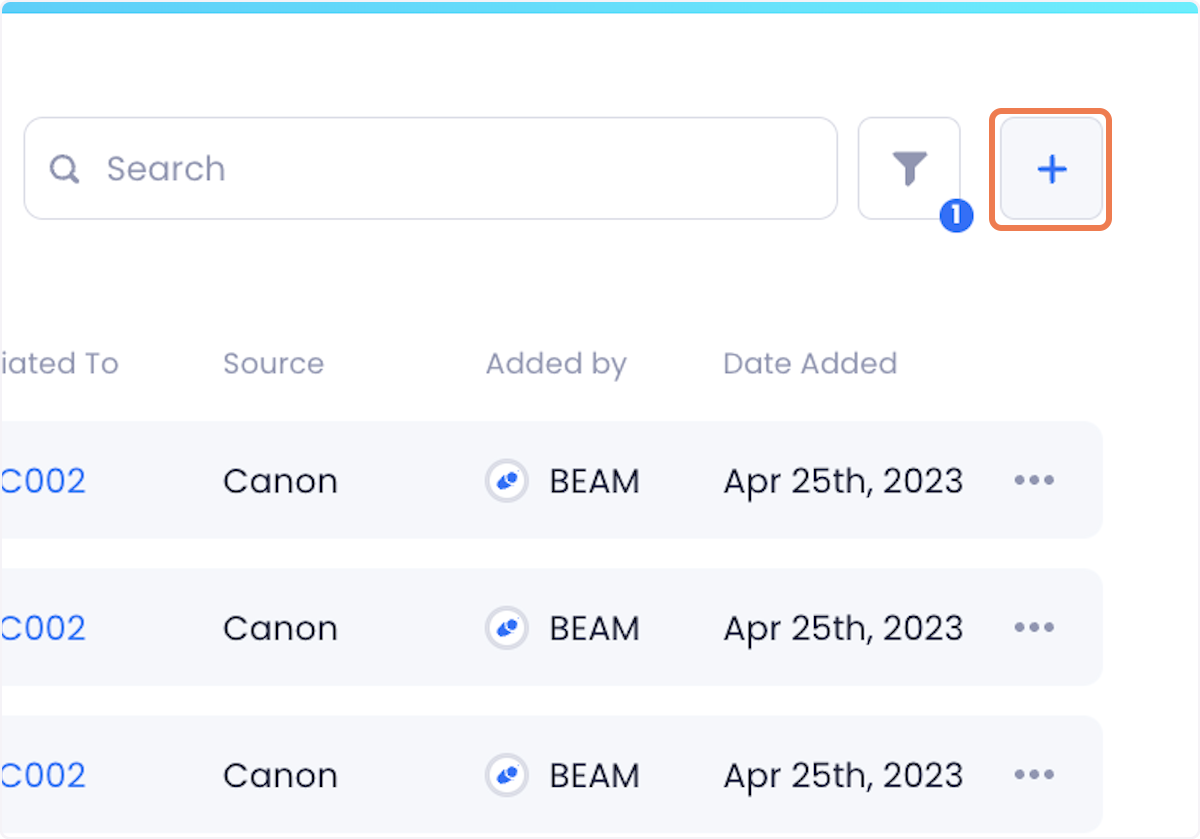
1. To upload a new document to Beam, click the plus button at the top right corner of the Documents page.
2. This will open a popup where you can configure your new document. Give your document a name and description.
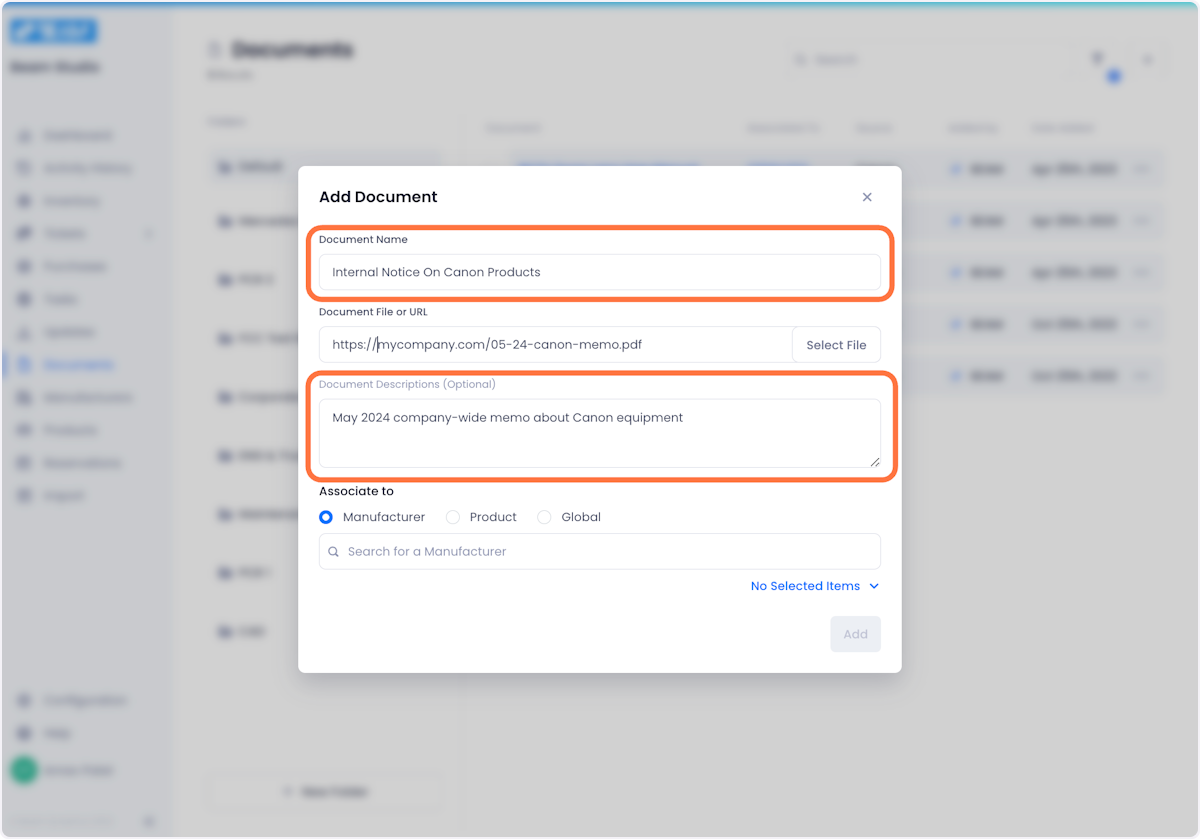
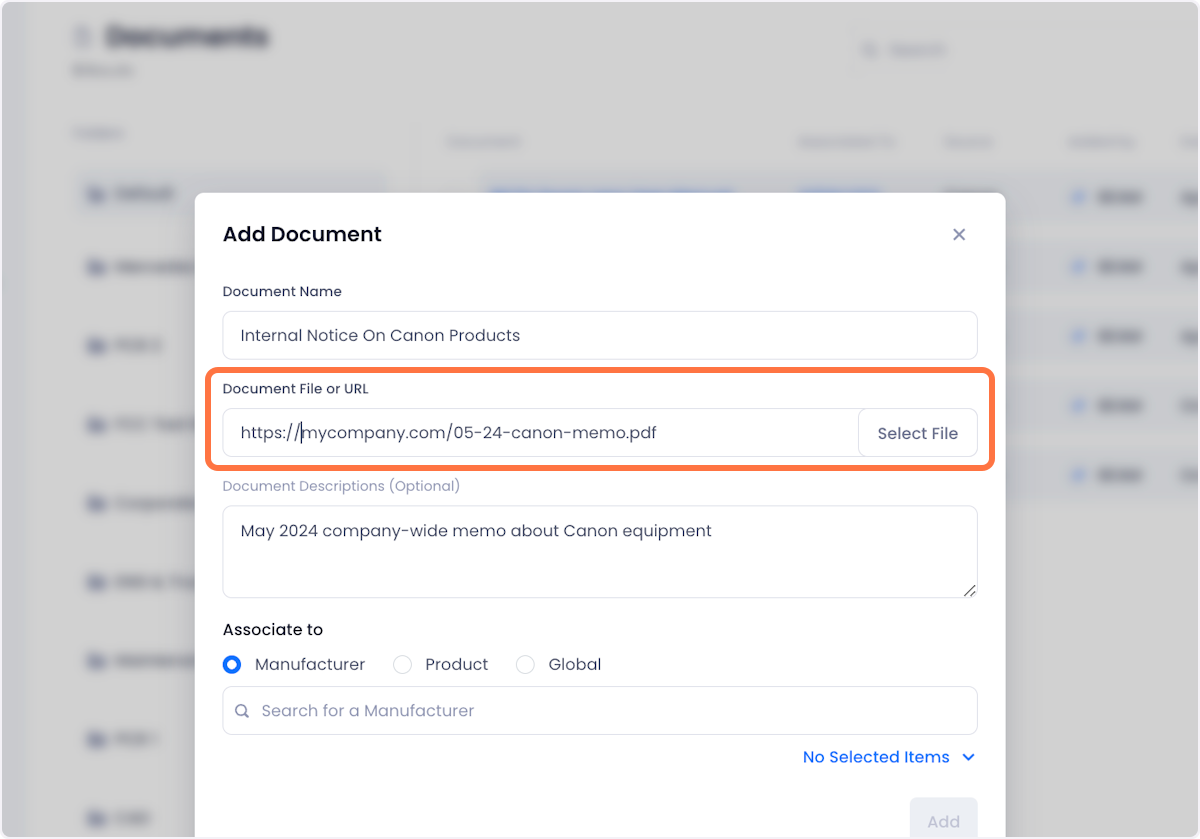
3. Upload the document file or paste a link to the file in the Document file or URL field.
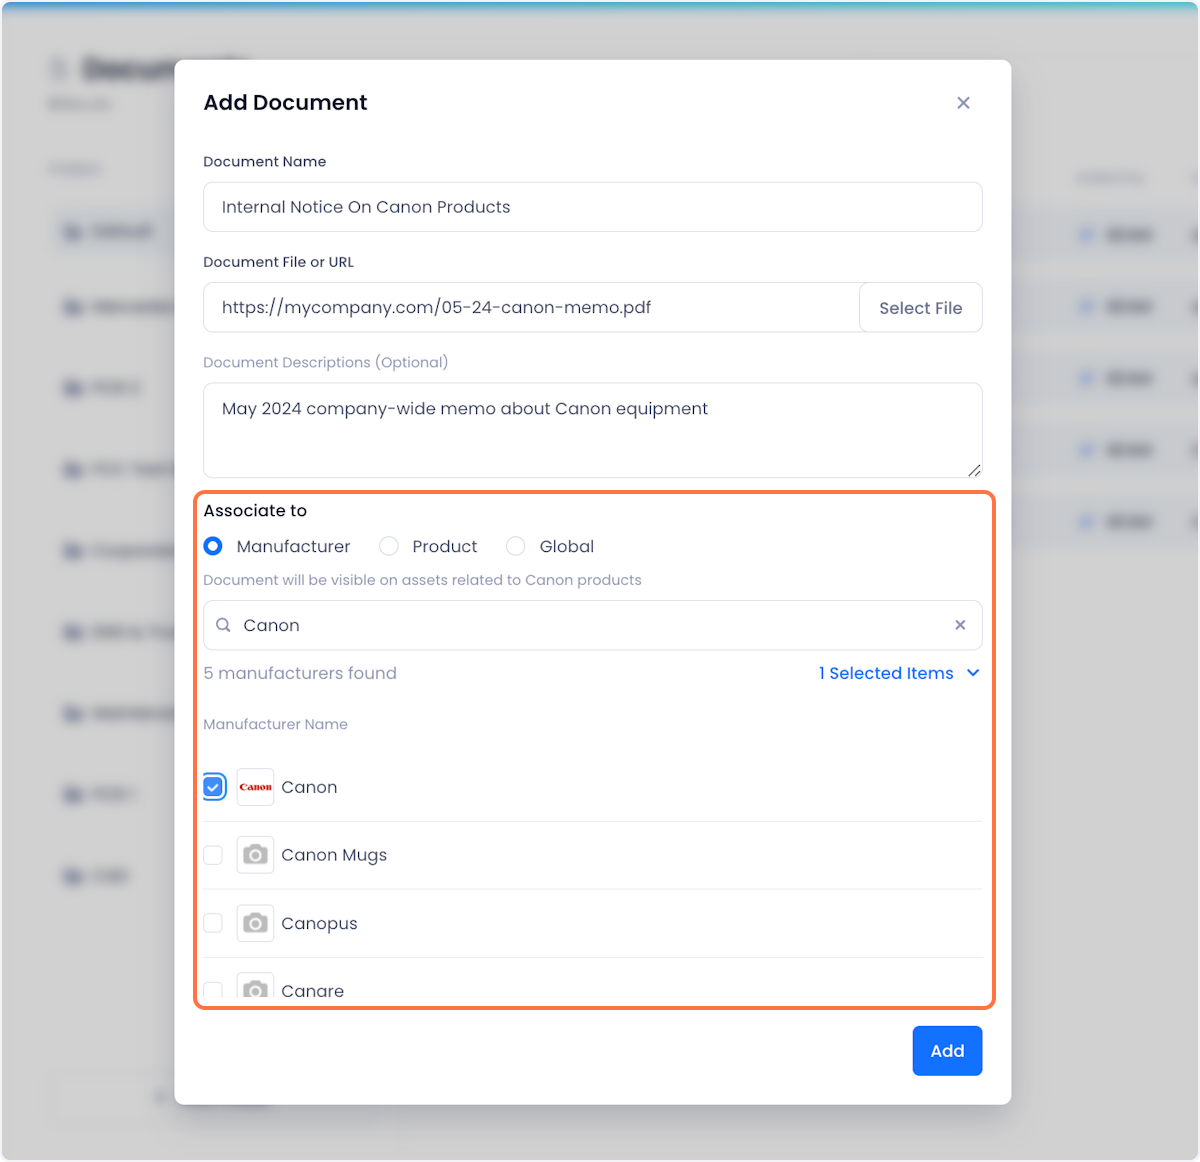
4. Select what products you want to associate your new document with
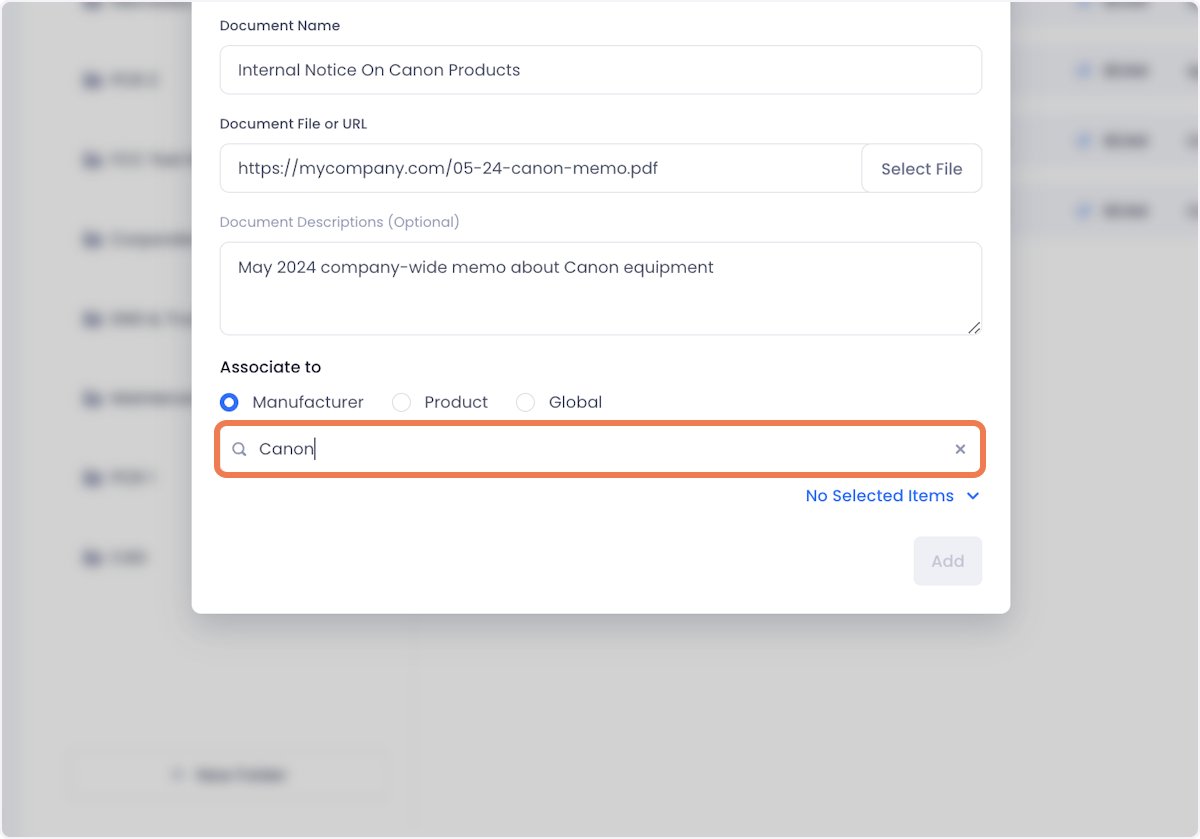
5. Select what products you want to associate your new document with.
This is what each of the available options do:
Manufacturer - By default, this option will associate the new document with all assets in your inventory that have the same manufacturer as the asset whose page you are currently on. You can use the search bar below to search for and add additional manufacturers that you want the document to be associated with. In this example, we've associated the document with all Canon products.
Product - By default, this option will associate the new document with all assets in your inventory that have the same model as the asset whose page you are currently on. You can use the search bar below to search for and add additional models that you want the document to be associated with.
Global - With this option selected, the new resource will be associated with all assets in your inventory.
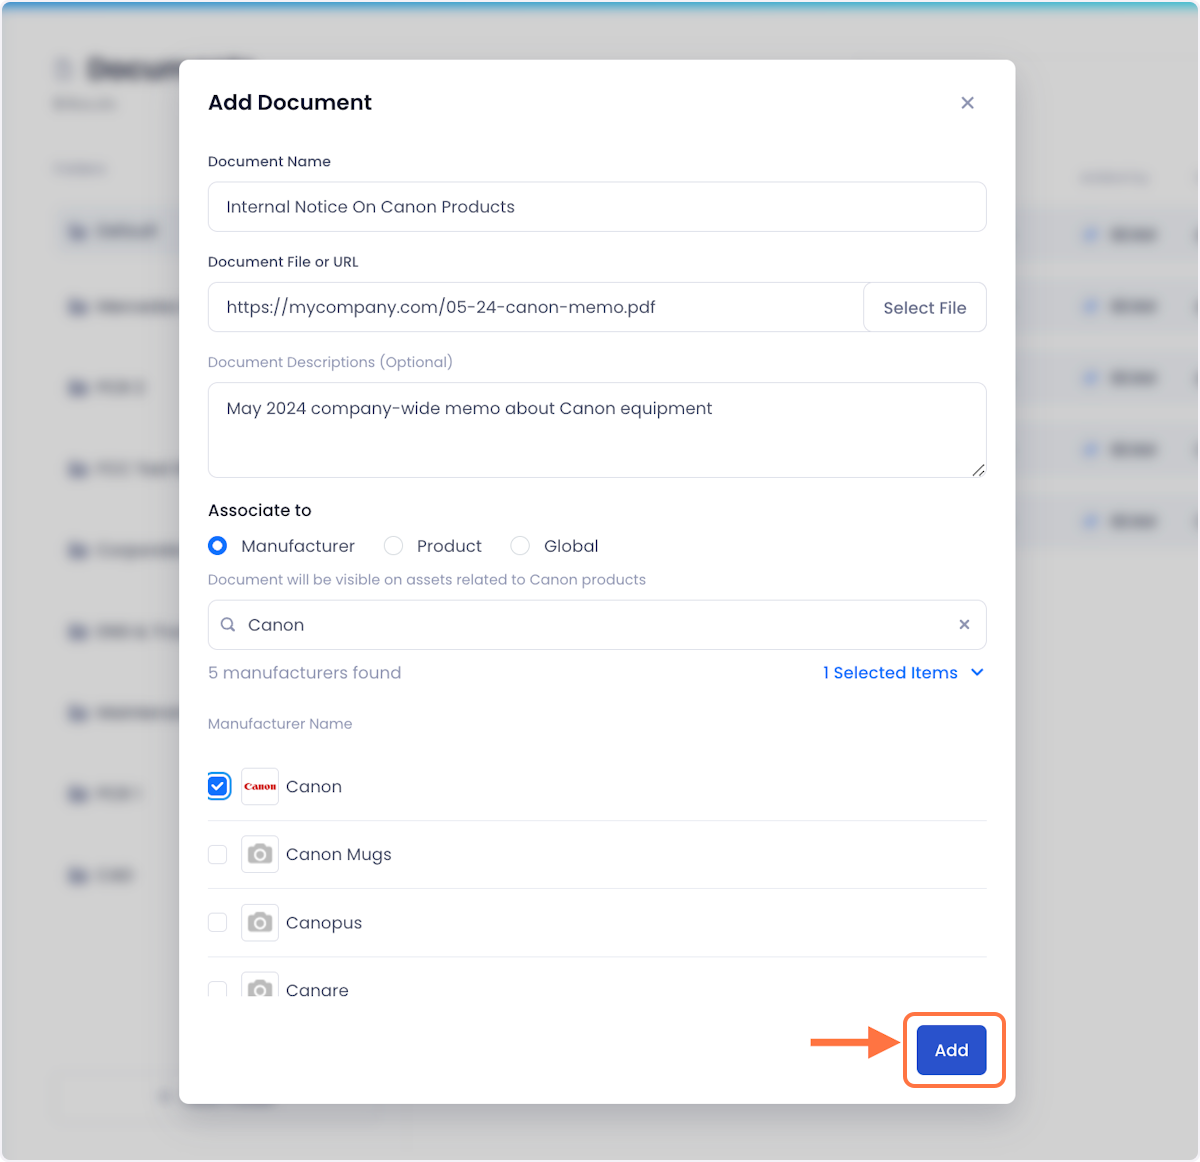
6. When you're satisfied with how your new document is setup, click Add to complete the process.
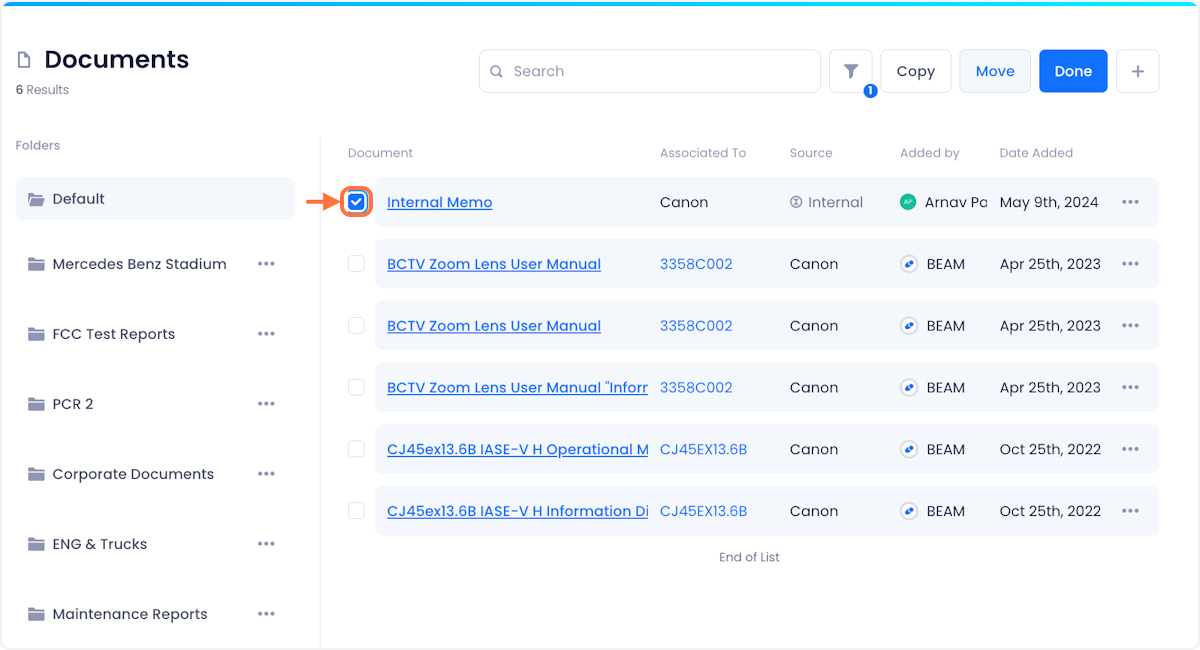
NOTE: All new documents are added to the Default folder. To move or copy the document to a different folder check out our documentation in the following sections
Moving Documents To A Different Folder
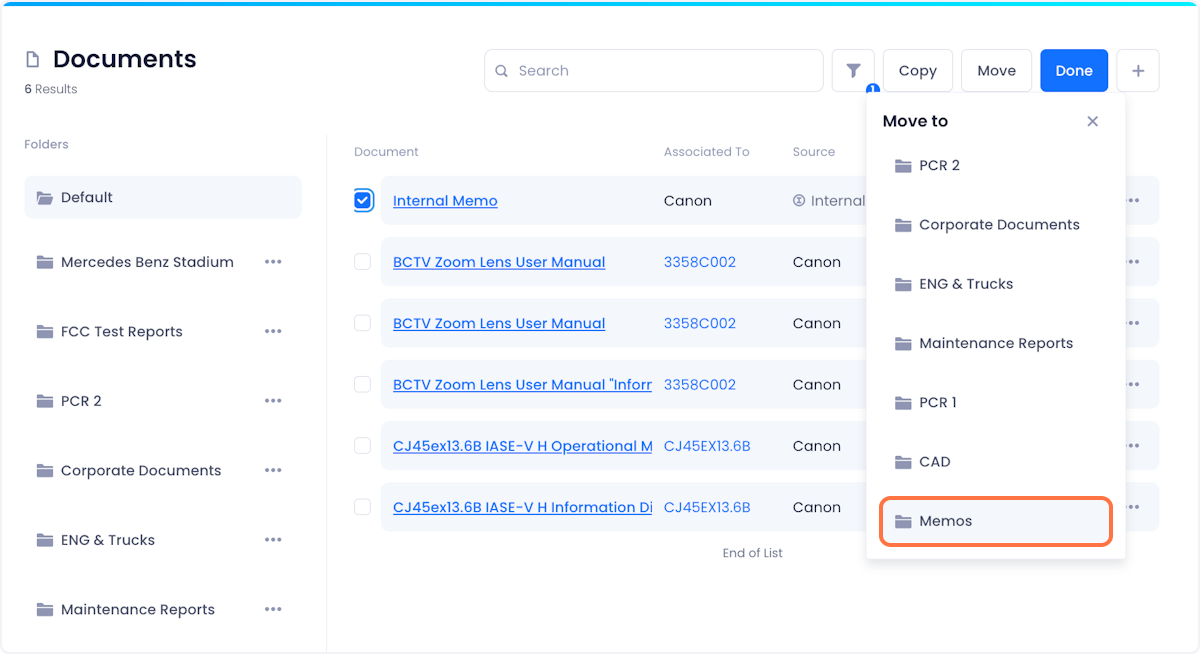
1. Select the documents you want to move by checking the box associated with it. You can select multiple checkboxes if you want to move multiple documents
2. Click on the Move button in the top right of your screen.

3. From the dropdown that appears, select the folder you want to move the document to. Your document will automatically be moved to the selected folder.

Copying Documents To A Different Folder
1. Select the documents you want to copy by checking the box associated with it. You can select multiple checkboxes if you want to copy multiple documents

2. Click on the Copy button in the top right of your screen.
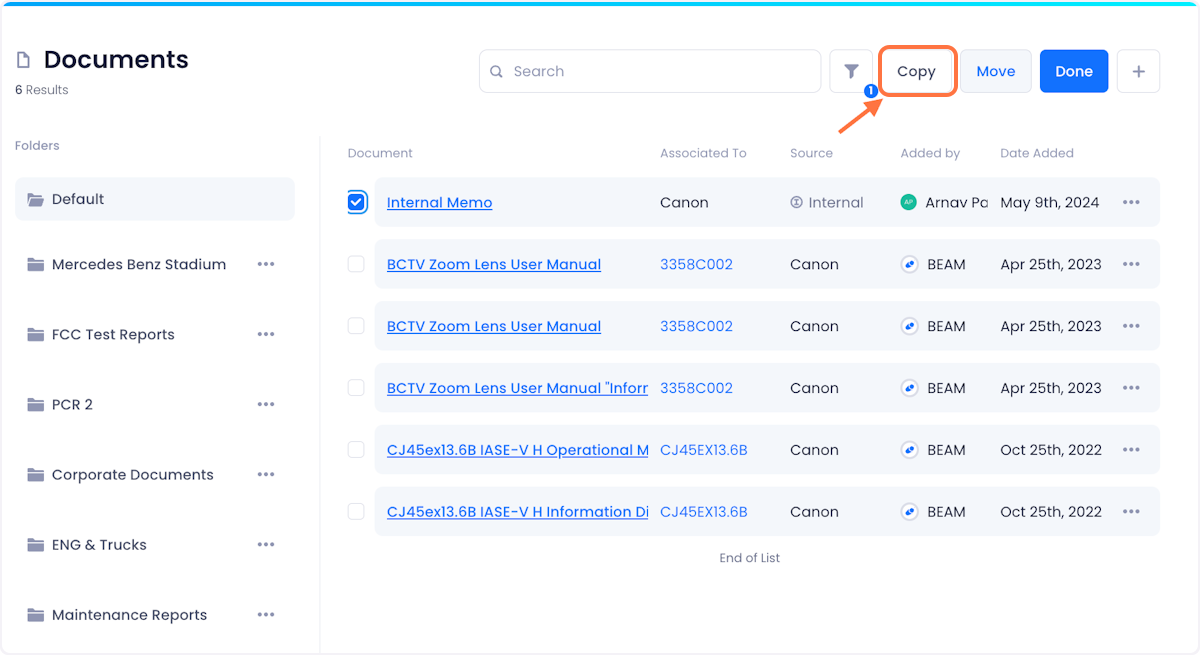
3. From the dropdown that appears, select the folder you want to copy the document to. Your document will automatically be copied to the selected folder.
Editing A Document's Name, Description & Scope
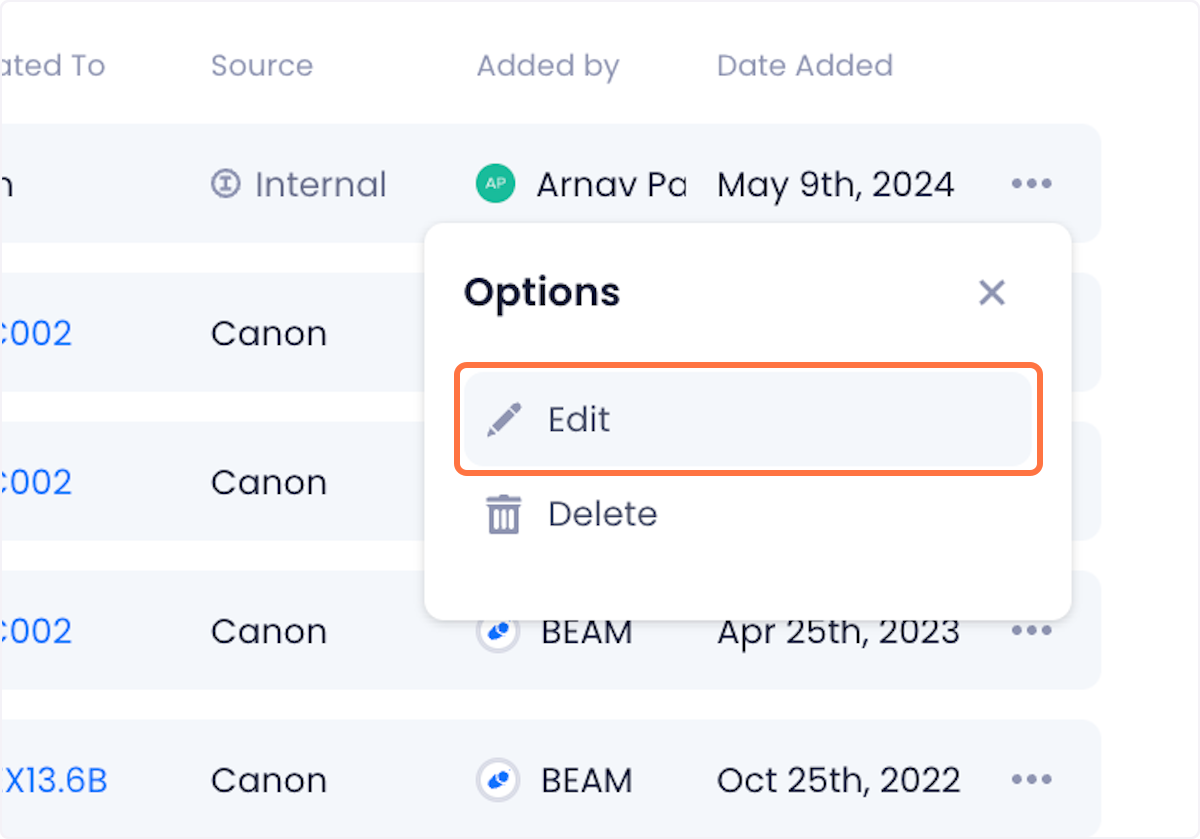
1. Click on the overflow menu associated with the document you want to edit.

2. Click on Edit from the dropdown menu.
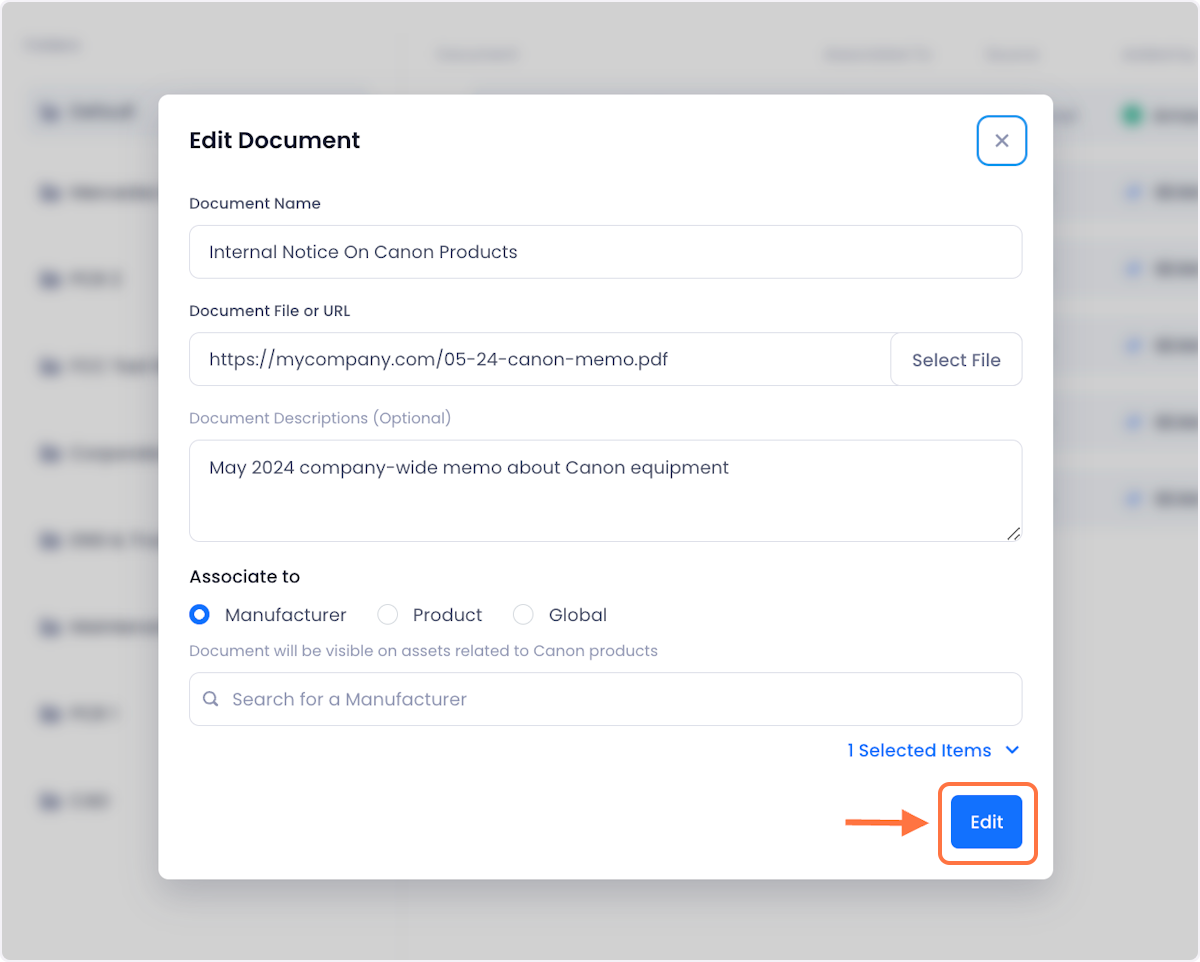
3. Edit your document in the ensuing popup. When you're satisfied with your changes, click on Edit in the bottom right corner of the popup to complete the process
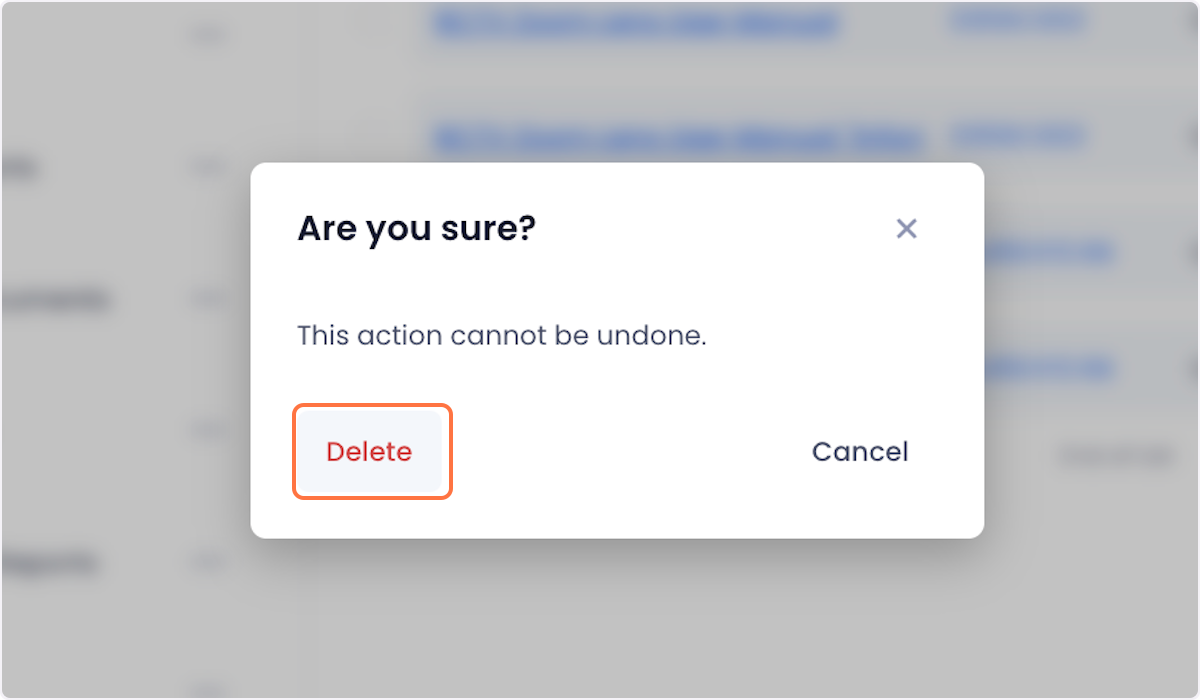
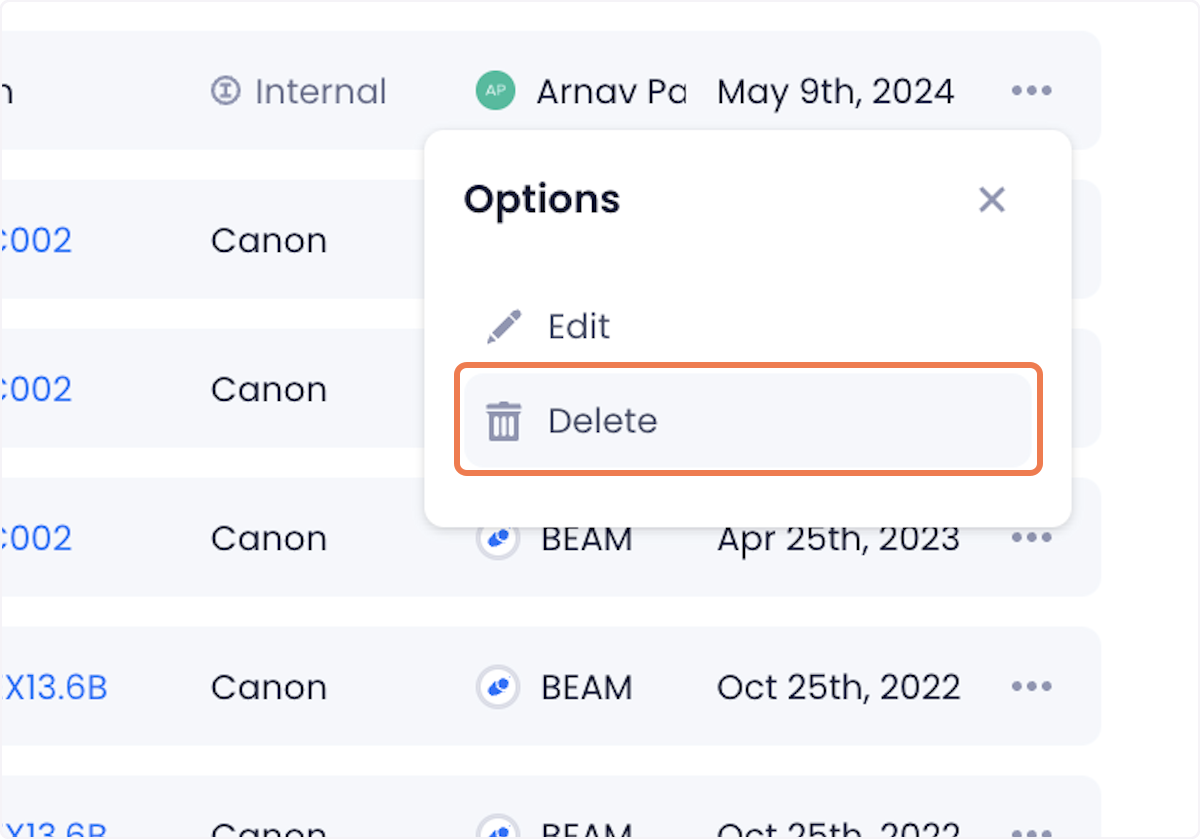
Deleting A Document
NOTE: You can only delete documents created by Beam users. Documents collected automatically by Beam's algorithm cannot be deleted.
1. Click on the overflow menu associated with the document you want to delete.

2. Select Delete from the dropdown.
3. Confirm your deletion on the ensuing popup to complete the process.