Assigning Barcode Values To Your Assets
Learn how to assign barcode values to your assets in your Beam inventory
.png)
Beam Lens makes accessing a technology asset's information easier while you are in the field. Using the app, you can pull up and edit asset pages simply by scanning asset barcodes. Whether you're in the warehouse, on the truck, in the studio or on location, all your asset data is readily accessible from your phone. To use Beam Lens, however, you must assign barcode values to your assets in your Beam inventory.
Before you start make sure you meet the following requirements:
- Unique text field. Create a custom field that will store your asset barcode values. Make sure you configure the field with Type = Text and Unique Field = Yes
-
If you want to learn how to create and configure custom fields, read our tutorial on creating custom fields.
Instructions
Part 1: Converting your unique text field into a barcode field
Before you can start assigning barcode values to your assets, you need to tell Beam which field in your account is being used to store barcodes. This will allow Beam to know which field to look for if you query a barcode using the Beam Lens barcode scanner app.
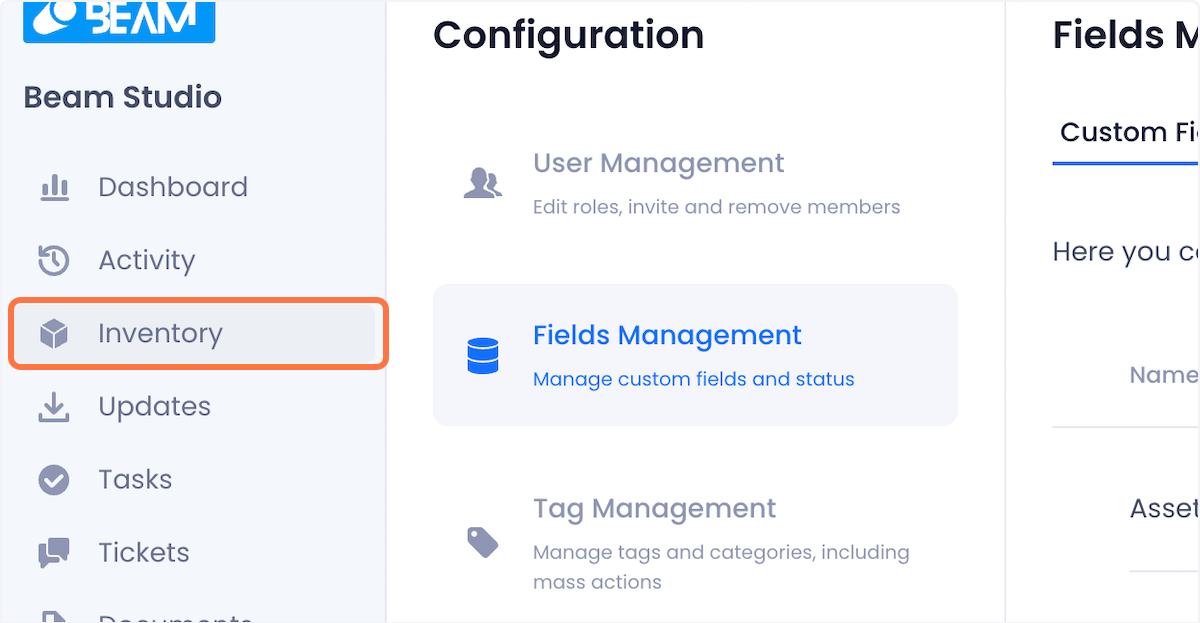
1. Click on Configuration in the sidebar of your Beam dashboard.
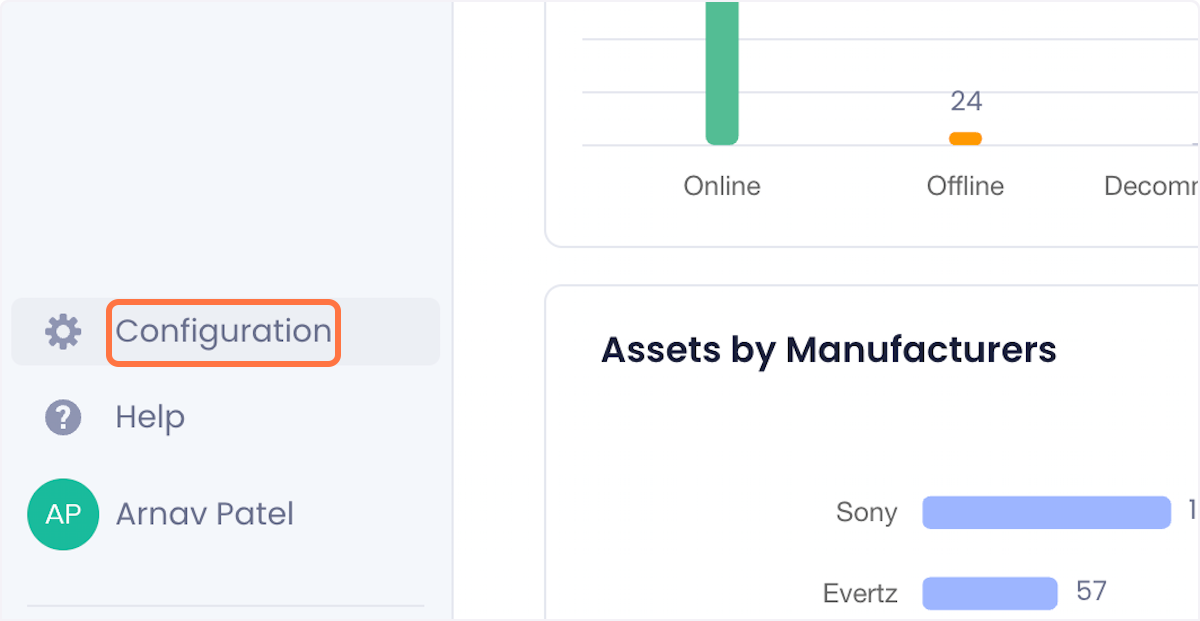
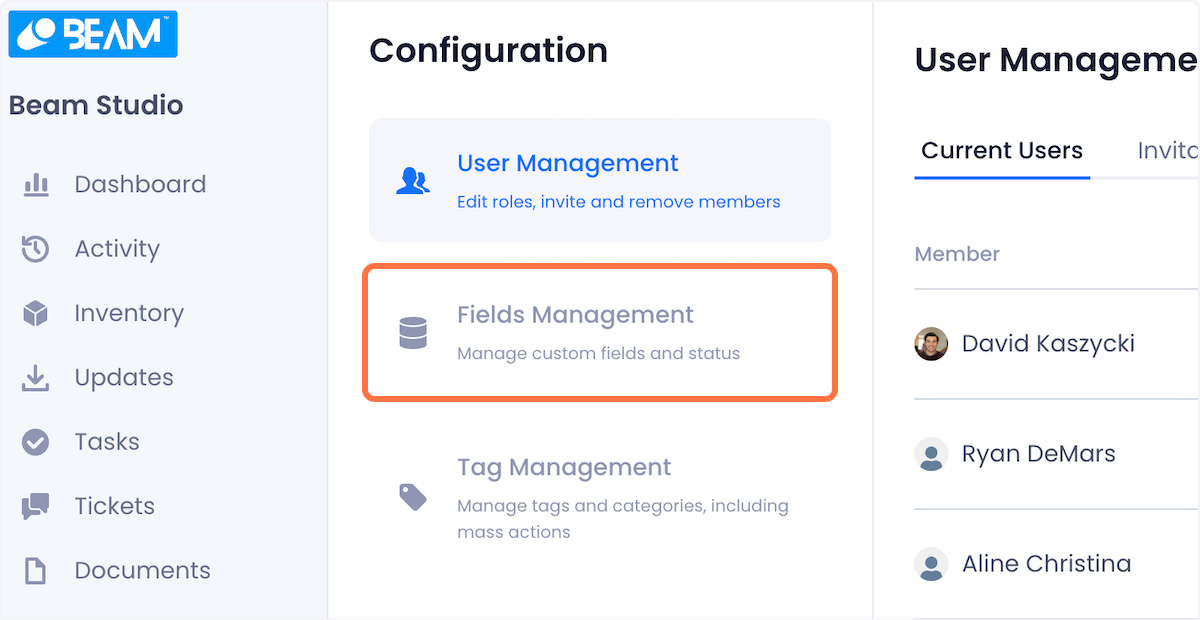
2. Select Field Management from the configuration options.
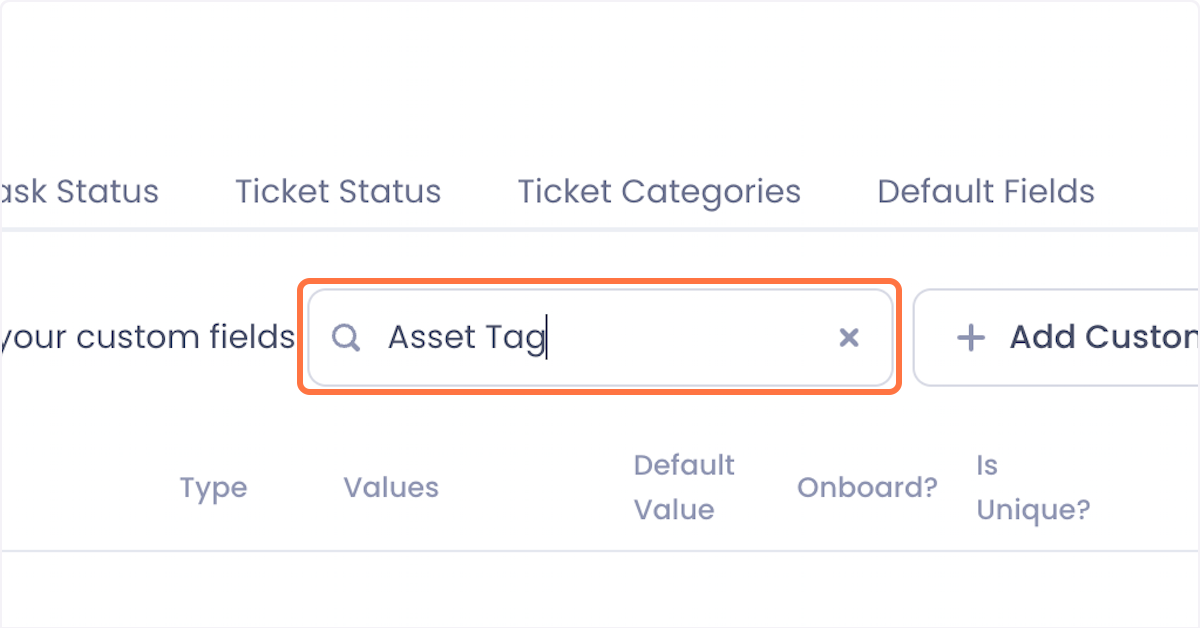
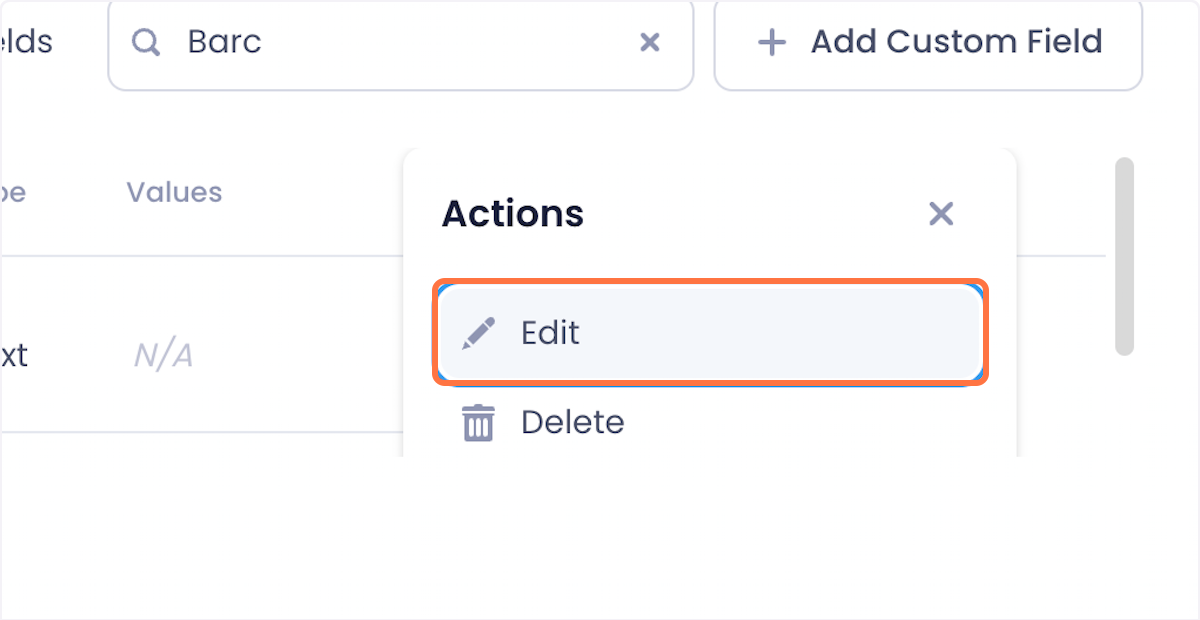
3. In the Field Configuration menu, search for the unique text field you created to store barcode values.
4. When the field shows up in the search results, click on the Overflow Menu.
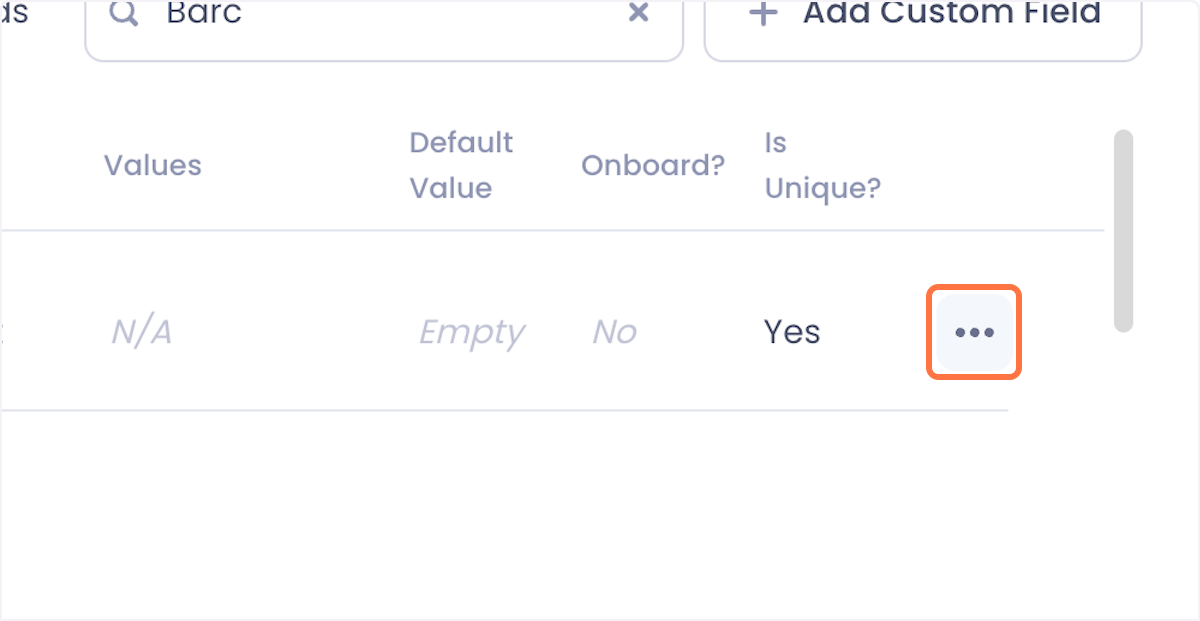
5. Click on Edit.
6. Switch the Is Barcode option to Yes.
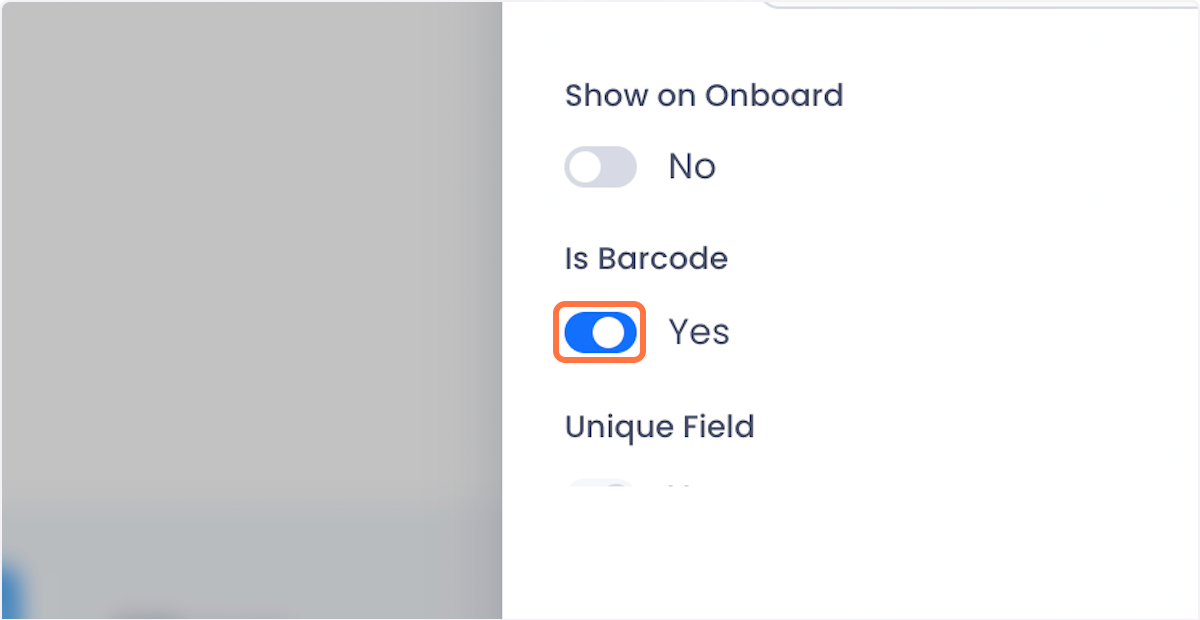
7. Click on Save to complete the conversion process.

Part 2: Adding barcodes to your assets
Now that we’ve prepared our barcode field, you’re ready to add barcodes to your assets in Beam!
8. Click on Inventory in the sidebar of your Beam Dashboard.
9. Click on the asset you wish to add a barcode to.

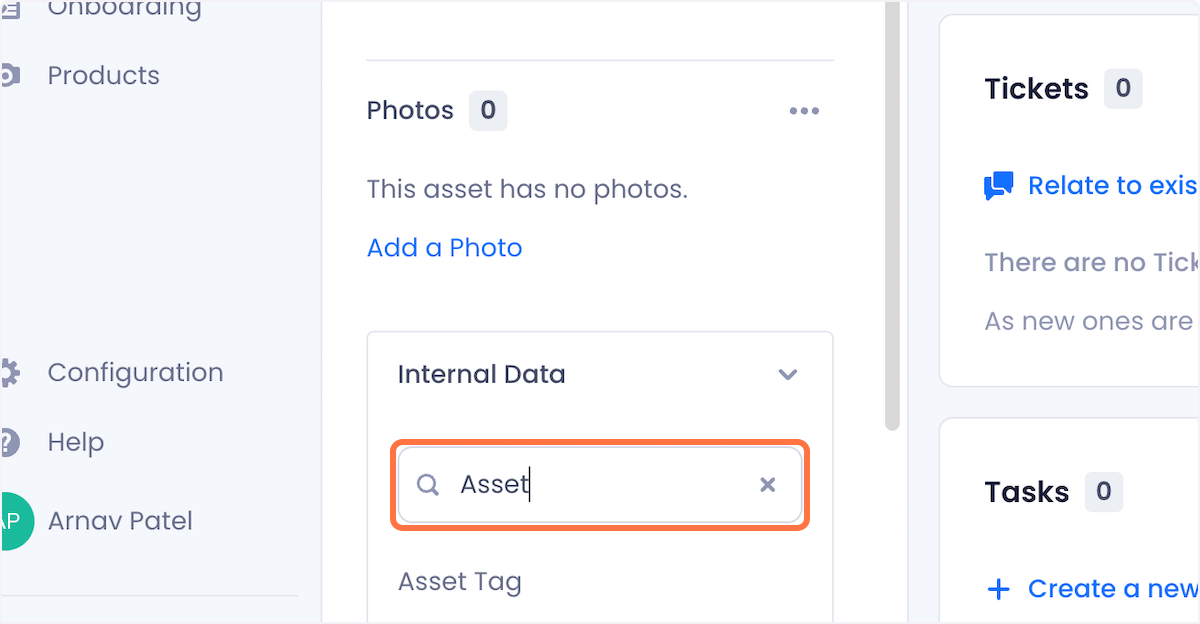
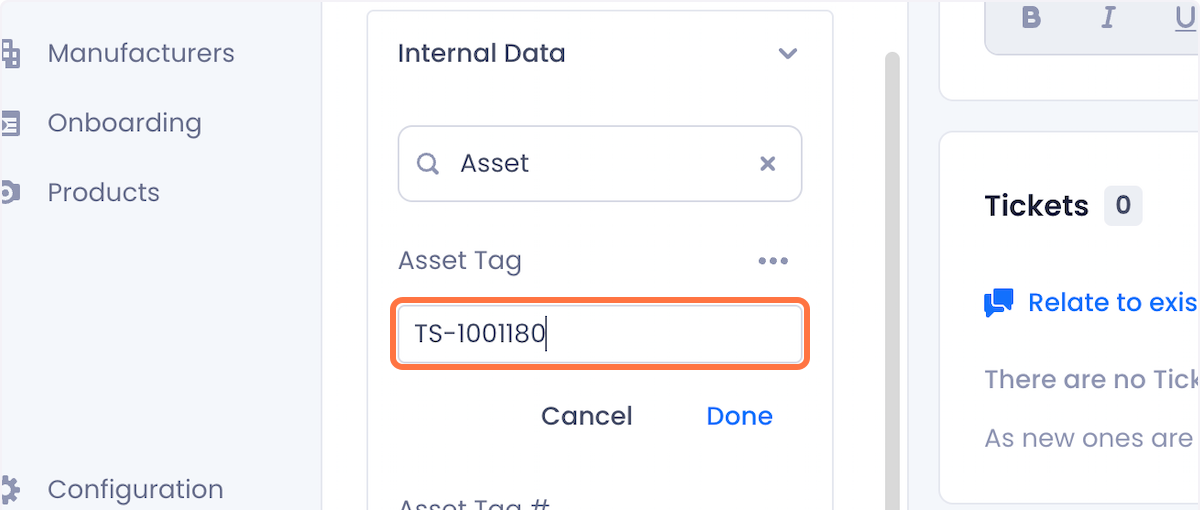
10. Scroll to the bottom of the asset data panel and click on Internal Data.

11. Search for the barcode field you created in Part 1.
12. Click on the empty field.

13. Type out your barcode value into the field.
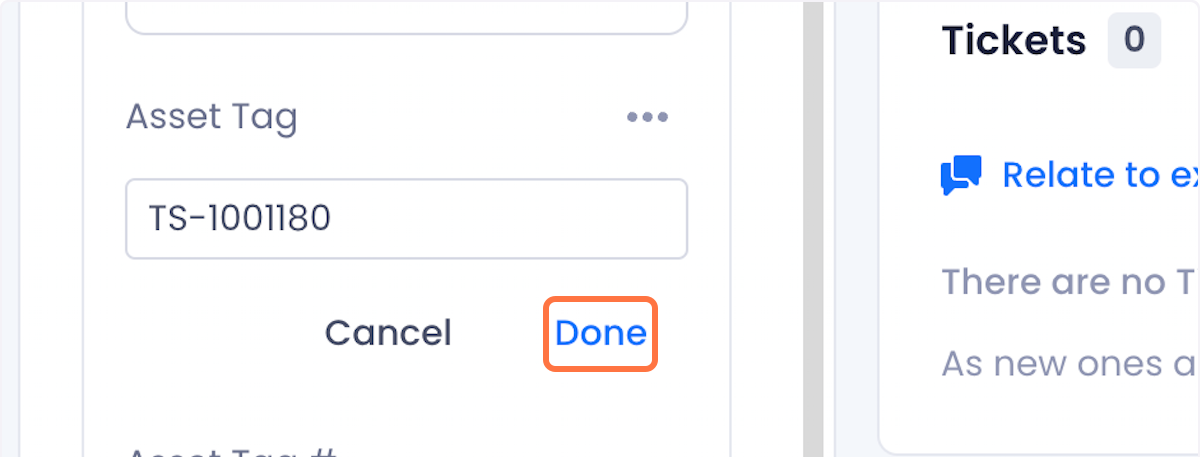
14. Click on Done to save the value.
Next Steps
Once you’ve added barcodes to your assets, your technicians can use the Beam Lens Android app to scan asset barcodes using their phone to pull up asset pages. If you’re interested in learning how to use Beam Lens, check out our documentation on accessing asset pages using Beam Lens.
If you need additional help, please contact your Implementation Specialist or a Beam Representative.
Other articles
Learn more about technology management, industry tips, product news and more.


