Navigating the Inventory Page
In this tutorial, we will give you an overview of the inventory page and all its features.
The Inventory Page is one of the most used sections of the Beam platform. For many users, the inventory page serves their primary base of operations for their day-to-day inventory management needs. In this tutorial, we will give you an overview of all the functionality available on the inventory page.
Accessing Your Inventory
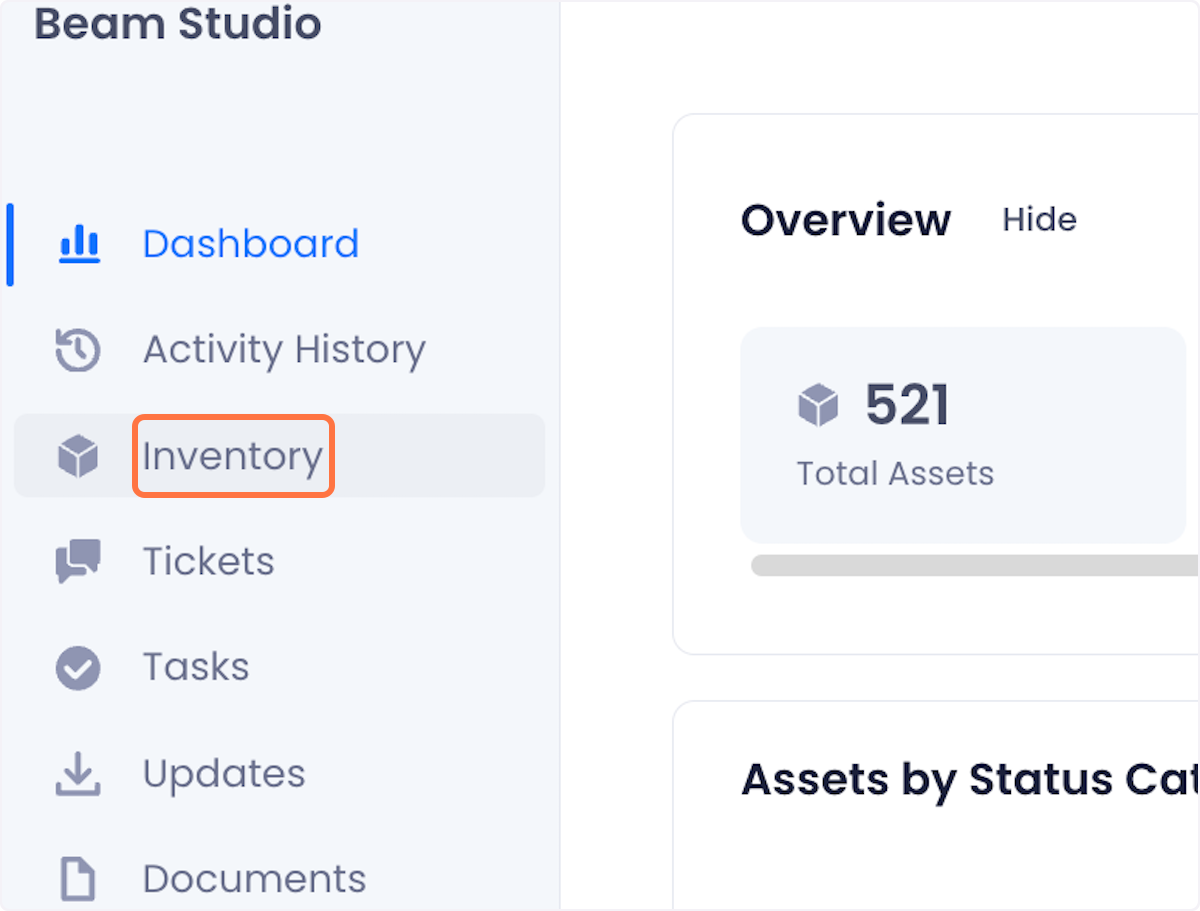
You can access the Inventory Page from anywhere in the platform by clicking Inventory in the sidebar of your Beam workspace.
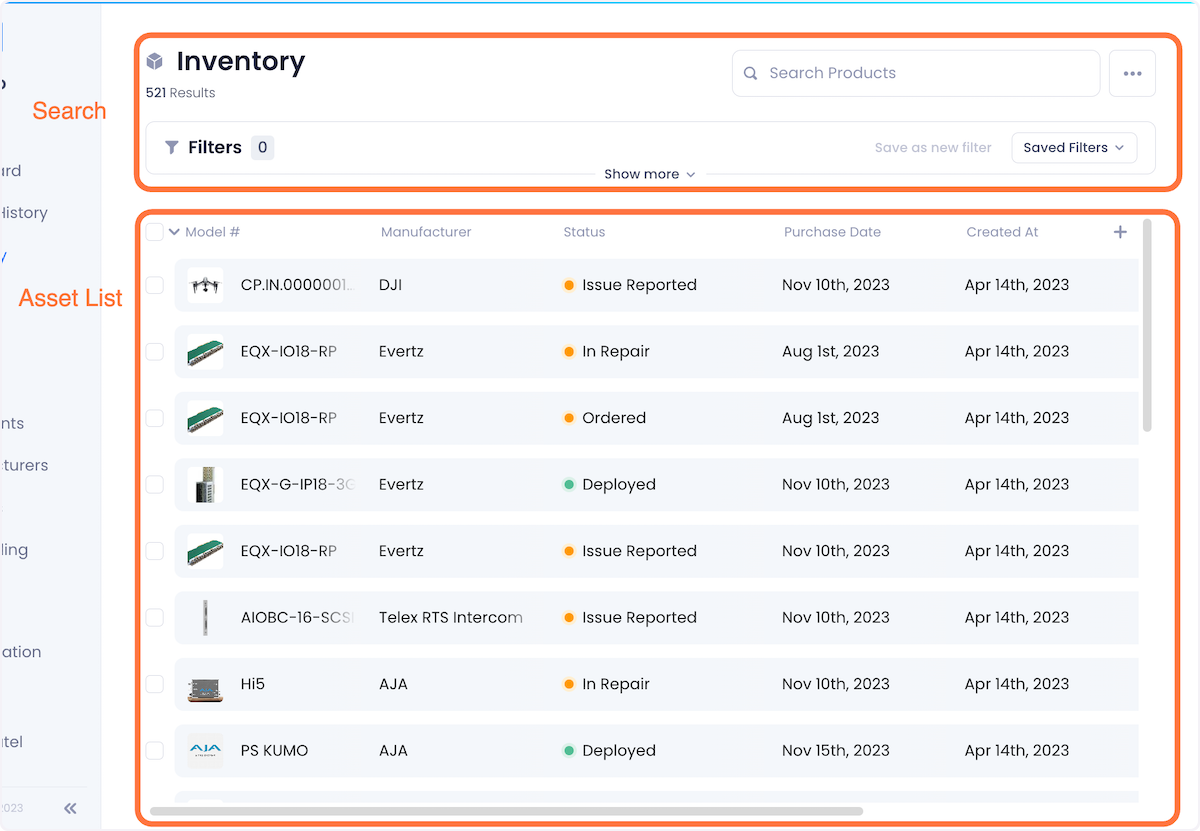
The Inventory Page is divided into two sections:
- Asset List - a running list of the assets that live in your Beam inventory.
- Search - As the name suggests, this is where you can search for specific assets from your list or filter the list to view assets that meet specific criteria.
Customizing Your Inventory View
By default, the asset list will show you:
- Model #
- Manufacturer
- Status
- Purchase Date
- Tags
If you want to customize the columns in your inventory page, click the "+" button in the top right of the asset list and select the Tags, Default Fields or Custom Fields you want on display or use the built search function to look for the fields you want.
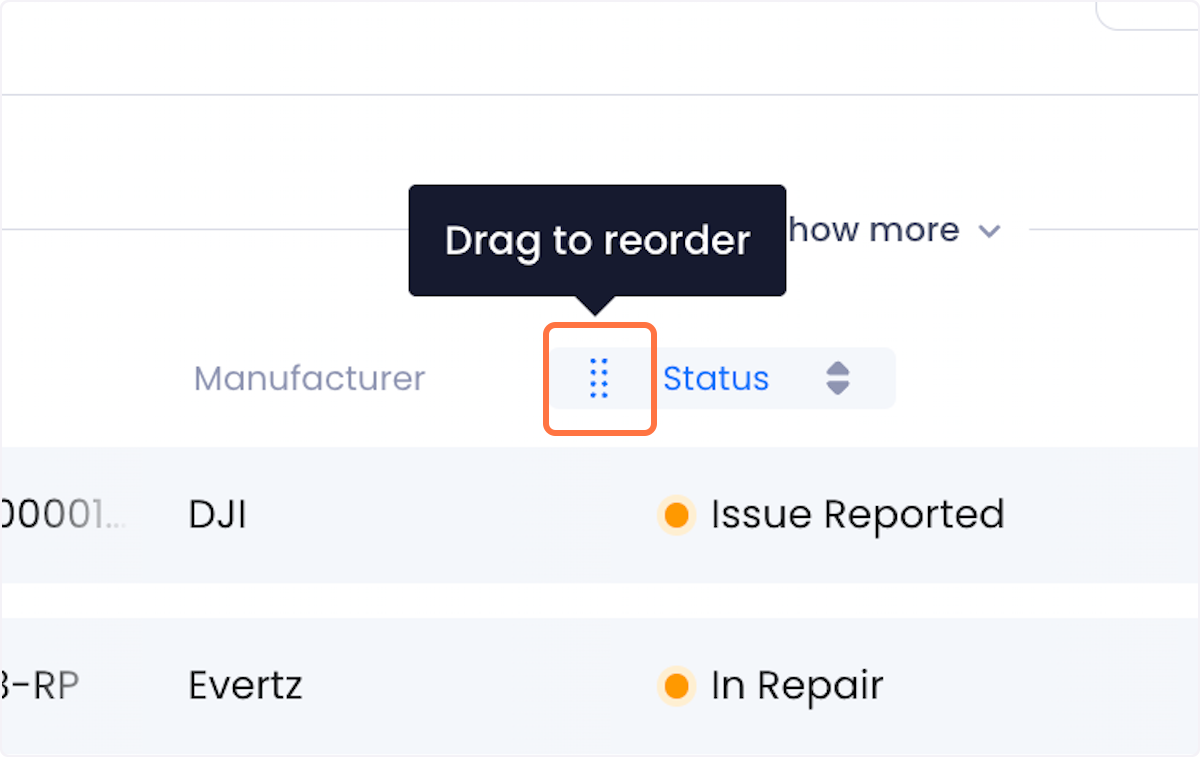
To reposition a column, hover over its heading, and then dragging it to your desired position.
Searching for Assets
In the day-to-day of managing your asset inventory, you will often find the need to find specific assets or filter down to specific asset groups (e.g. "all the equipment in studio 6"). Inventory search allows you to do just that.
Basic Search
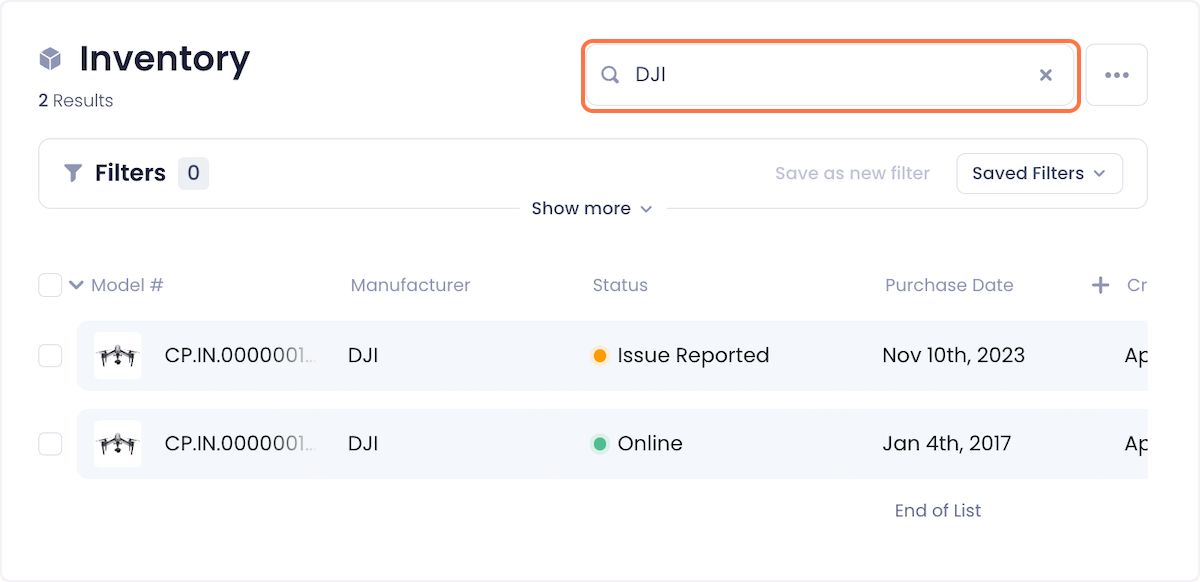
Using the search bar at the top right of the page, you can look up assets by:
- Product Name
- Model #
- Serial #
- Manufacturer
In the example below, for example, the user is able to find all DJI products in the inventory.
Filters
FIlters allow you to create more advanced queries by chaining together several search conditions. To use this feature, click the Show More button at the top of the inventory page.
Setup your filters using the filter configuration interface and click apply to execute your search:

To save your filters for easy access in the future, click the Save as new filter button.
Once saved, your filter presets are accessible in the Saved Filters dropdown.
If you want to a more in-depth explainer of filtering in your Beam inventory, check out our how-to guide on Searching for Assets in the Inventory Page.
Exporting Views
While we built Beam to run your entire production environment from one interface, we recognize that there will be situations where you need to export data from the platform (e.g. for generating reports). The Export feature lets you export your data out of your Beam inventory into .csv format.
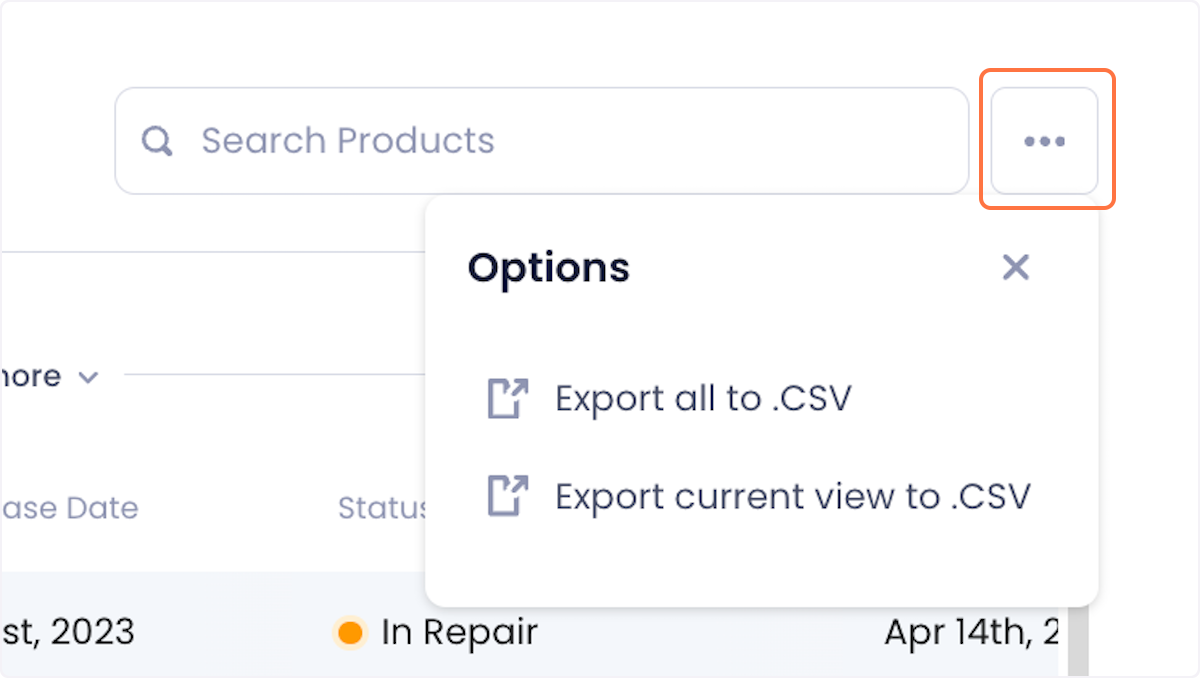
To use it, click on the overflow menu next to the search bar in the top right corner of the screen. This will reveal two export options:
- Export all to .CSV - This will export your entire inventory with all tags, fields, statuses and assignees.
- Export current view to .CSV - This will export only the assets that match the filter/search conditions you have set and will only export the columns that you have made visible.
Mass Edit
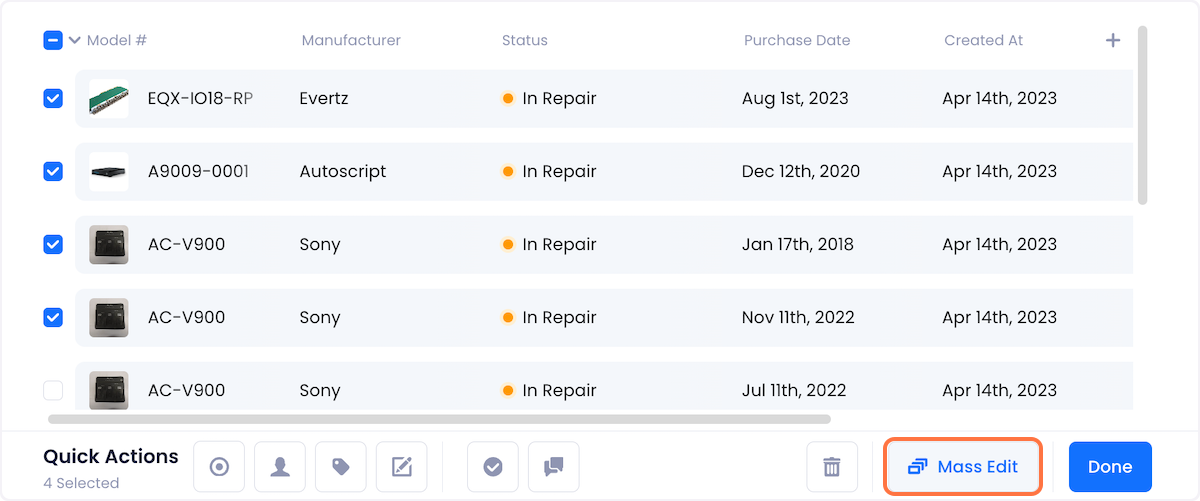
As the name suggests, Mass Edit lets you edit multiple assets together. To use the feature, first select the assets you want to edit using the checkboxes on the left side of the listings (or select all of them by selecting the checkbox at the top of the column) and click the Mass Edit button in the bottom right of the screen.
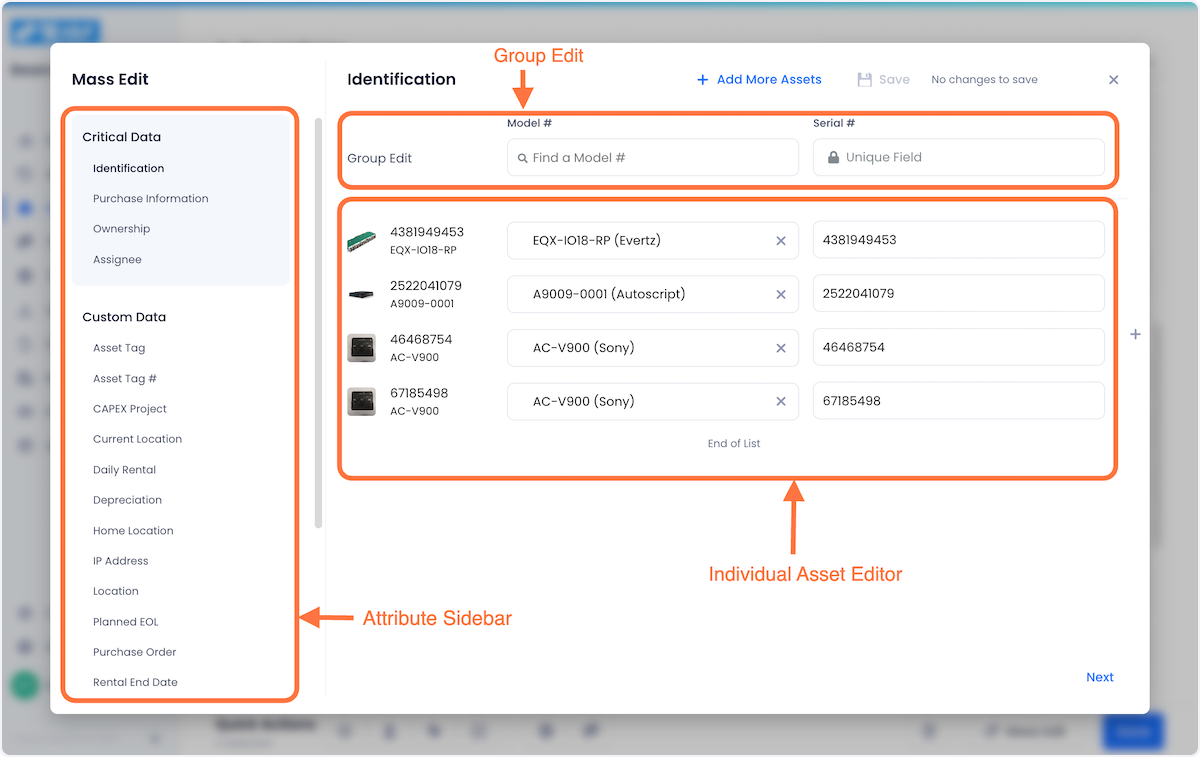
In the modal that pops up, you can select the fields you want to edit in the attribute sidebar and either edit each of the selected assets individually (if there are slight variations in how you want to edit them) or edit them all together using the Group Edit feature.
If you want a more in-depth explainer on the Mass Edit tool, check out our tutorial on Editing Data Using Mass Edit.
Quick Actions
Quick Actions are a shortcut for editing some of the more frequently edited fields across multiple assets. Specifically, quick actions lets you quickly update:
- Status
- Assignee
- Tags
- Fields
- Tickets
- Tasks
To use Quick Actions, select the assets you want to edit and use the quick actions buttons that appear at the bottom of the page to select the field you want to edit.
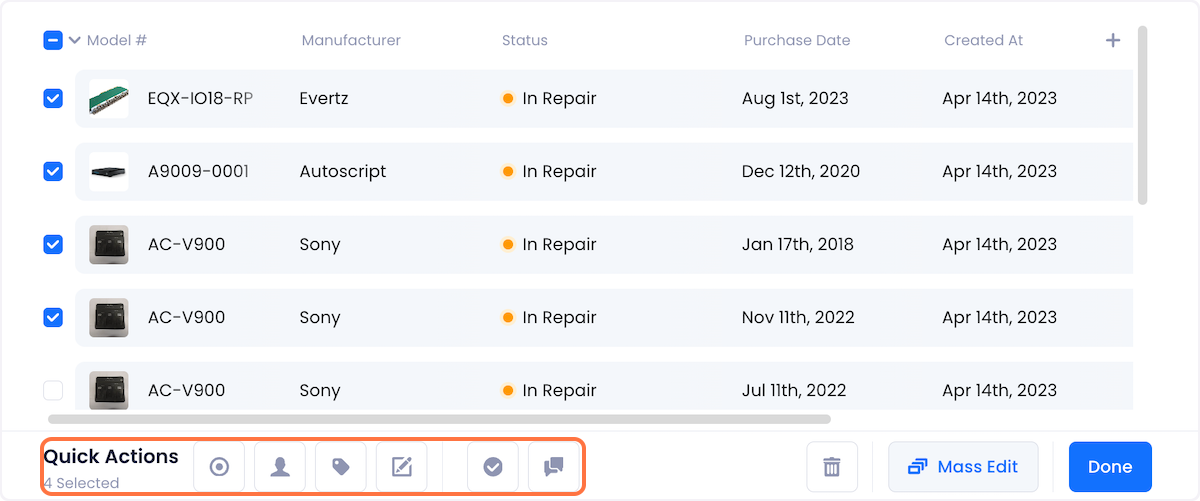
Clicking on any of these quick actions will reveal a popup where you can edit the value of your selected assets.

If you want to dive deeper into Quick Actions, check out our tutorial on Editing Asset Data Using Quick Actions.
Both Quick Actions and Mass Edit work particularly well, when used in conjunction with search. Use filters create asset groups that are often tracked, maintained and operated together. Then use Mass Edit or Quick Actions, edit those asset groups together.
For example, say a studio is going to be temporarily offline for maintenance. To update the data for assets in this studio, you can set up a filter to display all the assets from that studio and mass edit them to switch their status to Offline.
Related Links
Searching for Assets in the Inventory Page
Other articles
Learn more about technology management, industry tips, product news and more.


