Editing Asset Data Using Quick Actions
In this tutorial we'll show you how you can use Quick Actions.

Quick Actions is a tool that lets you edit attributes across multiple assets simultaneously. In this tutorial we'll show you how you can use Quick Actions to speed up your inventory management workflow.
The Quick Actions feature lives in the Inventory Page of your Beam workspace. If you are unfamiliar with the Inventory Page, we recommend you check out our documentation on Navigating the Inventory Page.
Using Quick Actions
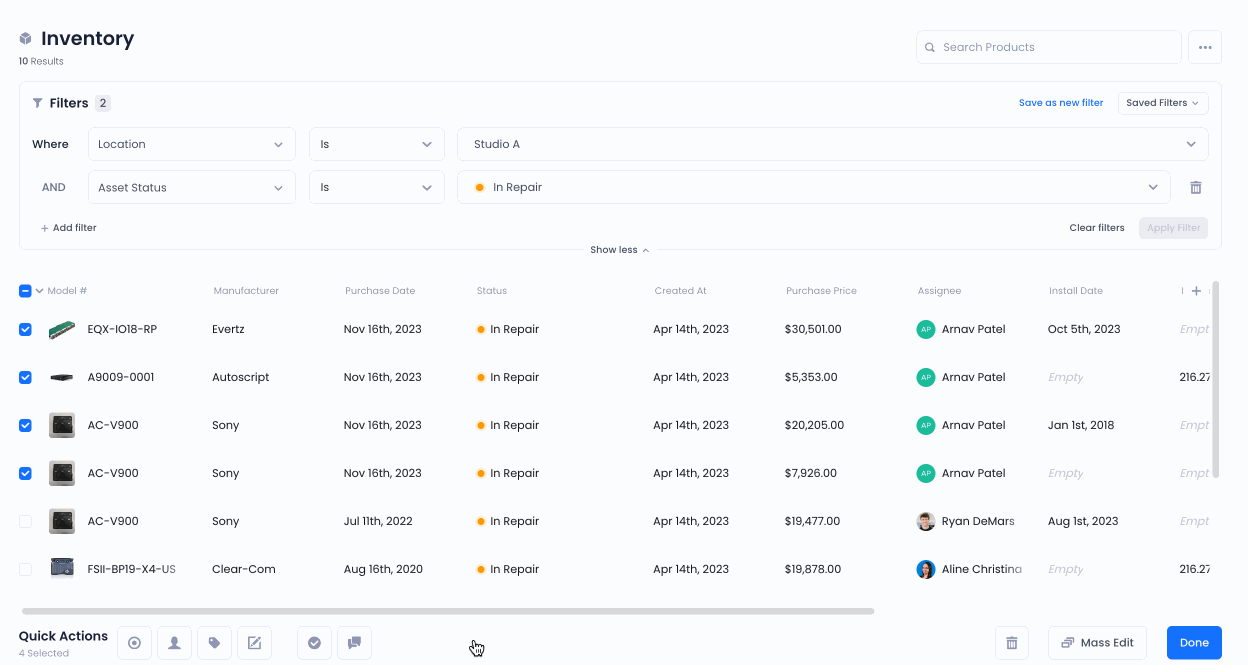
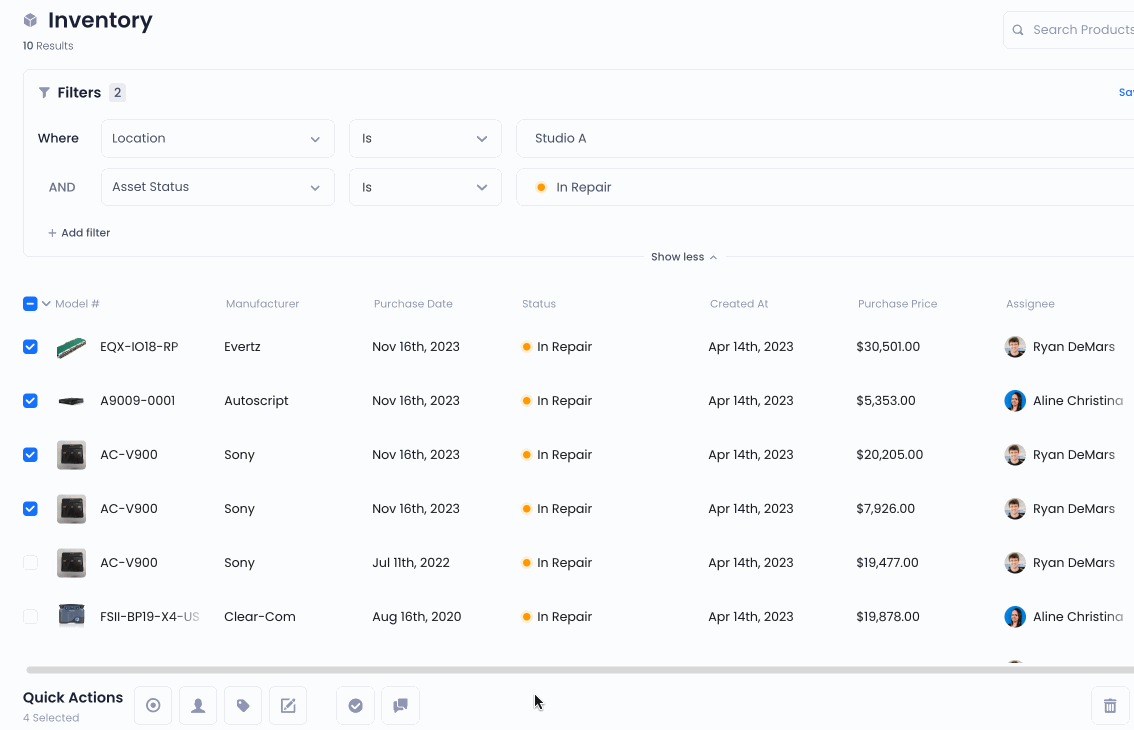
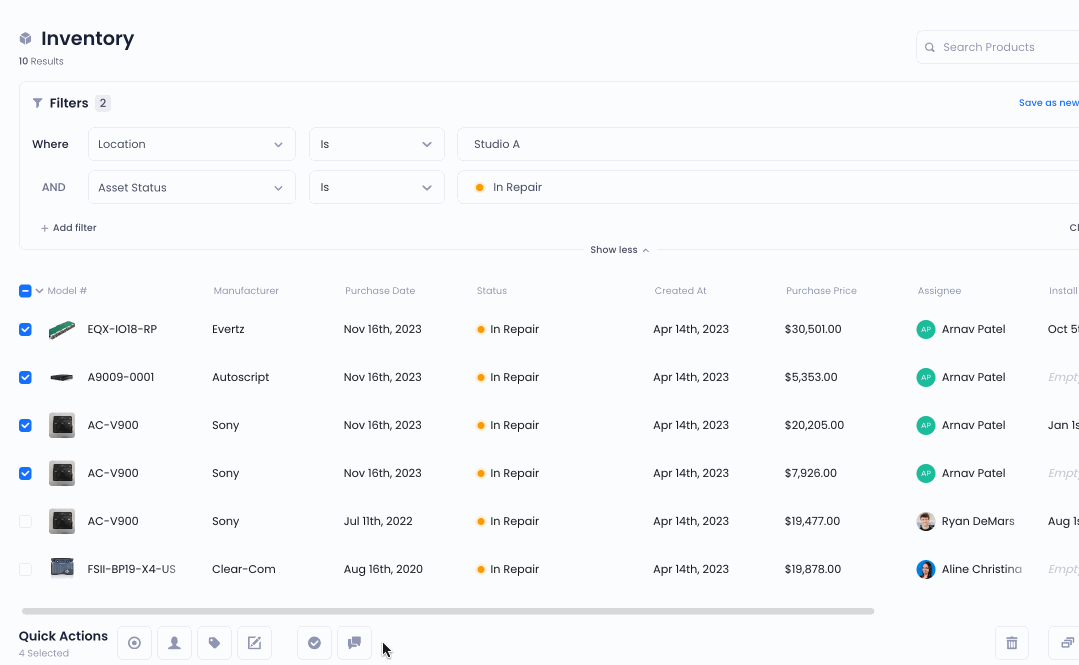
To access Quick Actions, select the assets that you want to edit using the checkboxes on the left of the asset list. Doing so will reveal editing options at the bottom of the inventory page.
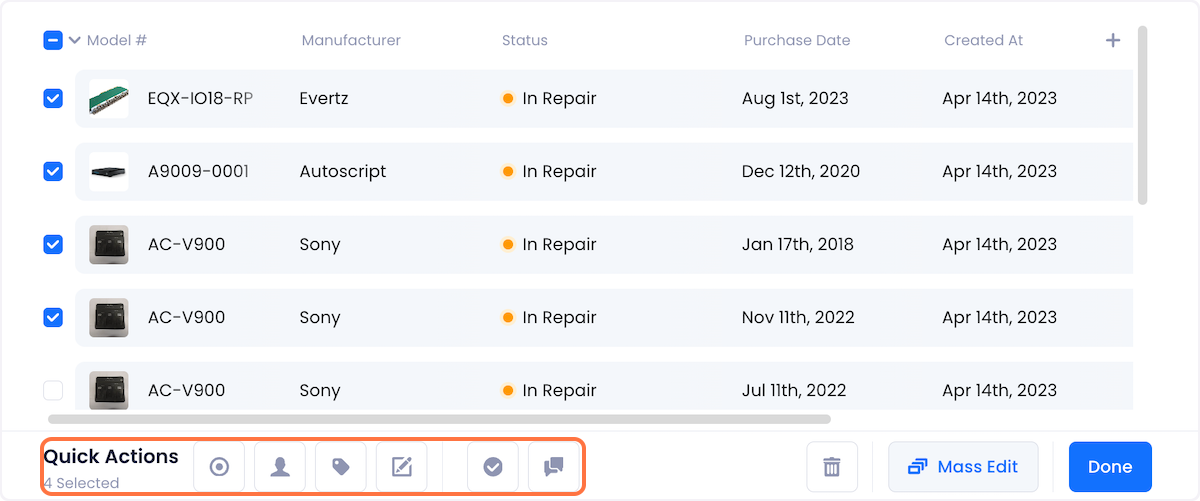
Within these options, Quick Actions are represented by the six buttons on the left of the bar. These buttons correspond to the attributes that you can edit using Quick Actions.
1. Status
The status quick action lets you set the status of multiple assets at the same time.
To change the status of your selected assets, click the Status Quick Action button and select your desired status from the menu.
2. Assignee
The status quick action lets you set the assignee of multiple assets at the same time.
To change the assignee of your selected assets, click the Assignee Quick Action button and select the new assignee from the menu.

In the given search bar, you can find users using their name or email address.
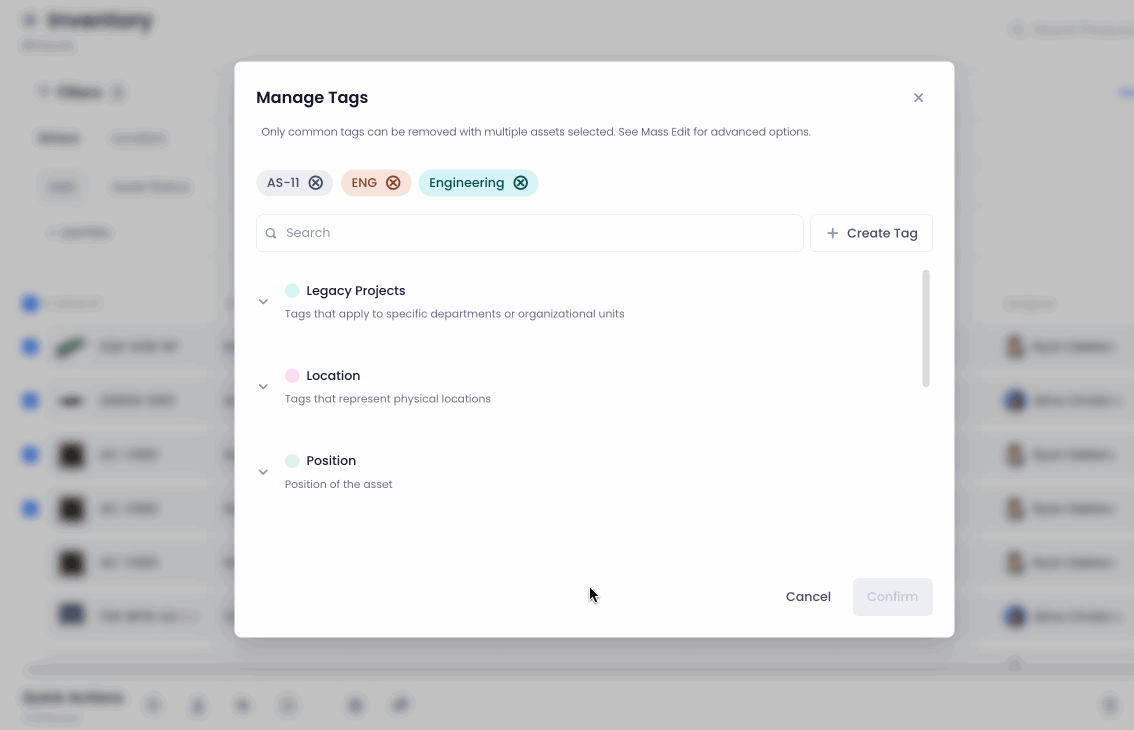
3. Tags
To edit the tags of your selected assets, click on the Tags Quick Action button. In the modal that opens up, you can you can add an existing tag to all the selected assets by either searching for it using the given search bar, or browsing the tag categories below.
At the top of the modal, you will see a list of all the tags that are common between the assets that you selected. You can delete tags from this list using the X button to remove them from all the selected assets.
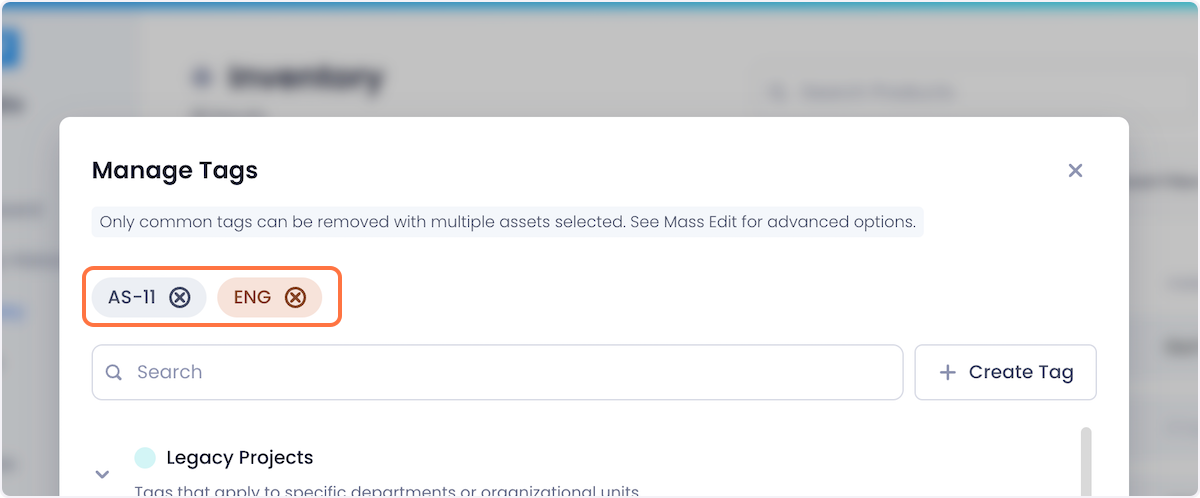
If you want to create and assign a new tag, click the Create Tag button to the right of the search bar. This will open a tag creation modal where you can create a new tag without having to navigate to the Field Management page.
4. Fields
To edit fields associated with your selected assets, click the Fields Quick Action button and select the field you want to edit from the popup menu. Enter the value that you want to set and click Confirm to save it.

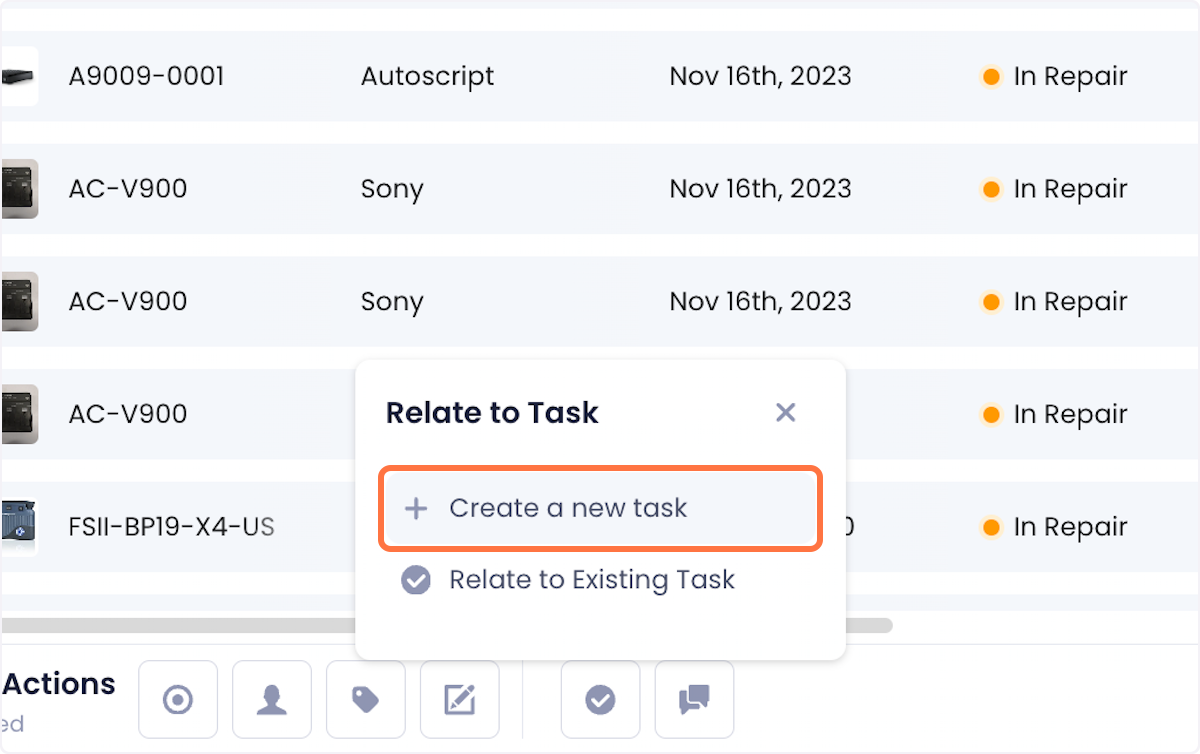
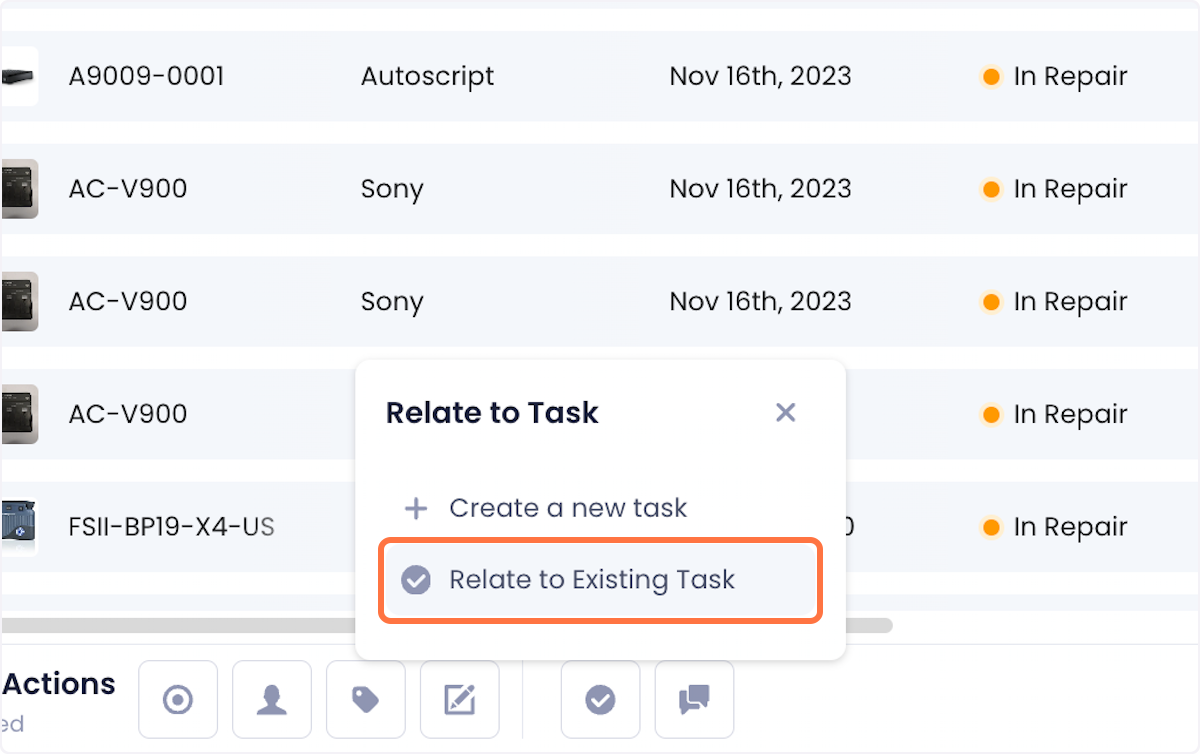
5. Tasks
To relate multiple assets to a task using Quick Actions, click the Relate to Task Quick Action button.

There are two options for how you can relate assets to tasks:
Create a New Task
If you want to relate the assets to a task that doesn't currently exist, select the Create a New Task option.
The ensuing modal lets you create a task on the inventory page without having to navigate to the task page.

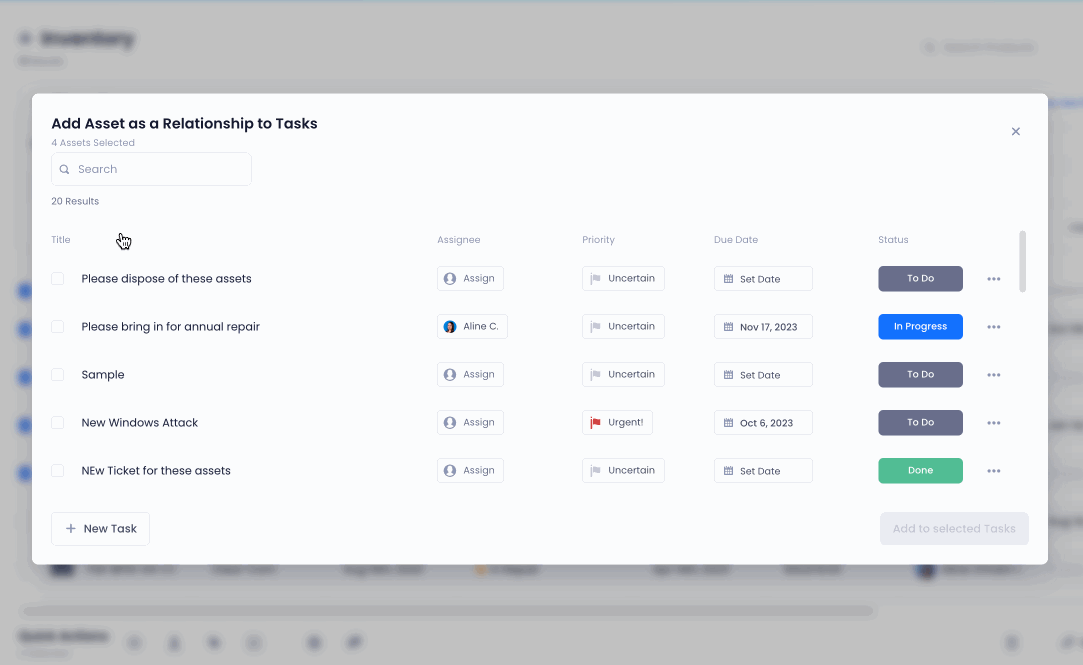
2. Relate to an Existing Task
If you want to relate the assets to a task that already exists, select the Relate to an Existing Task option. This will pull up a modal where you can view your tasks.
Choose the tasks you want to associate with your assets using the checkboxes on the left of each task card and click Add to selected Tasks when you’re satisfied with your selection.
6. Tickets
To relate multiple assets to a ticket using Quick Actions, click the Relate to Ticket Quick Action button. This will popup a modal where you can select the tickets you want to relate.
Select the tickets you want to relate to your assets, using the checkboxes on the left of the modal and click Add to selected Tickets to complete the process.

Related Links
Other articles
Learn more about technology management, industry tips, product news and more.