Customizing the Inventory Page
In this tutorial we will show you how you can set up your Inventory Page.

Every organization has a unique inventory management workflow. That is why we've built our inventory page to be customizable to your specific needs. In this tutorial we will show you how you can set up your Inventory Page the way that makes the most sense for your workflow.
The Default View
The Inventory Page is divided into two sections:
- Search - As the name suggests, this is where you can search or filter for specific assets from your list or filter the list to view assets that meet specific criteria. To learn more about how Beam's inventory search works check out our documentation on Searching for Assets in the Inventory Page.
- Asset List - This is a running list of all the assets in your inventory. Using search you can narrow down that list to show you specific asset groups.
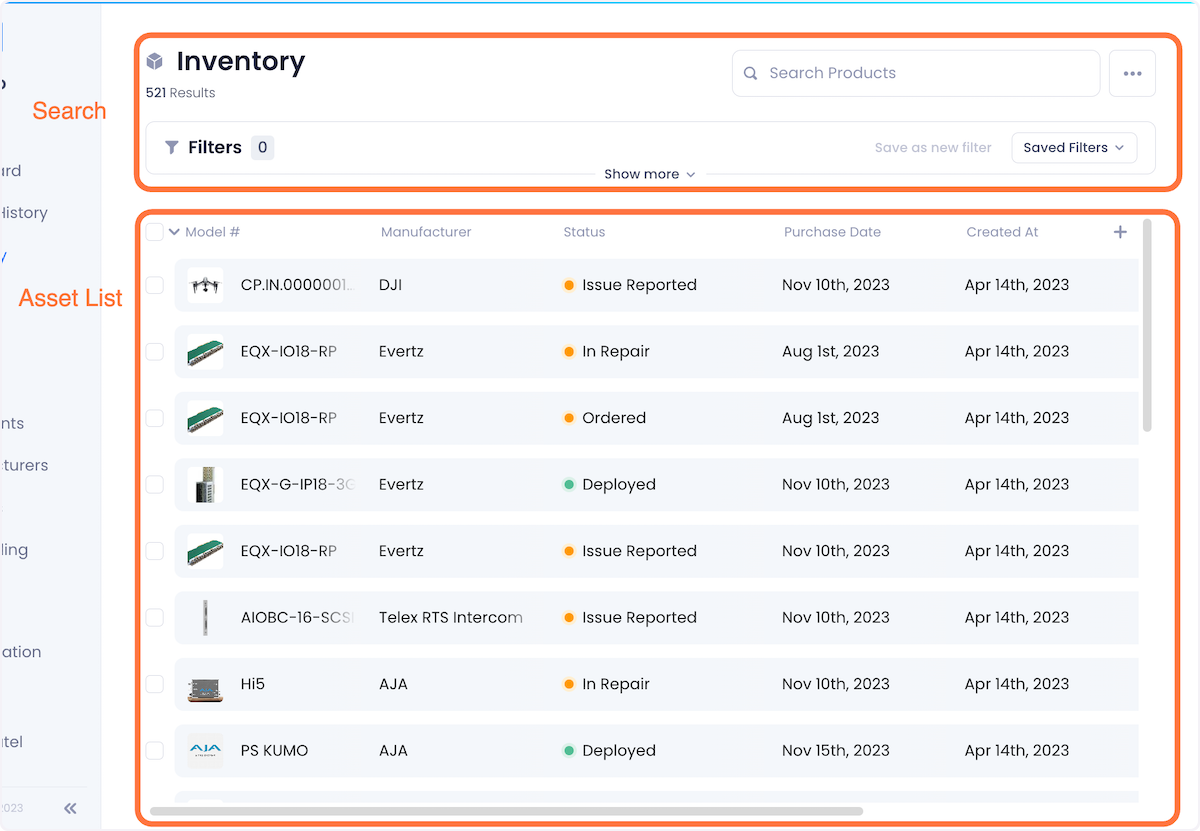
By default, the asset list shows you the following attributes:
- Model #
- Manufacturer
- Status
- Purchase Date
- Created at
- Tags
Customizing Columns on the Inventory Page
To customize the columns displayed in your inventory page, click the "+" button at the top right of the asset list. This will reveal a popup menu where you can select which tags and fields you want displayed. Select which tags and fields you want displayed by checking their associated checkboxes on or off and hit confirm to execute your changes.
If you want to quickly configure your asset list to display all the tags in your workspace, check the All tags checkbox. This will combine all tags into a single tag column.

Rearranging Columns
To rearrange columns in your asset list, hover over the column heading and click on the dotted tab that appears on the left of the column heading and drag the column to your desired position.
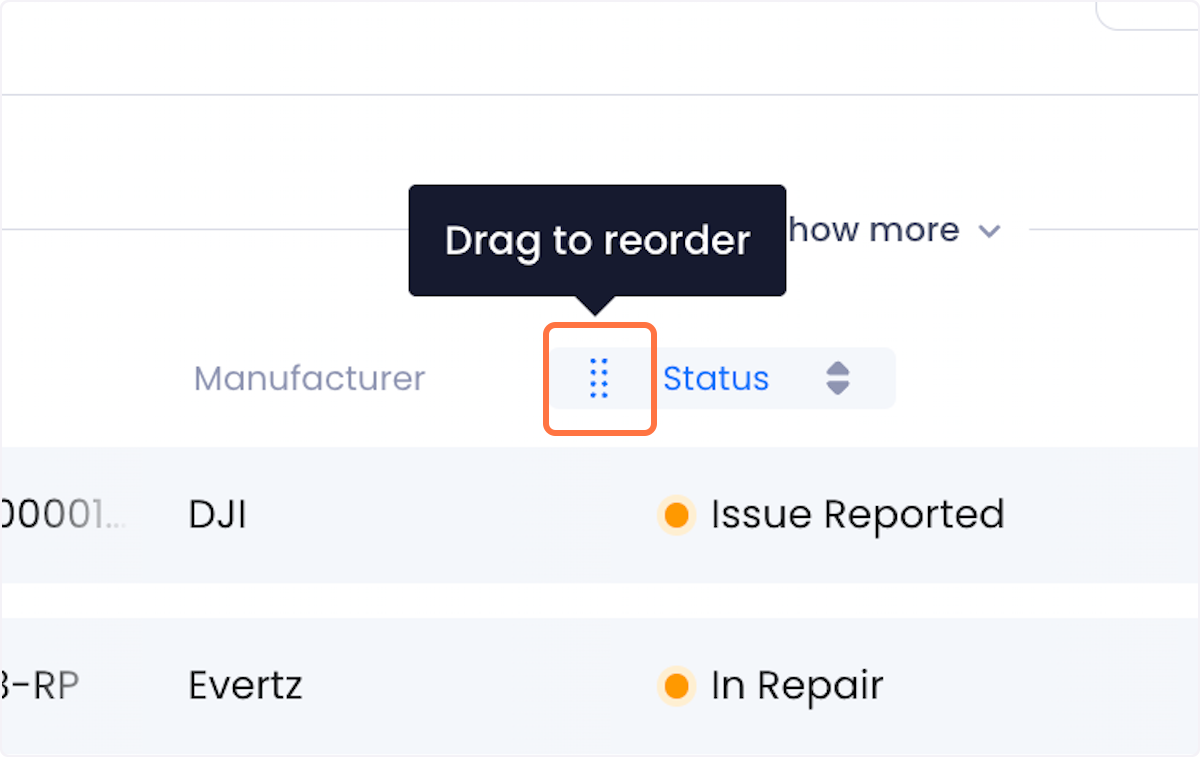
If you want to quickly move the column to the first or last position of the table, you can also click on the column heading and select either Move to start or Move to end.

Sorting Columns
To sort your assets by a column, hover over the column and click on the arrows to the right of the column heading. The first click on these arrows will sort the column by ascending or alphabetical order. A second click will switch the order to descending or reverse alphabetical order.

Alternatively, you can click on the column heading and select your desired sort preferences using the options in the drop down menu.

Related Links
Other articles
Learn more about technology management, industry tips, product news and more.